Maintenance for the week of July 27:
• NA megaservers for maintenance – July 27, 6:00AM EDT (10:00 UTC) -11:00AM EDT (15:00 UTC)
• EU megaservers for maintenance – July 27, 10:00 UTC (6:00AM EDT) - 15:00 UTC (11:00AM EDT)
• NA megaservers for maintenance – July 27, 6:00AM EDT (10:00 UTC) -11:00AM EDT (15:00 UTC)
• EU megaservers for maintenance – July 27, 10:00 UTC (6:00AM EDT) - 15:00 UTC (11:00AM EDT)
PTS Update 23 - Feedback Thread for Moongrave Fane

ZOS_GinaBruno
✭✭✭✭✭
✭✭✭✭✭
✭✭✭✭✭
This is the official feedback thread for Moongrave Fane. Specific feedback that the team is looking for includes the following:
- Did you enjoy this new dungeon?
- How did the difficulty compare to existing dungeons on Normal and Veteran versions?
- Did you complete Normal or Veteran (or both)?
- Which was your favorite boss in this dungeon, and why?
- What level and build was the character you used?
- Do you have any other general feedback?
Gina Bruno
Principal Creator Engagement Manager
Dev Tracker | Service Alerts | ESO Twitter | My Twitter
Principal Creator Engagement Manager
Dev Tracker | Service Alerts | ESO Twitter | My Twitter
0
-
 Coldforge✭✭✭Risen Ruins boss kept moving east towards the encounter entrance stairs each time before it's boulder phase, and eventually reset because it moved so far away on it's own accord. Blood sphere mechanic is interesting, but the tooltip on how to break them didn't show up in combat, only learned how to do so after combat ended (they don't reset after an encounter ends, interestingly. Bug?).
Server hiccuped halfway through it and I was booted to login, but the first two bosses were both uninteresting and largely recycled, at least on normal - Risen Ruins is virtually identical to the Stone Atro in AA, and the second boss seems to be Zhaj'hassa by way of Urvan Veleth.
Difficulty was typically easy on normal, I managed to solo my way through on a stamden until the server tossed me. Capped CP.
edit: Went back in with a group. Boss encounters and overall experience is much better in the second half. Gargoyle boss was my favorite, I loved the need to manage adds while group finagled blocks onto fire spouts; much better than having to be a sewer plug in Scalecaller.Edited by Coldforge on July 8, 2019 10:12PM0 -
fboostb16_ESO✭✭✭Bit more telegraphs would be nice.
Can someone explain to me what to do with the Gargoyle boss? I watched the tank/dps in my group kill him, but I don't know what mechanics to play as dps.
Also my combat pet was gone halfway through this dungeon, same as the other new dungeon. Only here it never returned.0 -
andy_s✭✭✭✭Did you enjoy this new dungeon?
Yes, except the last boss.
Did you complete Normal or Veteran (or both)?
Veteran Hardmode.
Which was your favorite boss in this dungeon, and why?
Not the last boss.
Video: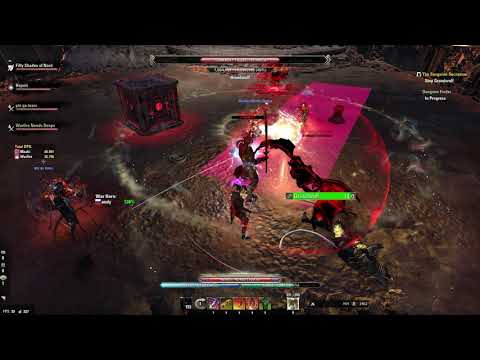 https://www.youtube.com/watch?v=p9NxHi3jo4Q&feature=youtu.be
There are so many issues with this fight that I don't even know where to start:
- Bleedings, DoTs, 100% Heal Debuffs. Definitely too much of them. I mean you can always make super tanky selfish builds and survive, but it's just not fun.
- Heavy attacks have different timings, but they all have the same animation. There is no way to survive a heavy attack with healing debuffs, bleeds and adds, so I had to dodge them, but some heavy attacks have 2.5s duration and some are 2x faster.
- DDs can't survive incoming damage without barriers, chudans and other things nobody likes.
- There are no any mechanics except 1 obvious box, everything is just incoming damage and debuffs, so I can't say I enjoyed it as much as Maarselok World's First Cloudrest Hardmode + Speed Run + No Death w/ HODORTick-Tock Tormentor & All vHoF Achievements done w/ ChimairaWorld's First Sanctum Ophidia Difficult Mode (patch 1.5)World#2 vMoL All Achievements w/ Aquila Raiders4
 -
TheNightflame✭✭✭✭✭yeah... watching it does not have me looking forward to playing it. the same way I don't look forward to vso runs0
-
 tpanisiakb16_ESO✭✭✭✭Hey ZOS,
My team and I tried this dungeon tonight on vet and got to Kujo Kethba but couldn't succeed in this fight. Up until this boss the dungeon was fun, had interesting mechanics, and the difficulty felt fair and well paced.
I do not know if it's a bug or designed to be this way, but you cannot have any pre-exsisting DOTs on the boss when he goes into "volcanic geyser" phase. Constantly, our two Stamina Nightblades would be insta-gibbed before he even landed to indicate this new phase and with a lot of testing we realized that Blazing Shield was killing them, and killing them extremely fast (again, before the boss even landed they would have been melted). We get that the reflect damage is there to discourage anything other than covering the geysers and managing adds, but to discourage DOT damage that was used prior to the phase transition seems far too punishing. This resulted in only doing direct attacks and being extremely careful not to hit him during the ground-air-ground switch which made this fight an extreme slog, especially as far as add management goes. If this is intended please reconsider having these types of fights that require completely different skills to be utilized. In addition, please reconsider the use of gimmicky mechanics like sliding the boxes over a very specific hitbox, while the boxes need absolute precision else they go sliding in in an unintended direction. Your server performance, plus low FPS adds to the frustration here. The theory behind this boss is exciting, but the execution quickly felt anti-fun.
In its current state if adds aren't managed on top of handling the gimmicky boxes they can overwhelm a group far too quickly, and Kujo transitions phases too fast to get on top of adds, on top of not being able to utilize your best DPS as the use of DOTs causes problems.
Some suggestions to keep the fight challenging but also fun:
- Reduce Blazing Shield's damage, or make it so pre-existing DOTS don't cause this damage, or make it so Blazing Shield's damage only applies AFTER the boss lands giving some leeway
- Cap the amount of adds which can spawn
- Make the geyser phases based on boss health percentage instead of time-based, this gives a bit of breathing room without making the fight feel like an uphill battle the entire time, especially if add management requires a bit of love
- give indications to where geysers are going to spawn so we can better prepare which direction to slide you gimmicky boxes
5 -
 code65536✭✭✭✭✭
✭✭✭✭✭Boss-specific feedback:
1/2. Risen Ruins & Dro'zakar
Fairly straightfoward. My only comment is that the breaking-the-blood-ball mechanic is not intuitive to someone who has not seen the fight before, and there aren't many cues to guide the player in the right direction.
3. Kujo Kethba
I really don't like mid-dungeon bosses that are more difficult than the final boss (at least in non-HM). This boss is definitely more difficult than the non-HM version of the final boss. And unlike previous "PUG Killer" bosses like the Vault Protector, whose difficulty came from tough but well-designed mechanics, the difficulty of this boss is the result of poor design.
Here's our kill of this boss: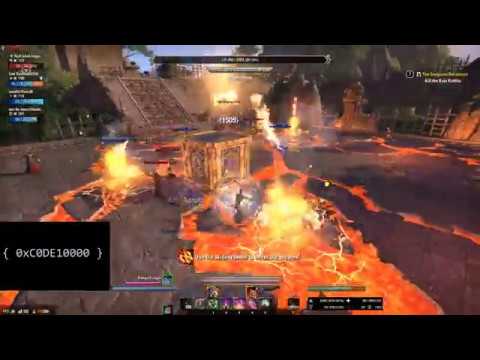 https://youtu.be/pMOFbQiZMTQ
- Players need to be given an opportunity to disengage from the boss. Either warn players that the boss is about to enter his Volcanic Geyser mechanic or add a delay between the start of Volcanic Geyser and the boss gaining his shield.
[476.667] {BEGIN} [0/]->[29661/] : Volcanic Geyser (116205) : [22000]
[476.667] {EFFECT_GAINED} [0/]->[29661/] : Shield (119308) : [1]
[476.886] {DAMAGE_SHIELDED} [34149/Snow Oryx]->[29661/Kujo Kethba] : Shield (119308) : [17622]
[476.886] {DOT_TICK_CRITICAL} [34149/Snow Oryx]->[29661/Kujo Kethba] : Fiery Rage (85127) : [0]
[476.886] {DAMAGE_SHIELDED} [34149/Snow Oryx]->[29661/Kujo Kethba] : Shield (119308) : [7640]
[476.887] {DAMAGE} [34149/Snow Oryx]->[29661/Kujo Kethba] : Prismatic Weapon (40337) : [0]
[477.587] {DAMAGE} [29661/Kujo Kethba]->[34149/Snow Oryx] : Blazing Shield (119309) : [17622]
[477.598] {DIED} [29661/Kujo Kethba]->[34149/Snow Oryx] : Blazing Shield (119309) : [0]
[477.598] {DAMAGE} [29661/Kujo Kethba]->[34149/Snow Oryx] : Blazing Shield (119309) : [1755+5885]
Look at the timestamps. The time between the the boss starting the mechanic to when I die to my damage being reflected back at me is less than a second. This is ridiculous.
You literally do not have time to relocate your ground DoTs. Okay, that's fine, we'll just use single-target spammables. Except the times when I had an Assassin's Will in-flight when he gained the shield and got 1-shot--there's even an example of that at the 8-second mark in the video above. - This damage retaliation mechanic is one of the most obtusely-telegraphed mechanics I have ever seen in this game. There is nothing to indicate that hitting the boss is going to reflect damage back at you. There is nothing in the death recap hints, and since this isn't a true reflect, you don't even see projectile bounces (not to mention DoTs). There are no visual or other cues to suggest that's how the mechanic works. And to further muddy the waters, these retaliation fireballs look similar to the fireballs coming from the geysers. We did figure it out quickly, because I guessed from the "Blazing Shield" name in my death recap that this was a damage-retaliation mechanic, and we confirmed it by seeing no "Blazing Shield" damage in our death recaps if we didn't touch the boss.
- The way the netches work in Blackrose is a far better approach for damage retaliation. In this dungeon, every single bit of damage that you do is returned in the exact amount and cadence. So in the log snippet from above, my destro ult and my backbar enchant ticked at the exact same time for 17622 and 7640 damage, and I received two retaliatory hits at the same time for 17622 and 7640. In the video above, I died from a single 37K tick from an Assassin's Will that had crit. And if you happen to have multiple damage ticks at the same time, you will get multiple retaliatory damage hits (e.g., if you have a back bar DoT tick with a back bar enchantment proc at the same time as a front bar LA weave, enchantment proc, and direct damage, you can get 5 retaliatory hits all within a fraction of a second). In contrast, the netches' retaliatory Shock Shield in BRP always does the same amount of damage per hit and there is a cooldown limiting how often it hits you. That was a far more balanced approach. Why didn't you just copy that?
- The damage from the Lava Geysers is very high. The per-tick damage isn't too bad, but they tick too frequently, and late in the fight, there are too many geysers. Coupled with the increasing number of adds that spawn, the damage increases significantly if you take too long. If your group has the DPS to kill the boss quickly, this is not an issue. But if you don't, or if you lose time due to needing to recover from deaths, this damage ramp will wipe you out.
- It takes too long to move the blocks, particularly if the geysers all spawn on one side and a block needs to be moved across the room. There are times when it didn't feel like it was worth plugging the geysers because the mechanic would end on its own before we could get the block in place.
This boss cannot go Live in its current state. If it does, I'd imagine that >90% of Group Finder groups will see their runs come to an end here.
4. Committee
This seemed pretty straightforward. We did damage. They died. Not much to say. I'm not completely sure I understood all of the mechanics here, but oh well.
5. Grundwulf, Hard Mode
We haven't cleared this yet on Hard Mode. The incoming damage in this fight is insane. Our tank was taking 37K damage through block, which means he pretty much needs to dodge them, but the boss will periodically increase his attack speed, which results in heavy attacks that have different windup times.
The heal absorption also feels overtuned.
The Maarselok Hard Mode was hard because of clever mechanical design and the need for teamwork and coordination. That was fun. This Hard Mode is just a test of your ability to survive everything plus the kitchen sink. This didn't feel like fun.
In contrast, on non-HM, this fight seems downright boring. Certainly easier than the third boss, as there really isn't much in the way of mechanics or threats.Edited by code65536 on July 12, 2019 8:49PMNightfighters ― PC/NA and PC/EU
Dungeons and Trials:Personal best scores:- Dragonstar Arena: 46817 (NA)
- Maelstrom Arena: 600526 (NA)
- Blackrose Prison: 99274 (EU) (Unchained)
- Maw of Lorkhaj: 165227 (EU)
- Halls of Fabrication: 220708 (NA) (Tick-Tock Tormentor #1, #2, #3, #4, #5, #6, #7, #8, #9, #10, #11, #12)
- Asylum Sanctorium: 114957 (NA) (Immortal Redeemer #1, #2, #3, #4, #5, #6, #7, #8, #9, #10)
- Cloudrest: 131256 (NA) (Gryphon Heart #1, #2, #3, #4, #5, #6, #7)
- Sunspire: 250866 (EU) (Godslayer #1, #2, #3, #4, #5, #6, #7)
- Kyne's Aegis: 235841 (EU) (Dawnbringer #1, #2, #3, #4, #5, #6, #7, #8)
Dungeon trifectas:- Mountain God and Leave No Bone Unbroken
- Apex Predator and Pure Lunacy
- Depths Defier and Relentless Raider
- Defanged the Devourer and Nature's Wrath
- In Defiance of Death and No Rest for the Wicked
- Bane of Thorns and True Genius
- Ardent Bibliophile and Subterranean Smasher
- Battlespire's Best and Bastion Breaker
- Zero Regrets and Land, Air, and Sea Supremacy
- Fist of Tava and Invader's Bane
- Curator's Champion (Valinna) and Temporal Tempest
- Unshakeable Fervor and Lighting the Embers
Extended Journal Add-Ons: Item Set Browser ― Loot Log ― Character Knowledge ― Collectibles Tracker ― RaidificatorPC/Console Add-Ons: Combat Alerts ― Group Buff PanelsOther Add-Ons: Deconstruction Junk Marker ― Purge Tracker ― Asylum Status Panel ― Smart Looter ― Improved Companion Rapport Information6 - Players need to be given an opportunity to disengage from the boss. Either warn players that the boss is about to enter his Volcanic Geyser mechanic or add a delay between the start of Volcanic Geyser and the boss gaining his shield.
-
tpanisiakb16_ESO✭✭✭✭This damage retaliation mechanic is one of the most obtusely-telegraphed mechanics I have ever seen in this game. There is nothing to indicate that hitting the boss is going to reflect damage back at you..
I want to say your entire post was very insightful @code65536 and I appreciate all the data points and time stamps and the video given. We ended up giving it a good 2-3 other attempts before we were just curious as to what DOTs trigger the reflect and threw ourselves at it for a while. The snipped quote above is SUPER important because the "reflect" is exactly the same bloody graphic as the volcanic geysers so it's easy to miss and be confused about until you're specifically scrutinizing what's going on. It was our ever-prudent healer who figured it out and I don't think PUGs or casual-folks be bothered to analyze on the level we did.
The group I run with have pretty much all HM's done with the exception of vDOM and vFV, but we haven't tried much as I took a break. This boss was surprisingly challenging for us but didn't feel fun or something I'd particularly want to work towards. I imagine the best way to do this in its current state is to just preemptively stop DPS, gather up for stack-heals, tank pulls in adds, and wait out the geyser stage. Anything else feels too messy, especially running with melee DPS.
Kujo needs to be looked at before going live for sure, because I promise it will be the front post in General for a good long while, much like Planar was pre-nerf.0 -
profundidob16_ESO✭✭✭✭✭I healed and tanked in 3 pug groups for the veteran version of this dungeon. All 3 groups stranded at Kujo. 2 groups were actually pretty good and eperienced in vet DLC in general but in no way were we able to get the blocks in time before geyser phase ended by itself.
In addition -shameful to admit- none of us realized that blazing shield was actually not a source of dmge but rather the reflection of the dmge our dps was doing, including dots. Embarrassing to have to come read that mechanic here but it goes to show just how counterintuitive it is, even though I inspected the death recaps. They simple made me believe they were dmge originating from the boss! Netch shields make alot more sense in vDC II and vBRP as opposed to this mechanic. This boss needs alot of fixing imho.
Also geyser dmge was way too high. People kept dying to itEdited by profundidob16_ESO on July 12, 2019 2:35AM0 -
code65536✭✭✭✭✭
✭✭✭✭✭Additional information about the Kujo fight:- There is actually a 1.3s warning before the Geyser and Blazing Shield mechanic starts. This warning appears in the form of a small conal telegraph in front of the boss. It's very easy for someone in melee range in front of the boss (i.e., the tank) to see, but for people standing behind the boss or at range, it's really difficult to see. I honestly hadn't noticed it until I had a chance to tank this boss.
- The first geyser/shield phase starts at 90% boss health (or after about 20s, if you just stand there and don't touch the boss).
- Each geyser/shield phase ends when all of the geysers have been plugged (after plugging a geyser--you'll see/hear a steam release effect--a box can be moved to plug another geyser; the first geyser will not unplug) or after 22s, whichever comes first.
- After the end of a geyser/shield phase, the next geyser/shield phase will start after 14s (could be slightly longer--I've observed up to 17s--if the boss is in the middle of a heavy attack or some other mechanic). If players return to the boss immediately when the geyser/shield phase ends, this is just long enough for a single rotation of DoTs.
Here's a video clip showing two different strategies for killing this boss. In the first one, we ignored the geysers. The tank pulled the adds to a position away from the boss, and we killed adds. In the second one, it was the opposite: the geysers were plugged while the tank pulled the adds to be boss to be burned down when the geyser/shield phase ends.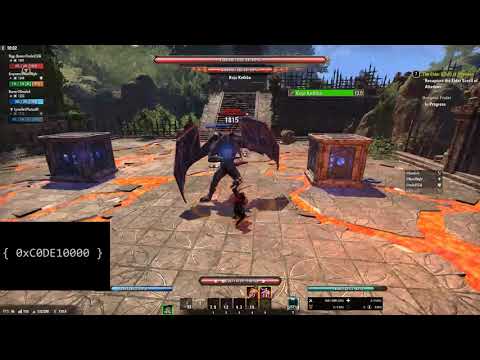 https://youtu.be/P0RWjI6IDHA
Having done it a few more times, I think this fight is really easy once you understand it and have a strategy for it.
That said, I still think it could use some modest adjustments; my suggestions are:- Add something in the death recap hints to let people know that Blazing Shield is a damage retaliation mechanic.
- Increase the pre-mechanic warning from 1.3s to 2s.
- Make the pre-mechanic warning easier for everyone to see. For example, what about giving the boss a red glow (like the kind of visual effect that you give to an enraged enemy)?
- Change the Blazing Shield mechanic to match the behavior of the Shock Shield in Blackrose Prison, where the retaliatory damage is of a fixed size and happens at a fixed interval instead of exactly matching the amount and cadence of the player's damage.
- Edited to add: Make the geyser tick damage ramp up instead of be constant. At the start of the geyser mechanic, the ticks should be smaller than what they are now, and towards the end of the mechanic, they should be more punishing than what they are now. This would do two things: it would lessen the initial burst of damage when all of the unplugged geysers start spewing alongside retaliatory ticks from any residual damage on the shield, and it would incentivize players to do the box mechanic to reduce the number of geysers active as the geysers themselves become stronger.
Edited by code65536 on July 21, 2019 11:25AMNightfighters ― PC/NA and PC/EU
Dungeons and Trials:Personal best scores:- Dragonstar Arena: 46817 (NA)
- Maelstrom Arena: 600526 (NA)
- Blackrose Prison: 99274 (EU) (Unchained)
- Maw of Lorkhaj: 165227 (EU)
- Halls of Fabrication: 220708 (NA) (Tick-Tock Tormentor #1, #2, #3, #4, #5, #6, #7, #8, #9, #10, #11, #12)
- Asylum Sanctorium: 114957 (NA) (Immortal Redeemer #1, #2, #3, #4, #5, #6, #7, #8, #9, #10)
- Cloudrest: 131256 (NA) (Gryphon Heart #1, #2, #3, #4, #5, #6, #7)
- Sunspire: 250866 (EU) (Godslayer #1, #2, #3, #4, #5, #6, #7)
- Kyne's Aegis: 235841 (EU) (Dawnbringer #1, #2, #3, #4, #5, #6, #7, #8)
Dungeon trifectas:- Mountain God and Leave No Bone Unbroken
- Apex Predator and Pure Lunacy
- Depths Defier and Relentless Raider
- Defanged the Devourer and Nature's Wrath
- In Defiance of Death and No Rest for the Wicked
- Bane of Thorns and True Genius
- Ardent Bibliophile and Subterranean Smasher
- Battlespire's Best and Bastion Breaker
- Zero Regrets and Land, Air, and Sea Supremacy
- Fist of Tava and Invader's Bane
- Curator's Champion (Valinna) and Temporal Tempest
- Unshakeable Fervor and Lighting the Embers
Extended Journal Add-Ons: Item Set Browser ― Loot Log ― Character Knowledge ― Collectibles Tracker ― RaidificatorPC/Console Add-Ons: Combat Alerts ― Group Buff PanelsOther Add-Ons: Deconstruction Junk Marker ― Purge Tracker ― Asylum Status Panel ― Smart Looter ― Improved Companion Rapport Information3 -
code65536✭✭✭✭✭
✭✭✭✭✭Addendum to my post above: I would suggest that you make the geyser tick damage ramp up instead of be constant. At the start of the geyser mechanic, the ticks should be smaller than what they are now, and towards the end of the mechanic, they should be more punishing than what they are now. This would do two things: it would lessen the initial burst of damage when all of the unplugged geysers start spewing alongside retaliatory ticks from any residual damage on the shield, and it would incentivize players to do the box mechanic to reduce the number of geysers active as the geysers themselves become stronger (as we demonstrated, it's possible to just ignore the box mechanic entirely).Nightfighters ― PC/NA and PC/EU
Dungeons and Trials:Personal best scores:- Dragonstar Arena: 46817 (NA)
- Maelstrom Arena: 600526 (NA)
- Blackrose Prison: 99274 (EU) (Unchained)
- Maw of Lorkhaj: 165227 (EU)
- Halls of Fabrication: 220708 (NA) (Tick-Tock Tormentor #1, #2, #3, #4, #5, #6, #7, #8, #9, #10, #11, #12)
- Asylum Sanctorium: 114957 (NA) (Immortal Redeemer #1, #2, #3, #4, #5, #6, #7, #8, #9, #10)
- Cloudrest: 131256 (NA) (Gryphon Heart #1, #2, #3, #4, #5, #6, #7)
- Sunspire: 250866 (EU) (Godslayer #1, #2, #3, #4, #5, #6, #7)
- Kyne's Aegis: 235841 (EU) (Dawnbringer #1, #2, #3, #4, #5, #6, #7, #8)
Dungeon trifectas:- Mountain God and Leave No Bone Unbroken
- Apex Predator and Pure Lunacy
- Depths Defier and Relentless Raider
- Defanged the Devourer and Nature's Wrath
- In Defiance of Death and No Rest for the Wicked
- Bane of Thorns and True Genius
- Ardent Bibliophile and Subterranean Smasher
- Battlespire's Best and Bastion Breaker
- Zero Regrets and Land, Air, and Sea Supremacy
- Fist of Tava and Invader's Bane
- Curator's Champion (Valinna) and Temporal Tempest
- Unshakeable Fervor and Lighting the Embers
Extended Journal Add-Ons: Item Set Browser ― Loot Log ― Character Knowledge ― Collectibles Tracker ― RaidificatorPC/Console Add-Ons: Combat Alerts ― Group Buff PanelsOther Add-Ons: Deconstruction Junk Marker ― Purge Tracker ― Asylum Status Panel ― Smart Looter ― Improved Companion Rapport Information0 -
dowinterfor6✭✭Here's my experience, clearing vMF HM with 3 DPS (Stamblade, 2x Magplar) and 1 Tank (DK).
Note: We also completed no death (non-HM) and speed run- Did you enjoy this new dungeon?
Not particularly, all but 2 bosses were memorable - How did the difficulty compare to existing dungeons on Normal and Veteran versions?
A little harder at first, but after learning mechanics, a little easier - Did you complete Normal or Veteran (or both)?
Veteran Hard Mode - Which was your favorite boss in this dungeon, and why?
Last boss - What level and build was the character you used?
Template character, DK tank, Chudan/Ebon/Claw - Do you have any other general feedback?
- Trash pulls
Pretty standard, not many 1 shot heavy attacks (good), and very manageable - Risen Ruins
Basically just Stone Atro from vAA, activating the synergy got DPS killed a few times due to lag(?). Usage of orbs weren't clear and intuitive, no telegraph for the unblockable charge CC feels bad to play against. - Dro'Zakar
Basically just Zhaj fight. First encounter was okay, second encounter after knowing I needed to chain sacrifices, if they were still running or barely after arriving, chaining them would result in them sprinting straight back to the pedestal and continuing their mechanic, except CC immune, and felt frustrating. - Kuja Kethba
Fun stuff, after knowing the mechanics, this fight became extremely easy. We changed our callouts to red light/green light: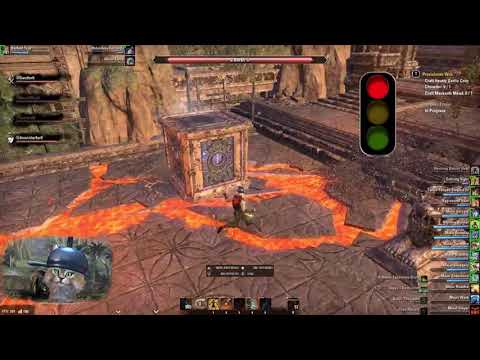 https://www.youtube.com/watch?v=Tb3k6cn1rZU
The 100% damage reflect should be a bit more telegraphed (after the stomp), as that's hard to tell initially.
Add wave is a prelude for the stomp, which helps gauge timings. - Grundwulf and Nisaazda
Introduction to the mechanics of the last boss, I guess? Uneventful fight. - Grundwulf
100k heal absorption = group needs a healer? Honestly, I'm not quite sure the direction that this whole patch is going. PvE AoE dps got nerfed, so there'll be a whole bunch of adds to kill, and healing got nerfed, so heal absorption will be a thing now? Regardless, doing this was better with 3 dps than with 1 healer and 2 dps because the adds died faster, and I could focus more on surviving. The two heavy attack speeds from the boss based on his buff is an interesting mechanic that pretty much eliminates dodge roll tanking, as the telegraph for the faster one is often too fast, and roll dodging too early will leave you unable to block for about half a second, which will kill you. I thought the initial fight would be bad, but getting down to execute and having 3 minis spawn was a nightmare, and on our HM clear I died at about 2% as my magma wasn't up. However, after clearing it once, the second time was much easier now that everyone knew their roles and the mechanics, and the fight quickly became just simply monotonous. - Overall feedback
An interesting dungeon with two memorable-ish fights and everything else was forgettable. The visuals were nice, and the box movement mechanic is an interesting speed run killer touch. We encountered an interaction where the first box was pushed behind a rock and got stuck, but the reset feature was useful. Heal absorption is not a fun mechanic, because there is no indication that you're doing anything to get rid of it. All in all, the other bosses could use some bug fixing and tuning, e.g. better indicators for mechanics, or more memorable mechanics rather than reused. It's much more fun to see a completely new mechanic and be surprised by it than seeing a mechanic and instantly recognizing it from another boss in the game. - Other links
Gandork's stream of our second HM clear (title is clickbait, we died):
ESO Logs (includes a fun vFV HM run afterwards): https://www.esologs.com/reports/pZB8YaNX4KCVWdHx/
Healing received CMX:
Achivement SS:
- Trash pulls
Edited by dowinterfor6 on July 13, 2019 4:45PM2 - Did you enjoy this new dungeon?
-
Shantu✭✭✭✭✭
✭✭After seeing the affect of all these absurd game changing nerfs, I couldn't care less about about this or any other dungeon that accompanies them.2 -
 Apherius✭✭✭✭✭
✭✭TheNightflame wrote: »@dowinterfor6 send pics of the pet and memento!
Probably the worst cosmetic rewards since Imperial City.3 -
LiquidPony✭✭✭✭✭
✭✭✭ZOS_GinaBruno wrote: »This is the official feedback thread for Moongrave Fane. Specific feedback that the team is looking for includes the following:- Did you enjoy this new dungeon?
- How did the difficulty compare to existing dungeons on Normal and Veteran versions?
- Did you complete Normal or Veteran (or both)?
- Which was your favorite boss in this dungeon, and why?
- What level and build was the character you used?
- Do you have any other general feedback?
Did you enjoy this new dungeon? Not really. I would say that it's probably, from a gameplay perspective, my least favorite dungeon in the game. Aesthetically it's quite nice, and the moving box mechanic is ... novel I guess? But aside from that it's a pretty sucky experience.
How did the difficulty compare to existing dungeons on Normal and Veteran versions? I did not attempt it on Normal. On Veteran, it alternates between trivially easy (trash, bosses 1, 2, and 4 and the final boss on regular vet) and obscenely and artificially difficult (Kujo Kethba and Grundwulf HM).
Which was your favorite boss in this dungeon, and why? None of them, I guess? Really can't say any of the fights were particularly enjoyable.
What level and build was the character you used? CP810 stamsorc with Deadly Strike/Rele or Deadly Strike/Automaton, vMA DW frontbar, vMA 2H backbar.
Do you have any other general feedback?
1. Kujo Kethba needs some serious adjustment. The Blazing Shield mechanic is simply too strong; when we cleared we were basically limiting ourselves to *only* spammable attacks in order to avoid accidentally triggering it. We utilized Barrier, Bone Shield, Circle of Protection, Echoing Vigor and I even resorted to using Mist Form ... and we had a healer with us. The Flame Geyser mechanic is too much too quickly, especially combined with Blazing Shield. I had death recaps were I took 4 Flame Geyser hits for 5-6k each within the space of a second. Even standing inside of my own Circle of Protection with Echoing Vigor and Crit Surge running, I died instantly multiple times. Eventually I took to popping Mist Form as soon as the geyser phase started, moving to my box while in Mist Form, and then doing a Heavy Attack/Dodge Roll rotation to move the box to the target geyser. Additionally, I think the geysers on Kujo Kethba could use a bit of "gravity" so that a box pushed a few inches away from covering the geyser slides into place automatically. We had a lot of deaths where we thought we had the box in the correct position but it was just barely off-target.
2. Grundwulf HM is just horrible. Honestly one of the most ridiculously over-tuned fights in the game. It is not mechanically interesting, it just presents an obscene amount of incoming damage combined with healing debuffs that no one likes. The healing debuff also makes healers basically useless in this fight.
3. Grundwulf on regular vet is absurdly easy. We spent an hour struggling to get Grundwulf under 75% on HM and then burned regular vet in a minute flat. Regular vet does nothing to prepare you for HM.
4. I felt like the two difficult bosses in this dungeon were far, far, far, far more punishing for stamina DPS than magicka DPS. Flame Geysers can easily be shielded. Shields can easily keep you alive during Grundwulf's healing debuff. Stamina DPS are SOL for both of these mechanics; Flame Geysers require a *ton* of dodging to avoid the damage and there's really nothing to be done when hit with the healing debuff.
All-in-all, really didn't like this dungeon at all. The mini Foundation Stone Atro adds are cute, and it's a pretty dungeon, but other than that it was pretty bad. Lair of Maarselok is much more interesting.0 -
code65536✭✭✭✭✭
✭✭✭✭✭
We use single-target spammables at the start, when pushing him to 90%. After that, each "safe" phase is 14s, which is enough for a single DoT rotation. Treat it like the Archcustodian fight.LiquidPony wrote: »Kujo Kethba needs some serious adjustment. The Blazing Shield mechanic is simply too strong; when we cleared we were basically limiting ourselves to *only* spammable attacks in order to avoid accidentally triggering it.
I feel like the geyser mechanic is rather brutal for groups that are learning the fight or groups that have low DPS, because each geyser phase features more and more geysers.LiquidPony wrote: »I had death recaps were I took 4 Flame Geyser hits for 5-6k each within the space of a second. Even standing inside of my own Circle of Protection with Echoing Vigor and Crit Surge running, I died instantly multiple times. Eventually I took to popping Mist Form as soon as the geyser phase started, moving to my box while in Mist Form, and then doing a Heavy Attack/Dodge Roll rotation to move the box to the target geyser.
Also, what was your vamp stage?
If you only see two geyser phases, the damage isn't that bad, but even then, look at the initial burst that I took--3x 4K hits within just a little over a second at the start of the first geyser phase.
But if you're on, say, the 4th geyser phase... then that stuff hurts. A lot. I too have died to the kind of thing that you're describing.
The difficulty of this fight stems entirely from two things:- Poorly-telegraphed mechanics
- Being overwhelmed by the number of geysers and adds that spawn late in the fight
If you understand the first, then you can go back to using DoTs, which gives you the DPS to bypass the second. Our latest kill was only about a minute: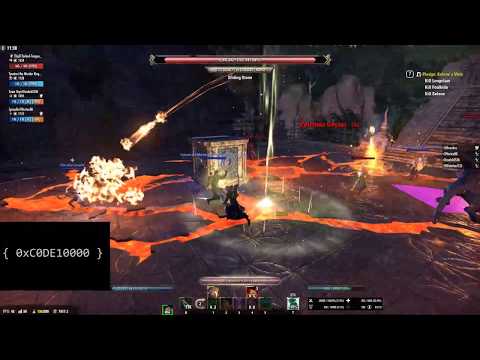 https://youtu.be/o2dJgA9BLwU Edited by code65536 on July 15, 2019 12:22PMNightfighters ― PC/NA and PC/EU
Dungeons and Trials:Personal best scores:- Dragonstar Arena: 46817 (NA)
- Maelstrom Arena: 600526 (NA)
- Blackrose Prison: 99274 (EU) (Unchained)
- Maw of Lorkhaj: 165227 (EU)
- Halls of Fabrication: 220708 (NA) (Tick-Tock Tormentor #1, #2, #3, #4, #5, #6, #7, #8, #9, #10, #11, #12)
- Asylum Sanctorium: 114957 (NA) (Immortal Redeemer #1, #2, #3, #4, #5, #6, #7, #8, #9, #10)
- Cloudrest: 131256 (NA) (Gryphon Heart #1, #2, #3, #4, #5, #6, #7)
- Sunspire: 250866 (EU) (Godslayer #1, #2, #3, #4, #5, #6, #7)
- Kyne's Aegis: 235841 (EU) (Dawnbringer #1, #2, #3, #4, #5, #6, #7, #8)
Dungeon trifectas:- Mountain God and Leave No Bone Unbroken
- Apex Predator and Pure Lunacy
- Depths Defier and Relentless Raider
- Defanged the Devourer and Nature's Wrath
- In Defiance of Death and No Rest for the Wicked
- Bane of Thorns and True Genius
- Ardent Bibliophile and Subterranean Smasher
- Battlespire's Best and Bastion Breaker
- Zero Regrets and Land, Air, and Sea Supremacy
- Fist of Tava and Invader's Bane
- Curator's Champion (Valinna) and Temporal Tempest
- Unshakeable Fervor and Lighting the Embers
Extended Journal Add-Ons: Item Set Browser ― Loot Log ― Character Knowledge ― Collectibles Tracker ― RaidificatorPC/Console Add-Ons: Combat Alerts ― Group Buff PanelsOther Add-Ons: Deconstruction Junk Marker ― Purge Tracker ― Asylum Status Panel ― Smart Looter ― Improved Companion Rapport Information0 -
code65536✭✭✭✭✭
✭✭✭✭✭Additional feedback for the final boss on hard mode:- The heal absorption is downright brutal and frankly, not fun. I don't know who thought this would be a fun mechanic. And it's needlessly opaque. How large is the heal absorption? I can't see this information anywhere in the UI. I can't see it in esologs. I get the feeling that different sources of the heal absorption apply it in different strengths. But I don't know for sure since this information isn't available to us.
- The shackle mechanic is grossly overtuned. It's random, so sometimes it might be right next to me. Sometimes it's clear across on the other side of the room, and I'm madly trying to dash there while the damage is ticking on me almost twice per second. If the pillar spawns on the other side of the room from where I am, then by the time I reach it, then the DoT will overpower even shield-spamming. Oh, and if you're stamina and you don't have a shield and need to rely on Vigor, then you're screwed if you also have the heal absorption.
- The shackle mechanic makes it pointless to have a healer. So late in the fight, we get 4 shackles. Everyone is spread out. They have jellies nibbling on them. They probably have some sort of heal absorption. And on top of that, if the healer's pillar is on one side of the room and everyone else is on the other side, then they can't even help their group (not that healing would do that much to counter the immediate damage that they're taking when they have the absorption) and they're also hard-pressed to deal with the adds that are attacking them. We've tried this fight with a healer and without a healer, and we're honestly not sure that having a healer is even worth it.
- Late in the fight, when you get multiple adds on the tank charging heavy attacks, you really can't eat that damage and need to dodge it. But hey, let's give the boss a mechanic that increases his attack speed, which makes dodging his attacks that much harder.
- There is just so much health to burn through. And so many adds to kill. Oh, and thank you combat team for making our AoE ground DoTs worthless.
Nightfighters ― PC/NA and PC/EU
Dungeons and Trials:Personal best scores:- Dragonstar Arena: 46817 (NA)
- Maelstrom Arena: 600526 (NA)
- Blackrose Prison: 99274 (EU) (Unchained)
- Maw of Lorkhaj: 165227 (EU)
- Halls of Fabrication: 220708 (NA) (Tick-Tock Tormentor #1, #2, #3, #4, #5, #6, #7, #8, #9, #10, #11, #12)
- Asylum Sanctorium: 114957 (NA) (Immortal Redeemer #1, #2, #3, #4, #5, #6, #7, #8, #9, #10)
- Cloudrest: 131256 (NA) (Gryphon Heart #1, #2, #3, #4, #5, #6, #7)
- Sunspire: 250866 (EU) (Godslayer #1, #2, #3, #4, #5, #6, #7)
- Kyne's Aegis: 235841 (EU) (Dawnbringer #1, #2, #3, #4, #5, #6, #7, #8)
Dungeon trifectas:- Mountain God and Leave No Bone Unbroken
- Apex Predator and Pure Lunacy
- Depths Defier and Relentless Raider
- Defanged the Devourer and Nature's Wrath
- In Defiance of Death and No Rest for the Wicked
- Bane of Thorns and True Genius
- Ardent Bibliophile and Subterranean Smasher
- Battlespire's Best and Bastion Breaker
- Zero Regrets and Land, Air, and Sea Supremacy
- Fist of Tava and Invader's Bane
- Curator's Champion (Valinna) and Temporal Tempest
- Unshakeable Fervor and Lighting the Embers
Extended Journal Add-Ons: Item Set Browser ― Loot Log ― Character Knowledge ― Collectibles Tracker ― RaidificatorPC/Console Add-Ons: Combat Alerts ― Group Buff PanelsOther Add-Ons: Deconstruction Junk Marker ― Purge Tracker ― Asylum Status Panel ― Smart Looter ― Improved Companion Rapport Information0 -
profundidob16_ESO✭✭✭✭✭About that insane geyser dmge...I just had to laugh real hard when reading the following new patch note:
"Kujo Kethba - Volcanic Geyser will no longer shoot two fireballs simultaneously."") 0
0 -
code65536✭✭✭✭✭
✭✭✭✭✭We cleared HM last night: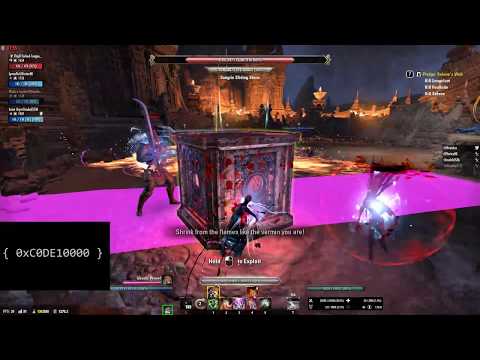 https://youtu.be/wVgNGKhbHD8
Much of what I want to say has already been said, so I'll just focus on one thing here: healing and heal absorption.
We ended up using a Necro healer. Why a Necro? Because it has the best class heals, particular HoTs. By completely gutting non-class heals, @ZOS_Gilliam @ZOS_BrianWheeler and the rest of the short-sighted combat team have created large gaps in the effectiveness of healing classes. Is this farce what you call balance?
The resto skill line was the great equalizer. This fight would've been fine without the Update 23 combat changes. But when we ran this with a Templar healer, they had trouble dealing with the heal absorption that multiple people would get, so they made a Necro template and there was a noticeable difference. Some friends of ours cleared HM last week without a healer since they judged that it was easier to just kill the threats before they could stack too much absorption on you and just have everyone self-heal (since self-healing was left untouched in Update 23 and in some cases even buffed).
This boss fight is a showcase of how inane and utterly unwarranted the bizarre Update 23 healing change are. This. Is. Not. Balance.
Also, I want to point out again just how poorly supported heal absorption is as a mechanic. There's no way to see in the UI just how much absorption you have. And it doesn't show up at all in esologs. And as expected, CMX doesn't recognize the mechanic either. It does appear in combat events that addons receive, but someone neglected to update the API documentation. ACTION_RESULT_HEAL_ABSORBED is in the game but doesn't appear anywhere in the documentation, not even the latest Update 23 version of the API documentation; I had to guess it. As far as I can tell, this is only the third place in the game where heal absorption exists (Solider of Anguish in PvP, Soul Tear in Sunspire, and Grundwulf HM), so I guess that's why there hasn't been much work put into supporting this mechanic.
Anyway, with the help of addon-based logging, I now have a glimpse of just how severe this effect is. At the 28-second mark in the video, I gain the heal absorption effect. This absorption is finally broken 14 seconds later. That's 14s where every single point of healing that I received was negated by the absorption. It took 41 ticks of healing from myself and the healer totaling 141K to finally punch through the absorption that was on me.
Here are the relevant bits from those 14s that I grepped from my addon log:[1189.561] {EFFECT_GAINED} [1268/Ravenous Hoarvor]->[45886/Snow Oryx] : Ghastly Wound (119135) : [1] [1189.596] {HEAL_ABSORBED} [70766/Wháts a heáler]->[45886/Snow Oryx] : Ghastly Wound (119135) : [564] [1189.967] {HEAL_ABSORBED} [70766/Wháts a heáler]->[45886/Snow Oryx] : Ghastly Wound (119135) : [564] [1190.069] {HEAL_ABSORBED} [70766/Wháts a heáler]->[45886/Snow Oryx] : Ghastly Wound (119135) : [563] [1190.237] {HEAL_ABSORBED} [70766/Wháts a heáler]->[45886/Snow Oryx] : Ghastly Wound (119135) : [564] [1190.503] {HEAL_ABSORBED} [45886/Snow Oryx]->[45886/Snow Oryx] : Ghastly Wound (119135) : [8269] [1190.595] {HEAL_ABSORBED} [70766/Wháts a heáler]->[45886/Snow Oryx] : Ghastly Wound (119135) : [1404] [1190.597] {HEAL_ABSORBED} [45886/Snow Oryx]->[45886/Snow Oryx] : Ghastly Wound (119135) : [3998] [1190.634] {HEAL_ABSORBED} [70766/Wháts a heáler]->[45886/Snow Oryx] : Ghastly Wound (119135) : [383] [1190.635] {HEAL_ABSORBED} [70766/Wháts a heáler]->[45886/Snow Oryx] : Ghastly Wound (119135) : [579] [1191.408] {HEAL_ABSORBED} [45886/Snow Oryx]->[45886/Snow Oryx] : Ghastly Wound (119135) : [689] [1191.808] {HEAL_ABSORBED} [70766/Wháts a heáler]->[45886/Snow Oryx] : Ghastly Wound (119135) : [12580] [1192.620] {HEAL_ABSORBED} [45886/Snow Oryx]->[45886/Snow Oryx] : Ghastly Wound (119135) : [3998] [1193.028] {HEAL_ABSORBED} [70766/Wháts a heáler]->[45886/Snow Oryx] : Ghastly Wound (119135) : [7519] [1193.657] {HEAL_ABSORBED} [70766/Wháts a heáler]->[45886/Snow Oryx] : Ghastly Wound (119135) : [969] [1193.831] {HEAL_ABSORBED} [45886/Snow Oryx]->[45886/Snow Oryx] : Ghastly Wound (119135) : [3042] [1193.983] {HEAL_ABSORBED} [70766/Wháts a heáler]->[45886/Snow Oryx] : Ghastly Wound (119135) : [12580] [1194.196] {HEAL_ABSORBED} [70766/Wháts a heáler]->[45886/Snow Oryx] : Ghastly Wound (119135) : [839] [1194.600] {HEAL_ABSORBED} [45886/Snow Oryx]->[45886/Snow Oryx] : Ghastly Wound (119135) : [3998] [1195.025] {HEAL_ABSORBED} [70766/Wháts a heáler]->[45886/Snow Oryx] : Ghastly Wound (119135) : [7519] [1195.056] {HEAL_ABSORBED} [45886/Snow Oryx]->[45886/Snow Oryx] : Ghastly Wound (119135) : [3042] [1195.211] {HEAL_ABSORBED} [70766/Wháts a heáler]->[45886/Snow Oryx] : Ghastly Wound (119135) : [839] [1196.182] {HEAL_ABSORBED} [45886/Snow Oryx]->[45886/Snow Oryx] : Ghastly Wound (119135) : [2739] [1196.183] {HEAL_ABSORBED} [70766/Wháts a heáler]->[45886/Snow Oryx] : Ghastly Wound (119135) : [6767] [1196.286] {HEAL_ABSORBED} [70766/Wháts a heáler]->[45886/Snow Oryx] : Ghastly Wound (119135) : [756] [1196.579] {HEAL_ABSORBED} [45886/Snow Oryx]->[45886/Snow Oryx] : Ghastly Wound (119135) : [3599] [1196.762] {HEAL_ABSORBED} [45886/Snow Oryx]->[45886/Snow Oryx] : Ghastly Wound (119135) : [341] [1196.763] {HEAL_ABSORBED} [45886/Snow Oryx]->[45886/Snow Oryx] : Ghastly Wound (119135) : [6772] [1197.285] {HEAL_ABSORBED} [70766/Wháts a heáler]->[45886/Snow Oryx] : Ghastly Wound (119135) : [713] [1198.765] {HEAL_ABSORBED} [23393/Intensive Mender]->[45886/Snow Oryx] : Ghastly Wound (119135) : [6591] [1198.797] {HEAL_ABSORBED} [45886/Snow Oryx]->[45886/Snow Oryx] : Ghastly Wound (119135) : [5351] [1198.798] {HEAL_ABSORBED} [45886/Snow Oryx]->[45886/Snow Oryx] : Ghastly Wound (119135) : [1189] [1199.614] {HEAL_ABSORBED} [70766/Wháts a heáler]->[45886/Snow Oryx] : Ghastly Wound (119135) : [346] [1199.975] {HEAL_ABSORBED} [45886/Snow Oryx]->[45886/Snow Oryx] : Ghastly Wound (119135) : [1593] [1200.741] {HEAL_ABSORBED} [45886/Snow Oryx]->[45886/Snow Oryx] : Ghastly Wound (119135) : [6214] [1201.143] {HEAL_ABSORBED} [45886/Snow Oryx]->[45886/Snow Oryx] : Ghastly Wound (119135) : [1593] [1202.208] {HEAL_ABSORBED} [70766/Wháts a heáler]->[45886/Snow Oryx] : Ghastly Wound (119135) : [1231] [1202.753] {HEAL_ABSORBED} [45886/Snow Oryx]->[45886/Snow Oryx] : Ghastly Wound (119135) : [6214] [1202.952] {HEAL_ABSORBED} [45886/Snow Oryx]->[45886/Snow Oryx] : Ghastly Wound (119135) : [11594] [1203.218] {HEAL_ABSORBED} [70766/Wháts a heáler]->[45886/Snow Oryx] : Ghastly Wound (119135) : [1231] [1203.878] {HEAL_ABSORBED} [45886/Snow Oryx]->[45886/Snow Oryx] : Ghastly Wound (119135) : [557] [1203.882] {HEAL_ABSORBED} [45886/Snow Oryx]->[45886/Snow Oryx] : Ghastly Wound (119135) : [1192] [1203.883] {EFFECT_FADED} [0/]->[45886/Snow Oryx] : Ghastly Wound (119135) : [3600000]Edited by code65536 on July 16, 2019 2:05PMNightfighters ― PC/NA and PC/EU
Dungeons and Trials:Personal best scores:- Dragonstar Arena: 46817 (NA)
- Maelstrom Arena: 600526 (NA)
- Blackrose Prison: 99274 (EU) (Unchained)
- Maw of Lorkhaj: 165227 (EU)
- Halls of Fabrication: 220708 (NA) (Tick-Tock Tormentor #1, #2, #3, #4, #5, #6, #7, #8, #9, #10, #11, #12)
- Asylum Sanctorium: 114957 (NA) (Immortal Redeemer #1, #2, #3, #4, #5, #6, #7, #8, #9, #10)
- Cloudrest: 131256 (NA) (Gryphon Heart #1, #2, #3, #4, #5, #6, #7)
- Sunspire: 250866 (EU) (Godslayer #1, #2, #3, #4, #5, #6, #7)
- Kyne's Aegis: 235841 (EU) (Dawnbringer #1, #2, #3, #4, #5, #6, #7, #8)
Dungeon trifectas:- Mountain God and Leave No Bone Unbroken
- Apex Predator and Pure Lunacy
- Depths Defier and Relentless Raider
- Defanged the Devourer and Nature's Wrath
- In Defiance of Death and No Rest for the Wicked
- Bane of Thorns and True Genius
- Ardent Bibliophile and Subterranean Smasher
- Battlespire's Best and Bastion Breaker
- Zero Regrets and Land, Air, and Sea Supremacy
- Fist of Tava and Invader's Bane
- Curator's Champion (Valinna) and Temporal Tempest
- Unshakeable Fervor and Lighting the Embers
Extended Journal Add-Ons: Item Set Browser ― Loot Log ― Character Knowledge ― Collectibles Tracker ― RaidificatorPC/Console Add-Ons: Combat Alerts ― Group Buff PanelsOther Add-Ons: Deconstruction Junk Marker ― Purge Tracker ― Asylum Status Panel ― Smart Looter ― Improved Companion Rapport Information2 -
code65536✭✭✭✭✭
✭✭✭✭✭Now that there is an addon to let me see in-game just how much heal absorption each player has, we poked around with the final boss some more to get a better understanding of just how this previously opaque mechanic works.
The amount of heal absorption that is applied is always exactly 141085, no matter the source. So our gut feeling that different sources of the absorption applied it at different strengths was completely wrong. Box movement, boss teleport, blood summoning, tick bites, etc., all apply the same 141K absorption.
It doesn't stack, so you'll never have more than 141K at a given time, and once you get it, there appears to be a brief cooldown before it can be refreshed. So you can hit the box multiple times, and you'll have "only" 141K worth of absorption. Also, when the boss teleports for the box mechanic, everyone gets the 141K heal absorption, so at that point it doesn't matter who hits the box since we all have the absorption. (Which means that our strategy of minimizing the absorption on key players like the tank by not having them touch the box turned out to be bogus.)
ISSUE #1 FOR THE COMBAT TEAM: Healing skills don't take healing absorption into account when prioritizing targeting. For example, here is a video clip showing Breath of Life hitting two people without absorption while the caster, who has the absorption, isn't actually getting hit by his own BoL.
ISSUE #2 FOR THE COMBAT TEAM: Green Dragon Blood, which is scaled off of missing health, is literally useless for heal absorption (outputs 0 heals and has no effect on the absorption) if the player is already at max health. With the proliferation of heal absorption as a mechanic, I believe GDB should be given a minimum heal amount.
ISSUE #3 FOR THE COMBAT TEAM: This isn't related to heal absorption, but rather a bug that I happened to notice while testing heal absorption mechanics. The healing from Sap Essence decreases each time I cast it. Here is a video clip demonstrating the problem. As a point of contrast, you can see that when I stand in my Path, I get the same-sized healing tick each time (well, two different sizes, for crits and non-crits). You can see the healing absorbed number in brackets scroll by and you can see the size of my heal absorption decrease (it's the purple number in the small panel). Afterwards, you can see that as I cast Sap, the amount of healing for each cast decreases, until it reaches zero. At which point no numbers are scrolling by and the remaining heal absorption on me stays unchanged at 53K. This particular issue is present even in the absence of any heal absorption mechanics. Again, it's unrelated to heal absorption. It's just that it's easier to see the problem against this backdrop of heal absorption.
ISSUE #4 FOR THE COMBAT TEAM: Orbs/Springs nerf, in the context of this sort of content mechanic existing. But it's not just 141K heal absorptions (which is bull**** mostly because of the healing nerfs; I think would probably be a fine mechanic if this dungeon had been released in Update 22), but also things like AG execute, Lokkestiiz HM Static, etc. And please don't insult us with some song and dance about adjusting content to match new combat standards. There is already a group that has cleared this fight--deathless, I might add--without a dedicated healer. If you ask the dungeon team to nerf the heal absorption strength to compensate for these unwarranted healing changes, then what's the point of having dedicated healers? The reason for support roles to exist is for them to do the things that are impractical for the DDs to do. It's impractical to ask DDs to survive a boss whose light attack hits for 40K, so that's why we must have a tank. Can you say the same about the healer role?Edited by code65536 on July 17, 2019 1:31PMNightfighters ― PC/NA and PC/EU
Dungeons and Trials:Personal best scores:- Dragonstar Arena: 46817 (NA)
- Maelstrom Arena: 600526 (NA)
- Blackrose Prison: 99274 (EU) (Unchained)
- Maw of Lorkhaj: 165227 (EU)
- Halls of Fabrication: 220708 (NA) (Tick-Tock Tormentor #1, #2, #3, #4, #5, #6, #7, #8, #9, #10, #11, #12)
- Asylum Sanctorium: 114957 (NA) (Immortal Redeemer #1, #2, #3, #4, #5, #6, #7, #8, #9, #10)
- Cloudrest: 131256 (NA) (Gryphon Heart #1, #2, #3, #4, #5, #6, #7)
- Sunspire: 250866 (EU) (Godslayer #1, #2, #3, #4, #5, #6, #7)
- Kyne's Aegis: 235841 (EU) (Dawnbringer #1, #2, #3, #4, #5, #6, #7, #8)
Dungeon trifectas:- Mountain God and Leave No Bone Unbroken
- Apex Predator and Pure Lunacy
- Depths Defier and Relentless Raider
- Defanged the Devourer and Nature's Wrath
- In Defiance of Death and No Rest for the Wicked
- Bane of Thorns and True Genius
- Ardent Bibliophile and Subterranean Smasher
- Battlespire's Best and Bastion Breaker
- Zero Regrets and Land, Air, and Sea Supremacy
- Fist of Tava and Invader's Bane
- Curator's Champion (Valinna) and Temporal Tempest
- Unshakeable Fervor and Lighting the Embers
Extended Journal Add-Ons: Item Set Browser ― Loot Log ― Character Knowledge ― Collectibles Tracker ― RaidificatorPC/Console Add-Ons: Combat Alerts ― Group Buff PanelsOther Add-Ons: Deconstruction Junk Marker ― Purge Tracker ― Asylum Status Panel ― Smart Looter ― Improved Companion Rapport Information4 -
profundidob16_ESO✭✭✭✭✭wow, I didn't realize it was that bad but this healing absorption will make healers even less wanted. (read: not at all)
I've always believed that the way forward in order to make healers needed is not to add 1-shot mechanics but rather multiple different non-lethal sources of dot dmge that all stack and layer to create a continuous incoming and dmge flow which should not be able to be handled by dmge dealers without temporarily stopping most or all of their outgoing dmge.
That way either skilled dps have to limit their own dps in favor of outputting healing on the spot while not being optimally specced for it or....-much more effeciently- run with 1 optimized dedicated healing specced healer to handle all that so dps can do dps most efficiently.0 -
code65536✭✭✭✭✭
✭✭✭✭✭profundidob16_ESO wrote: »wow, I didn't realize it was that bad but this healing absorption will make healers even less wanted. (read: not at all)
I've always believed that the way forward in order to make healers needed is not to add 1-shot mechanics but rather multiple different non-lethal sources of dot dmge that all stack and layer to create a continuous incoming and dmge flow which should not be able to be handled by dmge dealers without temporarily stopping most or all of their outgoing dmge.
That way either skilled dps have to limit their own dps in favor of outputting healing on the spot while not being optimally specced for it or....-much more effeciently- run with 1 optimized dedicated healing specced healer to handle all that so dps can do dps most efficiently.
I think the heal absorption in HM had the potential to be a very good "you want a healer for this fight" mechanic... if this dungeon had been released one patch ago. The problem with it in its current state is that with the nerfs to multi-target healing output through the elimination of layering heals, the healer isn't really helping that much.
So, for example, if you look at the log snippet that I included in post #21, it took 14s to break the 141K heal absorption that was on me. Of that 141K worth of healing, 76K was my own self-heals and 65K came from our dedicated healer. The healer didn't even account for the majority of the healing.
And this was with our healer on a Necro, which was the class that worked out best for us. We had tried it before with him on his Templar and with him as a DD, and those two combinations didn't seem that different from each other. That's because the healing from the Templar was so ineffective relative to our self-heals that it didn't make up for the additional exposure to damage/mechanics that we had to face by having only 2 DDs instead of 3 DDs.
So the question that needs to be asked is, would adding a healer make things easier when the tradeoff is more exposure to damage/mechanics? For us, it was a wash with Templar healer vs. no healer. And slight advantage with Necro healer vs. no healer. That's far from the kind of resounding "yes" that we should be seeing.
A couple of the people that we did this dungeon with ran with another group that cleared HM without a healer and they did it without any deaths. Self-healing is very strong, particularly for a magplar running Sweeps, who did all the blood ball summons. For stam DDs, Vigor is now stronger than before.
So how do you change this balance and convince groups that it's actually worth bringing a healer along?- If you gut the strength of the heal absorption, then it'll be even easier to break through it with self-healing, and would shift the balance towards 3DD. This is why I vehemently disagree with the combat team's suggestion that their asinine "balance" changes could be compensated for by nerfs from the dungeon team. Yes, such an adjustment could be made to make the content clearable. While also eliminating any remaining reason to bring a healer.
- If healers were able to actually heal everyone effectively and intensively (particularly after the boss teleport that applies the absorption on everyone), then that would favor 1H/2DD. If the healer had a proper toolkit, then we wouldn't see self-heals dominating over external heals, we wouldn't see the heal absorption lasting a whole bloody 14s on someone, and I honestly think even a 141K heal absorption would be fine.
As I've said before, this boss fight is a great showcase of everything that's wrong with these farcical Update 23 "balance" changes. And once someone gets around to testing things like vHoF execute, I expect that it'll become clearer to the misguided defenders of this so-called "balance" just how far off the mark these changes are.Edited by code65536 on July 17, 2019 1:13PMNightfighters ― PC/NA and PC/EU
Dungeons and Trials:Personal best scores:- Dragonstar Arena: 46817 (NA)
- Maelstrom Arena: 600526 (NA)
- Blackrose Prison: 99274 (EU) (Unchained)
- Maw of Lorkhaj: 165227 (EU)
- Halls of Fabrication: 220708 (NA) (Tick-Tock Tormentor #1, #2, #3, #4, #5, #6, #7, #8, #9, #10, #11, #12)
- Asylum Sanctorium: 114957 (NA) (Immortal Redeemer #1, #2, #3, #4, #5, #6, #7, #8, #9, #10)
- Cloudrest: 131256 (NA) (Gryphon Heart #1, #2, #3, #4, #5, #6, #7)
- Sunspire: 250866 (EU) (Godslayer #1, #2, #3, #4, #5, #6, #7)
- Kyne's Aegis: 235841 (EU) (Dawnbringer #1, #2, #3, #4, #5, #6, #7, #8)
Dungeon trifectas:- Mountain God and Leave No Bone Unbroken
- Apex Predator and Pure Lunacy
- Depths Defier and Relentless Raider
- Defanged the Devourer and Nature's Wrath
- In Defiance of Death and No Rest for the Wicked
- Bane of Thorns and True Genius
- Ardent Bibliophile and Subterranean Smasher
- Battlespire's Best and Bastion Breaker
- Zero Regrets and Land, Air, and Sea Supremacy
- Fist of Tava and Invader's Bane
- Curator's Champion (Valinna) and Temporal Tempest
- Unshakeable Fervor and Lighting the Embers
Extended Journal Add-Ons: Item Set Browser ― Loot Log ― Character Knowledge ― Collectibles Tracker ― RaidificatorPC/Console Add-Ons: Combat Alerts ― Group Buff PanelsOther Add-Ons: Deconstruction Junk Marker ― Purge Tracker ― Asylum Status Panel ― Smart Looter ― Improved Companion Rapport Information8 -
 XIIICaesar✭✭✭So I see we have to do the Challenger achievement again to unlock the pet or cosmetics. With Wrathstone DLC the Challenger requirement was done away with so that you only had to clear it on veteran difficulty. ESO stated this was done due to feedback from the playerbase. From FACE MERIDIA’S MINIONS WITHIN THE DEPTHS OF MALATAR 1-31-2019 under ESO News:
"Finally, you can complete Depths of Malatar on the Veteran difficulty to also receive the Meridian Purified Skin, giving your character the shining visage of the Lady of Infinite Energies.
“We have heard the feedback from players regarding how we award the cosmetic rewards for dungeons,” says Finnigan. “So, with Wrathstone, you need only complete the Veteran difficulty of the dungeon in order to get the new skin, rather than the collection of Achievements as before.”
What happened there? @ZOS_GinaBruno @ZOS_BrianWheeler
1 -
 Grollok76✭✭✭✭ZOS should hire Code and fire the mo.rons well-meaning but under-qualified people currently in charge of "balancing the game". This thread alone shows he's got way better understanding of PVE than the clueless bunch we have to deal with at the moment.
Edited by Grollok76 on July 19, 2019 11:02AM0 -
code65536✭✭✭✭✭
✭✭✭✭✭Heal Absorption, a comparison
As far as I am aware, there are only three places where someone can encounter heal absorption in this game.- Update 20: Soldier of Anguish PvP gear set
- Strength: 4800
- Max. Duration: 4 seconds
- Update 22: Soul Tear from Nahviintaas, Sunspire trial boss
- Strength: 41699 in Veteran; 52122 in Veteran Hard Mode
- Effective Adjusted Strength: 59570 in Veteran; 74460 in Veteran Hard Mode
- Max. Duration: 20 seconds
- Soul Tear also applies Major Defile (the "Effective Adjusted Strength" values listed above had been adjusted for Major Defile)
- Soul Tear is accompanied by a DoT that ticks in the ballpark of 3K/s.
- Update 23: Ghastly Wound from Grundwulf, Moongrave Fane dungeon boss
- Strength: Mechanic does not exist in Veteran; 141085 in Veteran Hard Mode
- Max. Duration: Indefinite (technically 3600 seconds)
In my recent experience, Soul Tear on Nahviintaas Hard Mode is broken through usually within about 3 seconds. Aside from it having about half the effective strength, healing the group through it is easy because of the toolkit available. There's always strong layers of HoTs on the ground at all times. These anticipatory heals are very strong.
We don't have those kinds of persistent HoTs any more. A full stack of Springs on the ground is nearly 10K/s tooltip worth of pre-laid heals, and between the removal of stacking and the nerf to the tick size, it's now only a bit over 1K/s tooltip. It's literally not even worth the bar space. The combination of pre-laid anticipatory HoTs, reactive direct heals, and of course some off-heals from the non-healers, is what allows groups today to make short work of the Soul Tear mechanic. And next patch, we effectively lose those pre-laid anticipatory HoTs.
So here we have a dungeon hard mode heal absorption that's about twice as large as the previous patch's trial hard mode absorption at the same time that the toolkit for dealing with it gets severely nerfed in strength.
Veteran vs. Veteran Hard Mode: Also... I know that Veteran should be more accessible than Veteran Hard Mode... but come on, it's waaaay too easy. Put the heal absorption in Veteran too. Just make it small, like 10K or something. In its current state, Veteran is so easy that it does nothing to help groups get ready for Veteran Hard Mode.Edited by code65536 on July 20, 2019 2:59PMNightfighters ― PC/NA and PC/EU
Dungeons and Trials:Personal best scores:- Dragonstar Arena: 46817 (NA)
- Maelstrom Arena: 600526 (NA)
- Blackrose Prison: 99274 (EU) (Unchained)
- Maw of Lorkhaj: 165227 (EU)
- Halls of Fabrication: 220708 (NA) (Tick-Tock Tormentor #1, #2, #3, #4, #5, #6, #7, #8, #9, #10, #11, #12)
- Asylum Sanctorium: 114957 (NA) (Immortal Redeemer #1, #2, #3, #4, #5, #6, #7, #8, #9, #10)
- Cloudrest: 131256 (NA) (Gryphon Heart #1, #2, #3, #4, #5, #6, #7)
- Sunspire: 250866 (EU) (Godslayer #1, #2, #3, #4, #5, #6, #7)
- Kyne's Aegis: 235841 (EU) (Dawnbringer #1, #2, #3, #4, #5, #6, #7, #8)
Dungeon trifectas:- Mountain God and Leave No Bone Unbroken
- Apex Predator and Pure Lunacy
- Depths Defier and Relentless Raider
- Defanged the Devourer and Nature's Wrath
- In Defiance of Death and No Rest for the Wicked
- Bane of Thorns and True Genius
- Ardent Bibliophile and Subterranean Smasher
- Battlespire's Best and Bastion Breaker
- Zero Regrets and Land, Air, and Sea Supremacy
- Fist of Tava and Invader's Bane
- Curator's Champion (Valinna) and Temporal Tempest
- Unshakeable Fervor and Lighting the Embers
Extended Journal Add-Ons: Item Set Browser ― Loot Log ― Character Knowledge ― Collectibles Tracker ― RaidificatorPC/Console Add-Ons: Combat Alerts ― Group Buff PanelsOther Add-Ons: Deconstruction Junk Marker ― Purge Tracker ― Asylum Status Panel ― Smart Looter ― Improved Companion Rapport Information0 - Update 20: Soldier of Anguish PvP gear set
-
tpanisiakb16_ESO✭✭✭✭Going back quick to Kujo and healing. The best way to deal with this boss is to go with three damage dealers. Stop DPS at 90%, stack behind him, tank chains adds, use self-sustain to deal with the geysers, when Kujo is done with his temper DPS as much as possible. In 14second he will go into Geyser phase again, stop DPS, stack behind him, pull adds, self-heal, wait out Geysers, repeat. Should be dead in three transition phases, in less than one and a half minutes.
This is extremely discouraging that three damage dealers and a tank can still blow through mechanics, but weaker groups will get hung up on this fight because it continuously punishes the longer the fight stretches out. We did Lair of Marseelok tonight and most of the fights, especially the Defend Selene / Marseelok fight was better again with three damage dealers. Why even have healers in the game at this point?1 -
code65536✭✭✭✭✭
✭✭✭✭✭From today's patch notes:Area of Effect abilities no longer trigger Kujo Kethba’s reflect.
I don't think this is the right way to fix it. You can relocate AoE DoTs easily enough if you know that the reflect is coming. You can't do the same for single-target DoTs. And with Update 23 nerfing AoE DoTs and buffing ST DoTs, reflecting ST DoT damage a bigger concern than reflecting AoE DoT damage.
As I've suggested earlier, the BRP netch reflect is a great model to follow here. Instead of making the reflect not trigger from AoE, why why not just copy-and-paste the netch shield behavior?
Also, helping players identify the reflect mechanic so that they are better able to avoid it outright.Nightfighters ― PC/NA and PC/EU
Dungeons and Trials:Personal best scores:- Dragonstar Arena: 46817 (NA)
- Maelstrom Arena: 600526 (NA)
- Blackrose Prison: 99274 (EU) (Unchained)
- Maw of Lorkhaj: 165227 (EU)
- Halls of Fabrication: 220708 (NA) (Tick-Tock Tormentor #1, #2, #3, #4, #5, #6, #7, #8, #9, #10, #11, #12)
- Asylum Sanctorium: 114957 (NA) (Immortal Redeemer #1, #2, #3, #4, #5, #6, #7, #8, #9, #10)
- Cloudrest: 131256 (NA) (Gryphon Heart #1, #2, #3, #4, #5, #6, #7)
- Sunspire: 250866 (EU) (Godslayer #1, #2, #3, #4, #5, #6, #7)
- Kyne's Aegis: 235841 (EU) (Dawnbringer #1, #2, #3, #4, #5, #6, #7, #8)
Dungeon trifectas:- Mountain God and Leave No Bone Unbroken
- Apex Predator and Pure Lunacy
- Depths Defier and Relentless Raider
- Defanged the Devourer and Nature's Wrath
- In Defiance of Death and No Rest for the Wicked
- Bane of Thorns and True Genius
- Ardent Bibliophile and Subterranean Smasher
- Battlespire's Best and Bastion Breaker
- Zero Regrets and Land, Air, and Sea Supremacy
- Fist of Tava and Invader's Bane
- Curator's Champion (Valinna) and Temporal Tempest
- Unshakeable Fervor and Lighting the Embers
Extended Journal Add-Ons: Item Set Browser ― Loot Log ― Character Knowledge ― Collectibles Tracker ― RaidificatorPC/Console Add-Ons: Combat Alerts ― Group Buff PanelsOther Add-Ons: Deconstruction Junk Marker ― Purge Tracker ― Asylum Status Panel ― Smart Looter ― Improved Companion Rapport Information0 -
code65536✭✭✭✭✭
✭✭✭✭✭PTS Week 3
Boss 1: I summoned a blood ball to break the boss out of immunity/boulder mechanic and then shortly after got hit by three boulders for 5K each. The three boulders landed within 0.1s of each other for 15K damage, on top of the damage that I had from having just summoned the ball. Instant death. Is it intended that so many boulders can all hit the same player at essentially the same time?
Boss 3: Making AoEs non-reflectable seems arbitrary. If the goal is to lessen the impact of pre-existing damage, then it's not helping with the non-AoE DoTs that I have ticking on the boss, like from Soul Trap.
This change affects AoE spammables as well, so I can for example spam Sap Essence to kill the adds and not worry about a reflect. This further encourages not doing the box mechanic. We just chained the adds to the boss and killed them with AoE DoTs and spammables while ignoring the boxes and geysers.
Finally, I still think that the visual cues could use some work to help players who are unfamiliar with this fight.- With other reflect mechanics--Grobull in DS2, netches in BRP, Calefactors in HoF, enemies in DSA that cast the DK wings, etc.--there is a visual aura around the enemy. None exist here. The Gargoyle looks exactly the same during the mechanic as he does outside the mechanic . Except that he's angrily pounding the floor, which isn't exactly suggestive of damage reflect.
- To further muddy the waters, reflected damage appear in the form of fireballs that resemble the fireballs from the geysers.
- The telegraph for the start of the mechanic is still fairly short and subtle.
Boss 5 HM:
I love the Ghastly Wound changes. Since the patch notes did not provide details...- The heal absorption has been reduced from 141085 to 40310.
- There were times when the heal absorption that was applied was slightly smaller. 38050 and 35790. I think these may have been times when the absorption was re-applied to a person who already had it but am not completely sure.
- Shield strength cast by players with the absorption is reduced by 85%.
- Healing done by players with the absorption is reduced by 90%. (Why not make it 85% to be consistent?)
- The DoT from subsequent reapplications ticked on me in the rough ballpark of 1.5K/s.
Coupled with the removal of the everyone-gets-Ghastly-Wound mechanic from the Baleful Retreat, groups now need to coordinate who gets the heal absorption.- Under no circumstances should the healer be allowed get the heal absorption. Tanks should probably avoid it too.
- We found it easier to designate one DD for moving the box and one DD for summoning the blood ball, to minimize the risk of us getting the DoT from reapplication.
These changes make it impractical for players to "self-medicate" their way out of the heal absorption (since it is now effectively a 400K absorption if you try to self-heal out of it).
I still expect healerless groups to be viable, however, given the strength of Echoing Vigor, particularly on stam DDs with high crit chance. Magicka DDs have very limited off-healing options because of the need to equip a resto staff. Vigor has no class or weapon restrictions. On a side note, perhaps the combat team should take this into account when they try to shoehorn restoration staff skills into the same power budget that less restrictive skills like Vigor are subject to.
Issue #1: We tried to see how much SD/WD was given to a DD with the heal absorption, but when we looked at our character sheet, the SD/WD increase was very fleeting. It was there for a second and then immediately fell. I'm not sure if this is a problem with the SD/WD buff falling off too fast. Or a problem with the character sheet.
Issue #2: Not a new problem, but box movement is still very finicky. Here is an example clip. The movement is blocked by seemingly anything, even if it looks like the obstruction is at an angle or distance that shouldn't interfere with the box's movement. The worst is when the box movement is blocked by a wall that is still a good distance away, and you have to run to the other side of the box to push it in the other direction.
Issue #3: Shackle pillar RNG still feels like a crapshoot. Yes, decreasing the initial damage of the shackle helps. But there is still so much variability. At one point, one of us had a shackle pillar spawn literally where he were standing. Absolutely zero movement required. And at another point, the healer had a shackle pillar spawn on the complete opposite side of the room, and he had to cross various ground AoEs to get to it. There's just too much variability and luck here. A limit on the maximum distance a shackle pillar could spawn from the shackled player (perhaps counterbalanced by a limit on the minimum distance) to reduce the range of RNG variability would be nice.
Issue #4: Had a shackle pillar spawn in the path of the dragon's fire breath again today.At least it wasn't 100% inside the dragon breath this time, which happened to us once in the past.
Overall, Grundwulf HM feels noticeably easier now. The changes mean that groups need more coordination, though, and that's a good thing. And despite HM being easier now, I still think that the non-HM and HM difficulty gap is too wide, and this is the result of non-HM lacking any meaningful mechanics and being too easy. I would suggest again adding Ghastly Wound to non-HM--at the fraction of the HM strength and with much weaker shield/heal debuffs. Right now, the final boss fight in non-HM is easier than some of the earlier boss fights and does absolutely nothing to prepare players for tackling HM.Edited by code65536 on July 26, 2019 1:44PMNightfighters ― PC/NA and PC/EU
Dungeons and Trials:Personal best scores:- Dragonstar Arena: 46817 (NA)
- Maelstrom Arena: 600526 (NA)
- Blackrose Prison: 99274 (EU) (Unchained)
- Maw of Lorkhaj: 165227 (EU)
- Halls of Fabrication: 220708 (NA) (Tick-Tock Tormentor #1, #2, #3, #4, #5, #6, #7, #8, #9, #10, #11, #12)
- Asylum Sanctorium: 114957 (NA) (Immortal Redeemer #1, #2, #3, #4, #5, #6, #7, #8, #9, #10)
- Cloudrest: 131256 (NA) (Gryphon Heart #1, #2, #3, #4, #5, #6, #7)
- Sunspire: 250866 (EU) (Godslayer #1, #2, #3, #4, #5, #6, #7)
- Kyne's Aegis: 235841 (EU) (Dawnbringer #1, #2, #3, #4, #5, #6, #7, #8)
Dungeon trifectas:- Mountain God and Leave No Bone Unbroken
- Apex Predator and Pure Lunacy
- Depths Defier and Relentless Raider
- Defanged the Devourer and Nature's Wrath
- In Defiance of Death and No Rest for the Wicked
- Bane of Thorns and True Genius
- Ardent Bibliophile and Subterranean Smasher
- Battlespire's Best and Bastion Breaker
- Zero Regrets and Land, Air, and Sea Supremacy
- Fist of Tava and Invader's Bane
- Curator's Champion (Valinna) and Temporal Tempest
- Unshakeable Fervor and Lighting the Embers
Extended Journal Add-Ons: Item Set Browser ― Loot Log ― Character Knowledge ― Collectibles Tracker ― RaidificatorPC/Console Add-Ons: Combat Alerts ― Group Buff PanelsOther Add-Ons: Deconstruction Junk Marker ― Purge Tracker ― Asylum Status Panel ― Smart Looter ― Improved Companion Rapport Information0
