Maintenance for the week of March 30:
• [COMPLETE] NA megaservers for patch maintenance – March 30, 4:00AM EDT (8:00 UTC) - 12:00PM EDT (16:00 UTC)
• [COMPLETE] EU megaservers for patch maintenance – March 30, 8:00 UTC (4:00AM EDT) - 16:00 UTC (12:00PM EDT)
• [COMPLETE] NA megaservers for patch maintenance – March 30, 4:00AM EDT (8:00 UTC) - 12:00PM EDT (16:00 UTC)
• [COMPLETE] EU megaservers for patch maintenance – March 30, 8:00 UTC (4:00AM EDT) - 16:00 UTC (12:00PM EDT)
PTS Update 45 - Feedback Thread for Lep Seclusa

ZOS_Kevin
Community Manager
This is the official feedback thread for Lep Seclusa. Specific feedback that the team is looking for includes the following:
Edited by ZOS_Kevin on January 13, 2025 6:31PM - Did you enjoy this new dungeon?
- How did the difficulty compare to existing dungeons on Normal and Veteran versions?
- Did you complete Normal or Veteran (or both)?
- Which was your favorite boss in this dungeon, and why?
- What level and build was the character you used?
- Did you happen to notice or find anything particularly interesting or different?
- Do you have any other general feedback?
Community Manager for ZeniMax Online Studio and Elder Scrolls OnlineDev Tracker | Service Alerts | ESO Twitter
0
-
 code65536✭✭✭✭✭
✭✭✭✭✭
We ran this on vet HM.
I'm on my usual NB tank, we had a templar healer, and two arc DDs.
First boss
We took about an hour to figure out the first boss. We discovered the duneripper--and its enrage--pretty quickly, and saw the death recap hint about hitting it with the boulder, but duneripper bowling felt very clunky at first. I'd try to move the boss when I saw one spawn, but while positioning him, he'd teleport for that interrupt mechanic, and then it was a hassle to get the boss positioned again, and to do so without getting too close to enrage the duneripper, and then my aim would be off by a bit and miss the shot, and we all thought, "what a mess! that can't possibly be what they intend for us to do".
Next, we noticed that one duneripper stopped moving when it reached the AoE left by a boulder, so we thought, "oh, maybe we don't have to hit it with boulder, but just have it walk into the AoE!". In hindsight, I think that it was just a coincidence that it stopped when it reached the AoE, but we chased that particular wild goose for a number of pulls.
Ah, but what if we just never hit them and never get close to them and just ignore them? So we tried a number of pulls like that, but they inevitably will get in the way of the poison hide mechanic. And after more pulls like that, we reached execute when every duneripper auto-enraged, so there goes that idea.
After a few pulls of us trying to kill them via brute force, we tried bowling again, and I eventually figured out a way to make it work pretty reliably (where I'd stand with my back to the boss, facing the duneripper, so that I could aim the boulder properly; I didn't miss a single shot after I adopted that method). Once we got that down, then the fight became much more straightforward... and... pretty fun.
As a tank, I think the bowling mech, while extremely frustrating initially, was a lot of fun in the end. Probably my favorite tank mech since 2017's Palm Strikes.
I feel like that this boss fight isn't too bad once you've figured everything out, but it does have an uncharacteristically steep learning curve for a first boss, and we spent more time getting this one down than we did with Shipwright's first boss, which was the previous record-holder for "how long did the first boss stump us on PTS day 1".
One pain point in particular is how unforgiving the poison-hiding mechanic is on HM. On non-HM, you don't even need to hide, but on HM, you have so little time to react, and there were times when I thought I had gone far enough behind the boulder to be safe, but apparently if I could still see one of the boss's legs, I wasn't quite far enough to be fully LoS'ed. I feel like giving players just an extra second of warning would help a lot here. And maybe give us a visual indicator to let us know when we're safe, similar to what you do with the pillar hide mechanic in Unhallowed Grave.
Second boss
This one was much easier to figure out. I immediately noticed that the Ignite DoT was the biggest threat to the tank (over 9K every 0.6s? yikes), and that it came from her chains, so I thought, "what if we don't let her chain me?" With enough speed and mobility, I could follow her whenever she dashed, and by keeping close, she doesn't chain me.
But when she goes to the middle wall, she immediately chains without giving me a chance to catch up with her. I don't know if that's intended or not, for those chains to be unavoidable.
Third boss
Pretty self-explanatory avoid-the-red-stuff fight. Not much to say about this since it seems like everything is pretty straightforward. What I mean is, despite there being a lot going on in this fight, but there's nothing to figure out, and no need to develop a strategy.
General thoughts
The first boss definitely felt like the most mechanically-interesting--and thus difficult--fight. The other bosses had more health, but that just means that those fights dragged out for a bit. And instead of difficulty going from easy to hard as you progressed through the dungeon, it was reversed here, where we faced the most challenge on the first boss and then everything else was breezy easy in comparison.
Because we started a bit late (have two Europeans in the group and it was midnight for them when we killed the final boss), we only had time for one dungeon. We'll run the other one tomorrow.
Addendum 1: Rescuer
I noticed that there's an achievement to rescue certain NPCs, similar to the one in City of Ash II. However, even though we didn't do this achievement, all of the NPCs were present at the end to speak to. That... feels like it's a bug? In CoA2 and Mazzatun, only the ones that you actually rescued show up at the end.
Addendum 2: Thoughts as a tank
And as a tank, I feel like this dungeon's HM--well, the first two bosses at least--give tanks a more interesting challenge than what we've seen from other dungeons from recent years. It's refreshing to get tank mechs that are about positioning and mobility rather than "here's a stupid amount of damage for you to eat".Edited by code65536 on January 14, 2025 3:25AMNightfighters ― PC/NA and PC/EU
Dungeons and Trials:Personal best scores:- Dragonstar Arena: 46817 (NA)
- Maelstrom Arena: 600526 (NA)
- Blackrose Prison: 99274 (EU) (Unchained)
- Maw of Lorkhaj: 165227 (EU)
- Halls of Fabrication: 220708 (NA) (Tick-Tock Tormentor #1, #2, #3, #4, #5, #6, #7, #8, #9, #10, #11, #12)
- Asylum Sanctorium: 114957 (NA) (Immortal Redeemer #1, #2, #3, #4, #5, #6, #7, #8, #9, #10)
- Cloudrest: 131256 (NA) (Gryphon Heart #1, #2, #3, #4, #5, #6, #7)
- Sunspire: 250866 (EU) (Godslayer #1, #2, #3, #4, #5, #6, #7)
- Kyne's Aegis: 235841 (EU) (Dawnbringer #1, #2, #3, #4, #5, #6, #7, #8)
Dungeon trifectas:- Mountain God and Leave No Bone Unbroken
- Apex Predator and Pure Lunacy
- Depths Defier and Relentless Raider
- Defanged the Devourer and Nature's Wrath
- In Defiance of Death and No Rest for the Wicked
- Bane of Thorns and True Genius
- Ardent Bibliophile and Subterranean Smasher
- Battlespire's Best and Bastion Breaker
- Zero Regrets and Land, Air, and Sea Supremacy
- Fist of Tava and Invader's Bane
- Curator's Champion (Valinna) and Temporal Tempest
- Unshakeable Fervor and Lighting the Embers
Extended Journal Add-Ons: Item Set Browser ― Loot Log ― Character Knowledge ― Collectibles Tracker ― RaidificatorPC/Console Add-Ons: Combat Alerts ― Group Buff PanelsOther Add-Ons: Deconstruction Junk Marker ― Purge Tracker ― Asylum Status Panel ― Smart Looter ― Improved Companion Rapport Information7 -
 Freelancer_ESO✭✭✭✭✭
✭Did you enjoy this new dungeon?
Yeah, the visuals and the atmosphere was great and some of the fights were amusing.
How did the difficulty compare to existing dungeons on Normal and Veteran versions?
Seemed pretty comparable to other recent dungeons on normal.
Did you complete Normal or Veteran (or both)?
Normal
Which was your favorite boss in this dungeon, and why?
I think it's hard to say for me between Noriwen and the Siege Master.
I've always enjoyed using siege vs npcs and the barrel rolling gryphons were cool.
What level and build was the character you used?
2kish CP Tanky Char running Crimson+Leeching.
Did you happen to notice or find anything particularly interesting or different?
I really enjoyed the bridge bombing.
Do you have any other general feedback?
The Tactician's fighting style wasn't really what I was anticipating as it felt almost more like fighting a Mora Cultist than what I'd expect from someone trying to be Emperor but, that might just be my dislike of Mora.0 -
 WhiteCoatSyndrome✭✭✭✭✭
✭✭✭✭✭Played through this on normal. We managed to skip right past the Siegemaster and didn’t even realize we’d missed him until I backtracked to look for lorebooks and noticed the boss health bar. Having to fix the siege weapons and knock him down to fight was an interesting mechanic though.#proud2BAStarObsessedLoony
PAWS (Positively Against Wrip-off Stuff) - Say No to Crown Crates!
A useful explanation for how RNG works
How to turn off the sustainability features (screen dimming, fps cap) on PC0 -
 AJTC5000✭✭✭✭
We ran this on vet HM.
I'm on my usual NB tank, we had a templar healer, and two arc DDs.
First boss
We took about an hour to figure out the first boss. We discovered the duneripper--and its enrage--pretty quickly, and saw the death recap hint about hitting it with the boulder, but duneripper bowling felt very clunky at first. I'd try to move the boss when I saw one spawn, but while positioning him, he'd teleport for that interrupt mechanic, and then it was a hassle to get the boss positioned again, and to do so without getting too close to enrage the duneripper, and then my aim would be off by a bit and miss the shot, and we all thought, "what a mess! that can't possibly be what they intend for us to do".
Next, we noticed that one duneripper stopped moving when it reached the AoE left by a boulder, so we thought, "oh, maybe we don't have to hit it with boulder, but just have it walk into the AoE!". In hindsight, I think that it was just a coincidence that it stopped when it reached the AoE, but we chased that particular wild goose for a number of pulls.
Ah, but what if we just never hit them and never get close to them and just ignore them? So we tried a number of pulls like that, but they inevitably will get in the way of the poison hide mechanic. And after more pulls like that, we reached execute when every duneripper auto-enraged, so there goes that idea.
After a few pulls of us trying to kill them via brute force, we tried bowling again, and I eventually figured out a way to make it work pretty reliably (where I'd stand with my back to the boss, facing the duneripper, so that I could aim the boulder properly; I didn't miss a single shot after I adopted that method). Once we got that down, then the fight became much more straightforward... and... pretty fun.
As a tank, I think the bowling mech, while extremely frustrating initially, was a lot of fun in the end. Probably my favorite tank mech since 2017's Palm Strikes.
I feel like that this boss fight isn't too bad once you've figured everything out, but it does have an uncharacteristically steep learning curve for a first boss, and we spent more time getting this one down than we did with Shipwright's first boss, which was the previous record-holder for "how long did the first boss stump us on PTS day 1".
One pain point in particular is how unforgiving the poison-hiding mechanic is on HM. On non-HM, you don't even need to hide, but on HM, you have so little time to react, and there were times when I thought I had gone far enough behind the boulder to be safe, but apparently if I could still see one of the boss's legs, I wasn't quite far enough to be fully LoS'ed. I feel like giving players just an extra second of warning would help a lot here. And maybe give us a visual indicator to let us know when we're safe, similar to what you do with the pillar hide mechanic in Unhallowed Grave.
Second boss
This one was much easier to figure out. I immediately noticed that the Ignite DoT was the biggest threat to the tank (over 9K every 0.6s? yikes), and that it came from her chains, so I thought, "what if we don't let her chain me?" With enough speed and mobility, I could follow her whenever she dashed, and by keeping close, she doesn't chain me.
But when she goes to the middle wall, she immediately chains without giving me a chance to catch up with her. I don't know if that's intended or not, for those chains to be unavoidable.
Third boss
Pretty self-explanatory avoid-the-red-stuff fight. Not much to say about this since it seems like everything is pretty straightforward. What I mean is, despite there being a lot going on in this fight, but there's nothing to figure out, and no need to develop a strategy.
General thoughts
The first boss definitely felt like the most mechanically-interesting--and thus difficult--fight. The other bosses had more health, but that just means that those fights dragged out for a bit. And instead of difficulty going from easy to hard as you progressed through the dungeon, it was reversed here, where we faced the most challenge on the first boss and then everything else was breezy easy in comparison.
Because we started a bit late (have two Europeans in the group and it was midnight for them when we killed the final boss), we only had time for one dungeon. We'll run the other one tomorrow.
Addendum 1: Rescuer
I noticed that there's an achievement to rescue certain NPCs, similar to the one in City of Ash II. However, even though we didn't do this achievement, all of the NPCs were present at the end to speak to. That... feels like it's a bug? In CoA2 and Mazzatun, only the ones that you actually rescued show up at the end.
Addendum 2: Thoughts as a tank
And as a tank, I feel like this dungeon's HM--well, the first two bosses at least--give tanks a more interesting challenge than what we've seen from other dungeons from recent years. It's refreshing to get tank mechs that are about positioning and mobility rather than "here's a stupid amount of damage for you to eat".
Was in the group with Code, so I'll just add a couple more points from our second run today and as a DD in general:
Following on from our run in Exiled Redoubt today, I went back into Lep Seclusa on Normal difficulty to look for some lorebooks. Only then did I see the duneripper in the very first trash pack get killed by the scripted poison boulder. However, the duneripper's body despawned very quickly, even while I was still finishing off the trash, so we clearly missed it the first time, as both the duneripper and the poison circle had despawned by the time we had finished with the Veteran difficulty trash. This meant we spent a lot of time on Boss 1 HM trying to figure out what to do. Perhaps making the initial duneripper corpse remain for longer might assist in clueing players in to this mechanic for the actual boss encounter?
As a DD for Boss 1 HM, the most unforgiving mechanic is the poison cloud, and only because of how unpredictable it is. The first time it hits it's sort of easy to tell when it's going to come (just after the first Wild Bloom DoT), but after this there is no way to be watching the boss and go "Oh, I need to hide now" without being killed - unless you're playing with one foot behind a rock for the whole fight. Maybe this is intended? Not sure. We did narrow down that we needed to kill three dunerippers throughout the fight to prevent them from enraging in execute, so this made the flow of the fight a bit more straightforward.
On the second run of Lep Seclusa HM we tried without killing Malthoras, and this didn't seem to add to the difficulty much, which I think is fine. The siege can still kill you if you are not ready for it, or if it combos with something, but it doesn't hit often enough to be too annoying.
We managed to find all six Hel Netu, however I agree with Code that them all appearing at the end is a little strange. I get that there isn't a specific dialogue option to tell them "Hey, I saved you!" and it's all sort of implied that you killed the enemies surrounding them so they'll now just tag along with you - but we've had a similar sort of achievement in City of Ash 2, and this isn't like that.
Orpheon seems to get stuck in some mechanics sometimes which is a little frustrating. For example, sometimes while he's in the middle and after we have defeated the Arcane Hulk (and Alcunar has flown away temporarily), which should trigger him to portal back to the safe area, he will stay in the middle casting Enlightened Knowledge for a little bit. Also, we had one instance where he would teleport back to the middle of the safe area, but still be immune to taunt, so he would get his cone attack out and kill someone (presumably the counterplay to this is to stay away from his portal until he's properly taunted, but still a little frustrating). The stuns on Orpheon seem a little overbearing as well (the small tentacles do stun, but the big tentacles don't? But then both the gryphons and the smaller adds also stun??).
Some clarification on whether the "side bosses" (Lewin Fray, Malthoras and Ajim-Rei) actually count towards the "all encounters" parts of the speed-run, no-death and trifecta achievements would be appreciated. You can straight-up run around Lewin Fray, and Malthoras only requires you to kill the trash pack underneath him, but Ajim-Rei seems like a mandatory fight to get to Orpheon? It's unclear as to whether they share the same "secret boss" behaviour, and therefore credit, as previous dungeons.
General thoughts? I like the laser noise on Orpheon's heavy attack. Bzzzzzzt.- PC/NA - @AJTC5000
DC - Alena-Draco - Dunmer Magicka Templar
PvE AchievementsTrials- vHRC HM
- vAA HM
- vSO HM
- vMoL HM (Dro-m'Athra Destroyer)
- vHoF HM (Tick-Tock Tormentor/The Dynamo)
- vAS HM (Saintly Saviour/Immortal Redeemer)
- vCR HM (Gryphon Heart/Welkynar Liberator)
- vSS HM
- vKA HM
- vRG HM
- vDSR (Reef Guardian HM)
- vSE (Twelvane + Chimera HM)
- vLC HM
- vOC (Shapers of Flesh HM)
Arenas- vMA Flawless
- vBRP Flawless (The Unchained)
- vVA Flawless (Spirit Slayer)
- IA 12-4-3
Dungeons- vFL HM (Leave No Bone Unbroken)
- vSCP HM (Mountain God)
- vMHK HM (Pure Lunacy)
- vMoS HM (Apex Predator)
- vDoM HM (Depths Defier)
- vFV HM (Relentless Raider)
- vMGF HM (Defanged the Devourer)
- vLoM HM (Nature's Wrath)
- vIcereach HM (No Rest for the Wicked/Storm Foe)
- vUG HM (In Defiance of Death/Bonecaller's Bane)
- vSG HM (True Genius)
- vCT HM (Bane of Thorns)
- vBDV HM (Ardent Bibliophile)
- vCauldron HM (Subterranean Smasher)
- vRPB HM (Bastion Breaker/of the Silver Rose)
- vDC HM (Battlespire's Best/The Dreaded)
- vCA HM
- vSR HM (Zero Regrets/Privateer)
- vERE HM (Invaders' Bane)
- vGD HM (Fist of Tava)
- vSH HM (Magnastylus in the Making/Curator's Champion)
- vBS HM (Temporal Tempest)
- vOP HM (Lighting the Embers/Oathsworn)
- vBV HM (Unshakeable Fervour/Bedlam's Disciple)
- vER HM (Revenger Breaker/the Just)
- vLS HM (Sic Semper/Moth Trusted)
- vNC HM (Key to the Stone/Deathbringer)
- vBGF HM (Cut Above the Rest/The Brilliant)
2 - PC/NA - @AJTC5000
-
code65536✭✭✭✭✭
✭✭✭✭✭After @AJTC5000 told me that there were indeed dunerippers there in that "tutorial demonstration", I played back the streams from my two runs of this dungeon.
In the first run, I was grabbing adds and had my camera turned in a way that I literally could not see this demonstration at all. In the second run, I could see it... if I was looking out the corner of my eye.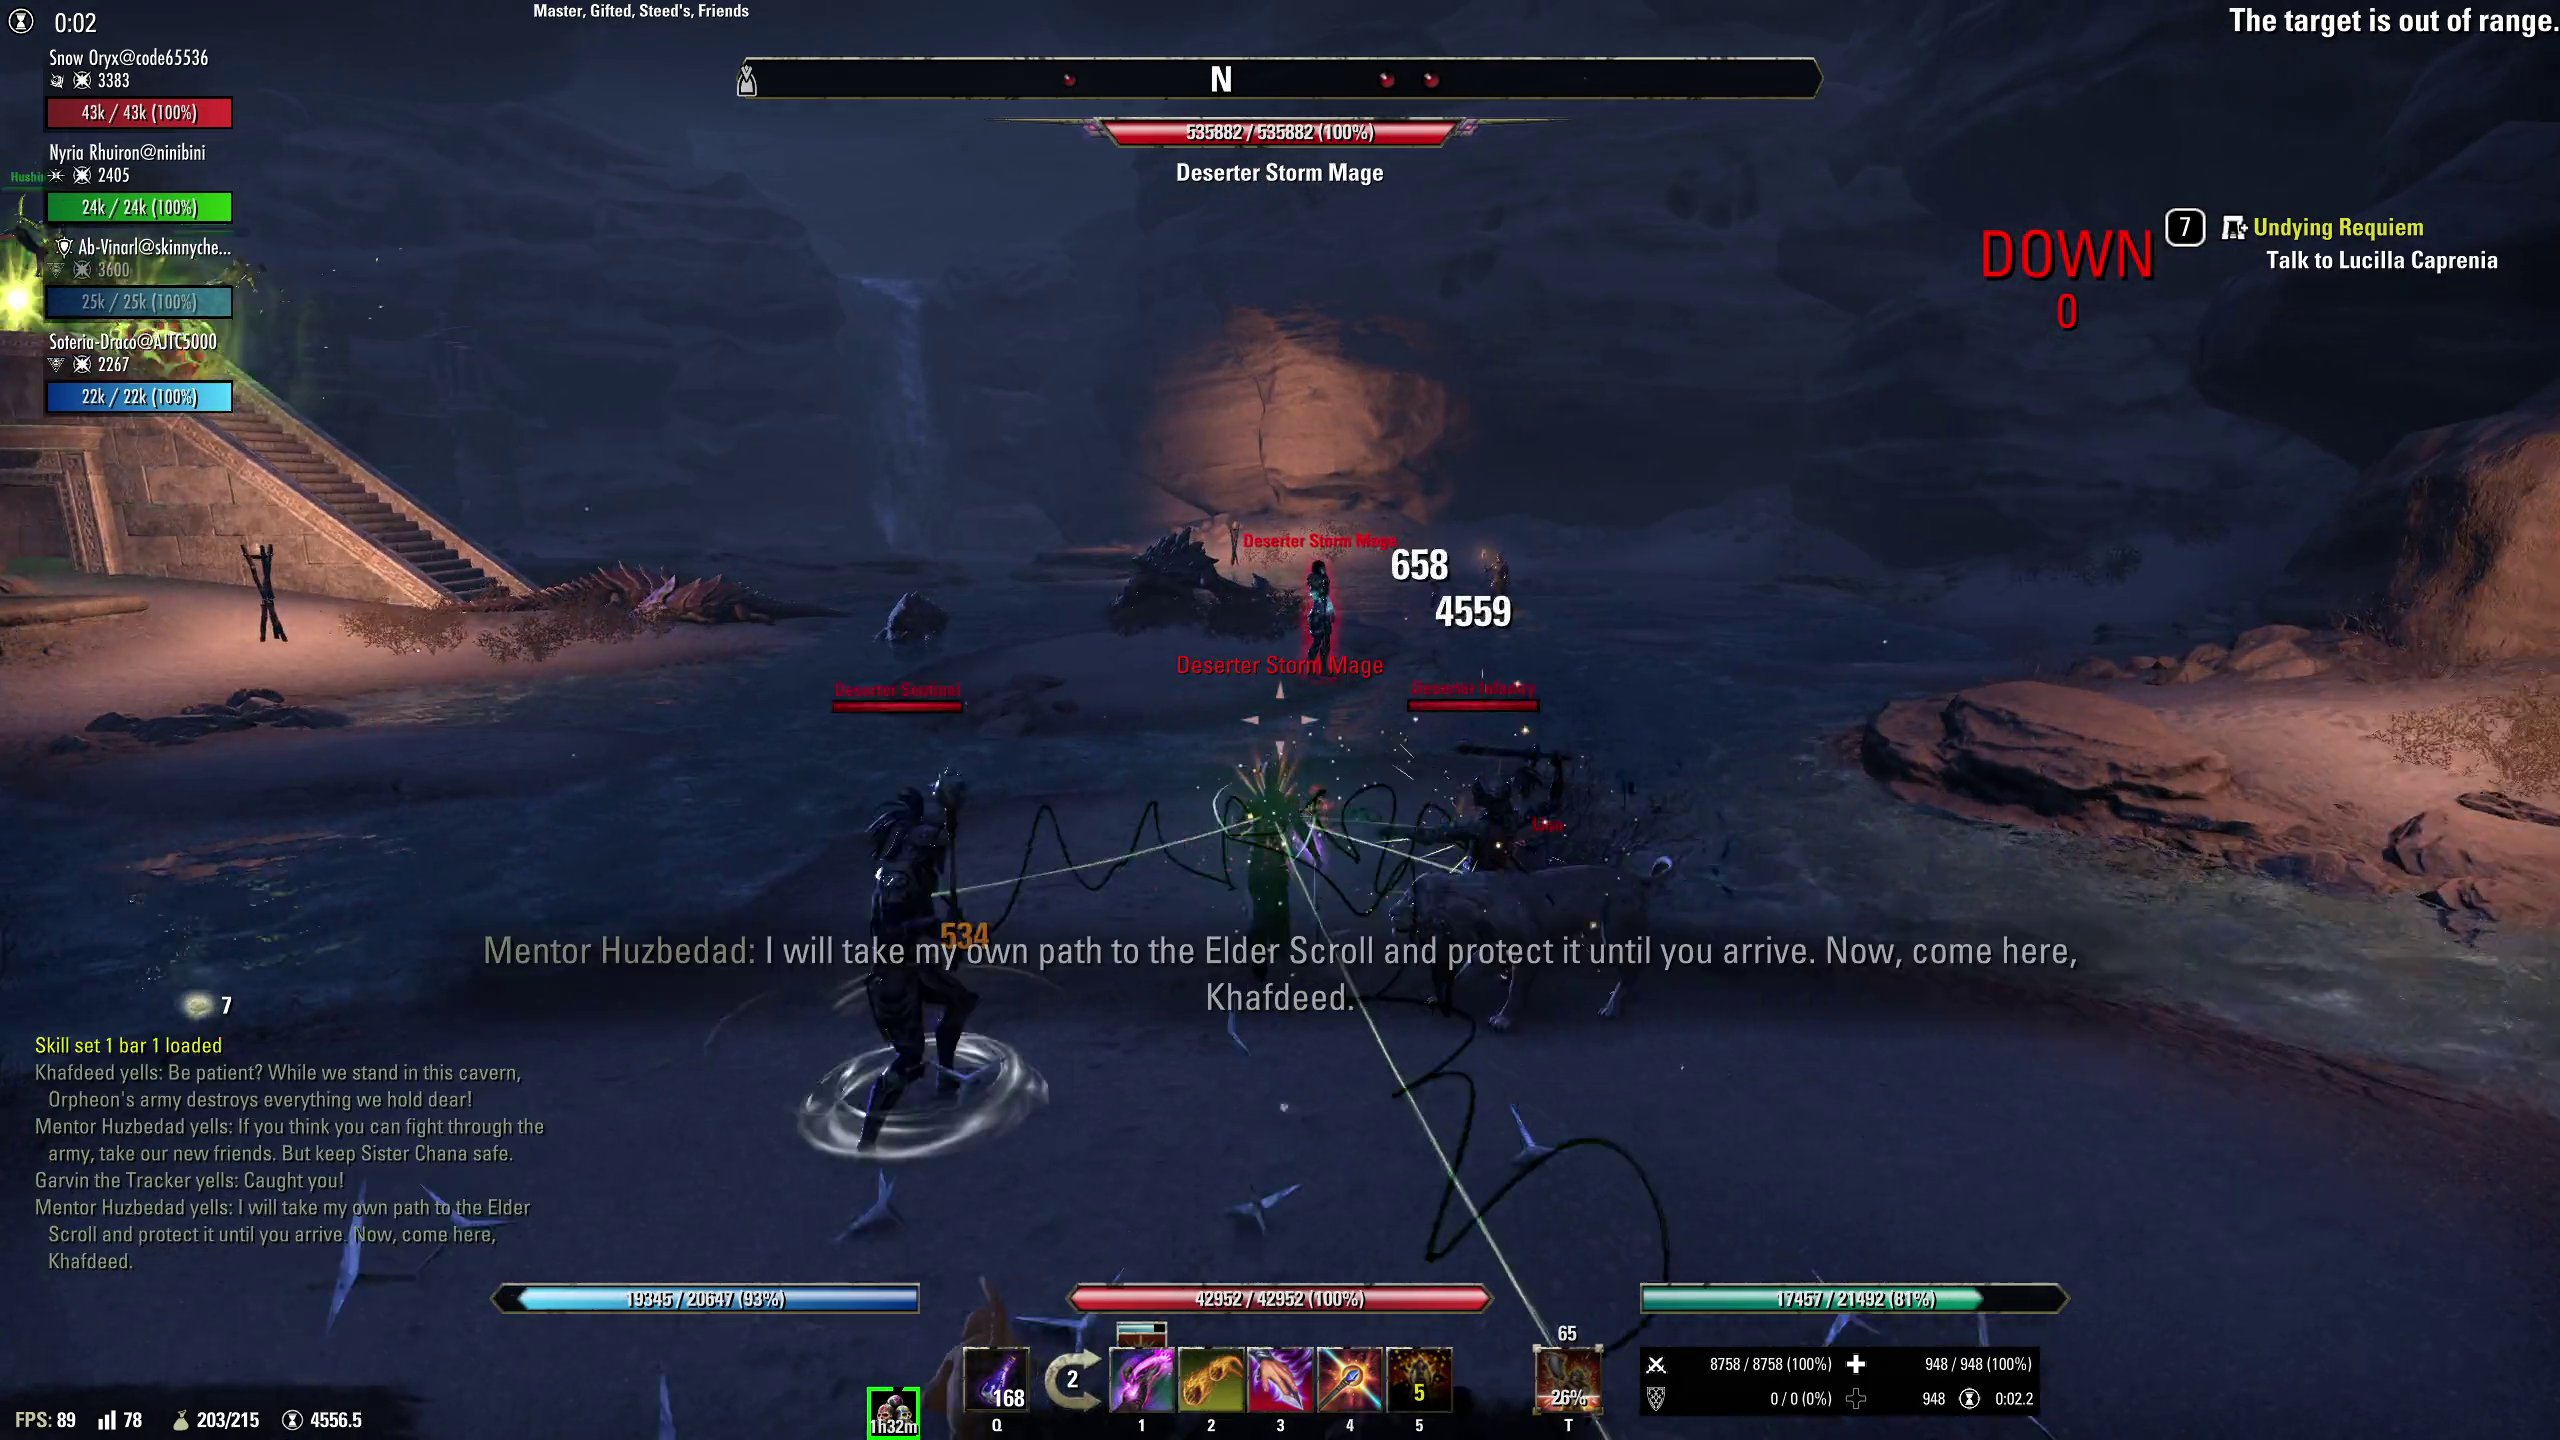
With the way players approach this area, they will be looking at the enemies in front of them, not looking at the scene unfolding off to the left. I honestly did not even notice that there were dunerippers because they die basically at the very start of that pull, and the initial moments of that pull are all about the other, more obvious enemies.
So my suggestion is this: Don't have the dunerippers there initially. AFTER the other enemies die, have them burrow out of the ground, and then roll the boulder over them. The boulder roll also comically knocks over two friendly NPCs that we're supposed to rescue, but that too gets lost because it's playing out while we are focused on those other enemies.
Delay this sequence of events, so that you have people's attention when it happens. It's too important of a demonstration to let it get obscured like it is currently.Edited by code65536 on January 15, 2025 4:52AMNightfighters ― PC/NA and PC/EU
Dungeons and Trials:Personal best scores:- Dragonstar Arena: 46817 (NA)
- Maelstrom Arena: 600526 (NA)
- Blackrose Prison: 99274 (EU) (Unchained)
- Maw of Lorkhaj: 165227 (EU)
- Halls of Fabrication: 220708 (NA) (Tick-Tock Tormentor #1, #2, #3, #4, #5, #6, #7, #8, #9, #10, #11, #12)
- Asylum Sanctorium: 114957 (NA) (Immortal Redeemer #1, #2, #3, #4, #5, #6, #7, #8, #9, #10)
- Cloudrest: 131256 (NA) (Gryphon Heart #1, #2, #3, #4, #5, #6, #7)
- Sunspire: 250866 (EU) (Godslayer #1, #2, #3, #4, #5, #6, #7)
- Kyne's Aegis: 235841 (EU) (Dawnbringer #1, #2, #3, #4, #5, #6, #7, #8)
Dungeon trifectas:- Mountain God and Leave No Bone Unbroken
- Apex Predator and Pure Lunacy
- Depths Defier and Relentless Raider
- Defanged the Devourer and Nature's Wrath
- In Defiance of Death and No Rest for the Wicked
- Bane of Thorns and True Genius
- Ardent Bibliophile and Subterranean Smasher
- Battlespire's Best and Bastion Breaker
- Zero Regrets and Land, Air, and Sea Supremacy
- Fist of Tava and Invader's Bane
- Curator's Champion (Valinna) and Temporal Tempest
- Unshakeable Fervor and Lighting the Embers
Extended Journal Add-Ons: Item Set Browser ― Loot Log ― Character Knowledge ― Collectibles Tracker ― RaidificatorPC/Console Add-Ons: Combat Alerts ― Group Buff PanelsOther Add-Ons: Deconstruction Junk Marker ― Purge Tracker ― Asylum Status Panel ― Smart Looter ― Improved Companion Rapport Information6 -
 Soarora✭✭✭✭✭
✭✭✭✭✭Did you enjoy this new dungeon?
Honestly, yeah, it was quite fun!
How did the difficulty compare to existing dungeons on Normal and Veteran versions?
As far as the hard mode goes, I'd say it's more difficult than the last set of dungeons. Its comparable to coral aerie last boss and second boss on HM in that you have to think about multiple things at once and have maneuverability.
Did you complete Normal or Veteran (or both)?
Hard mode. Only once so far, so of course things will probably feel easier with time.
Which was your favorite boss in this dungeon, and why?
All of the actual bosses have aspects I like about them, but if I had to choose, I'd say the first boss is my favorite due to having to think about LoS for the hide mechanic and the adds, chasing the boss down to interrupt him, as well as the bowling.
I like how the second boss chains you, it's an interesting take on a fight by taking away one aspect of tanking: placing the boss in the best spot. It makes me feel more like she is in control of the fight, which is intriguing.
For last boss, my takeaway is the moving floor. Changing the size of the fight space is a pretty cool idea.
Generally, I think the team had some great brainstorming here.
What level and build was the character you used?
CP 2000+ sorc tank. I used streak in both boss 1 and boss 2.
Did you happen to notice or find anything particularly interesting or different?
As said above, I think the new mechanics are interesting. This dungeon doesn't feel so much "oh it's the mechanic from this other content", a comment I had a lot with bedlam veil and oathsworn pit. There are a few comparisons to coral aerie and unhallowed grave but even then, it feels like fresh takes on those kinds of mechanics as opposed to a direct rip-off.
Do you have any other general feedback?
I think the difficulty level is perfect. Time will tell on how difficult the trifecta will be, but I think there's a lot of room for strategizing with the first and last boss. I will echo what one of my group members said: "I hope they don't nerf [the first] boss". I will say that I don't understand why it seems to be random between on if you get a wraith or a hulk on the last boss, though. The wraith is significantly easier to deal with than the hulk, so it adds an unnecessary feeling of randomization to the boss.
With respect to learning the bowling mechanic on the first boss, I learned it through dying to an enraged duneripper after I taunted it thinking it was another regular add then reading the hint in death recap. Echoing the above posts, I did not see the dunerippers by the stairs, only the ball as it came crashing down towards me when I was going up it.
Also, for the last boss, I feel like maybe there should be more voice lines for when he uses his modified languid eye on the tank. It felt very repetitive and didn't quite fit, like him telling me to stay down when I never was toppled over to begin with.Edited by Soarora on January 16, 2025 3:52AM[PC/NA] Dungeoneer (Tank/DPS), Retired Trialist, and amateur Battlegrounder (DPS) with a passion for The Elder Scrolls lore.- Current GM of Hard Dungeoneers
- Tanks: Sorcerer - Necromancer - Templar
- DPS: Frost Warden - Stamarc
- Ex-healer
- Dungeons: 32/32 HMs - 26/26 Tris
View my builds!
0 -
code65536✭✭✭✭✭
✭✭✭✭✭I've run this dungeon a third time on Wednesday; this time with a different group of players who did not want the mechanics spoiled, so I didn't explain anything or offer any guidance unless they asked for it.
Additionally, I've also skimmed the VODs of a couple of other groups that tried out this dungeon's HM.
And now that I've become more familiar with this dungeon, there are a few more things that I want to bring attention to.
1: Discoverability of the "bowling" mechanic
From watching other groups, it's clear that the bowling mechanic is not very easily discoverable. Many groups don't read the recap hints or check out the achievements. And if a group doesn't figure it out, they can be stuck on this boss for hours.
When I ran it with this new group, I told them, "you might want to take a look to your left" when we reached that demonstration scene that I talked about earlier in post #6. Afterwards, I asked them what they thought it meant. One of them commented on the AoE that it left on the ground, another commented on it knocking NPCs into the air. Nobody noticed the dunerippers. After we defeated Garvin, I revealed that the scene was intended to demonstrate the bowling mechanic, and one reaction that I got was, "there were dunerippers there?!".
So even though I directed their attention to it, that demonstration still did not convey to them the key information that the boulder should be used to kill dunerippers.
I really like this bowling mechanic, but I think that in order for it to work, you really have to improve its discoverability. To that end, I have three suggestions:- What I suggested earlier in post #6. Delaying this scripted sequence until after the other enemies are dead will ensure that you'll get the player's attention, and by having the dunerippers actively burrow out of the ground instead of just passively lying there, you draw attention to them, and hopefully make it more likely that people make a connection between duneripper and boulder.
- Add a second demonstration to the boss itself. Similar to how you demonstrate Chudan's mechanic in Mazzatun and the ice atro smash in Icereach, when we reach the boss room for the first time, have a duneripper burrow out of the ground in front of the boss, and have the boss kill it with a boulder. The current mechanics demonstration happens on the very first base pop pull, and by the time players reach the boss (which will likely also involve killing the optional "minor" boss), they likely would've forgotten about it.
- Allow the boulder to do some damage to enraged dunerippers. Nothing too high, but something modestly noticeable like 20-25% of the duneripper's health if they're enraged (vs. 0 currently) would make it more likely that players who ignore the demonstrations and don't read the recap hints could stumble upon this mechanic.
2: Pacing and too much boss health
Noriwen:
The second boss has 18 million health on HM. I do believe that this is a new record for a second boss. This is the kind of health level that you'd associate with a final boss, not a second boss. On top of that, there is a substantial immunity phase where the boss exits the fight.
The second boss is a bit too much of a drag on the pacing of the dungeon, and I think the health needs to be tuned down.
Orpheon:
The final boss has 20 million health, which is also on the high side compared to the final bosses of other dungeons. And on top of that, he too has lengthy immunity phases where he exits the fight and has his minions do his work. And as if that wasn't enough, there are also many smaller immunity periods when we are moving from one side of the room to the other.
We noticed that whenever the boss is on the other side of the "wall" in the area where we cannot go, he becomes immune to damage. When the "walls" force us to move from one side of the room to the other, I always try to keep close to the leading edge of the wall, to try to keep the boss inside the the clear area as much as possible. But he very frequently stops to channel mechanics like his heavy attack or the Forbidden Knowledge barrage, which leads to the trailing edge of the wall moving past him and making him immune. He's spending a third of the time Enshrouded during execute because he keeps stopping and consequently becoming immune.
To summarize, I have three complaints about the pacing of the Orpheon encounter:- I think 20 million health is too much. The fight doesn't really change that much as we progress, so 20 million health just makes it feel long and repetitive.
- I think that there should only be two of the long Enshrouded phases where we fight the elites, rather than three as we currently have.
- I don't think that the boss should become Enshrouded if he stops to do a mechanic when the wall is moving. These mini immunity phases are just frustrating and really drag out the execute phase.
Overall:
Not only does Lep Seclusa's second and final main bosses have considerably more health than their counterparts from Exiled Redoubt, but the minor bosses are kind of forced upon us. The first one is technically skippable, but is placed basically right in our path. The second is technically skippable as well, but doing so will penalize us with incoming siege for the remainder of the dungeon. And finally, the third minor boss is not optional. This is in contrast to the Redoubt's minor bosses which are all very much optional as the player has to go out of their way to find them.
So between the minor bosses being far less skippable and the main bosses having more health and immunity mechanics, this dungeon as a whole feels like it takes too long, compared to all the other dungeons from recent years.
At a minimum, I think the speedrun time for this dungeon should be raised from 25 to 30 minutes.
3: Forbidden Knowledge's inconsistent behavior
The game reports, via both the combat events API and esologs, that Forbidden Knowledge (Orpheon's barrage channel that hits all players) is Oblivion damage. But it behaves strangely. Like real Oblivion damage, it cannot be blocked. Unlike real Oblivion damage, it is mitigated by player resistances. It can be absorbed by shields, except that it ignores the Frost Safeguard shield from ice staff's Wall of Elements despite it clearly being a series of projectiles.
Is the inconsistency of all this intended? At the very least, I think that if it can be absorbed by other shields, then it should also be absorbable by Frost Safeguard since it's clearly a projectile. Having two of the most obvious mitigations against a projectile barrage (blocking and ice wall) just flat-out not work seems very counter-intuitive.
4: Other bugs/issues
The little small adds that spawn constantly during Orpheon's execute phase do not despawn after Orpheon dies.Edited by code65536 on January 16, 2025 5:45PMNightfighters ― PC/NA and PC/EU
Dungeons and Trials:Personal best scores:- Dragonstar Arena: 46817 (NA)
- Maelstrom Arena: 600526 (NA)
- Blackrose Prison: 99274 (EU) (Unchained)
- Maw of Lorkhaj: 165227 (EU)
- Halls of Fabrication: 220708 (NA) (Tick-Tock Tormentor #1, #2, #3, #4, #5, #6, #7, #8, #9, #10, #11, #12)
- Asylum Sanctorium: 114957 (NA) (Immortal Redeemer #1, #2, #3, #4, #5, #6, #7, #8, #9, #10)
- Cloudrest: 131256 (NA) (Gryphon Heart #1, #2, #3, #4, #5, #6, #7)
- Sunspire: 250866 (EU) (Godslayer #1, #2, #3, #4, #5, #6, #7)
- Kyne's Aegis: 235841 (EU) (Dawnbringer #1, #2, #3, #4, #5, #6, #7, #8)
Dungeon trifectas:- Mountain God and Leave No Bone Unbroken
- Apex Predator and Pure Lunacy
- Depths Defier and Relentless Raider
- Defanged the Devourer and Nature's Wrath
- In Defiance of Death and No Rest for the Wicked
- Bane of Thorns and True Genius
- Ardent Bibliophile and Subterranean Smasher
- Battlespire's Best and Bastion Breaker
- Zero Regrets and Land, Air, and Sea Supremacy
- Fist of Tava and Invader's Bane
- Curator's Champion (Valinna) and Temporal Tempest
- Unshakeable Fervor and Lighting the Embers
Extended Journal Add-Ons: Item Set Browser ― Loot Log ― Character Knowledge ― Collectibles Tracker ― RaidificatorPC/Console Add-Ons: Combat Alerts ― Group Buff PanelsOther Add-Ons: Deconstruction Junk Marker ― Purge Tracker ― Asylum Status Panel ― Smart Looter ― Improved Companion Rapport Information8 -
code65536✭✭✭✭✭
✭✭✭✭✭And instead of difficulty going from easy to hard as you progressed through the dungeon, it was reversed here, where we faced the most challenge on the first boss and then everything else was breezy easy in comparison.
I want to return to this statement of mine from the first day and contextualize it a little. So, on PTS day 1, we spent only 20 minutes on Orpheon, from the very first pull to the kill, which was less than what we spent on either of the other two bosses. But when I ran this on Wednesday with a different group, it took us an hour to kill Orpheon, which was more than the time we spent either of the other two bosses.
So I don't want to give the impression that Orpheon is easy, per se. It of course doesn't have Garvin's steep learning curve; it instead derives much of its difficulty from the near-impossibility of recovery in execute. Rezzing is already difficult on this fight due to the number of staggers and other CCs, but the constant movement in execute makes recovery in that phase virtually impossible.
And indeed, on Wednesday, almost all of our wipes were in execute. You just can't afford to have deaths in execute, and I think the biggest problem for us on Wednesday was Forbidden Knowledge; the people I ran with on Monday had quickly settled on roll dodge as their preferred way to deal with it, which I think helped a lot.
Anyway, I think this highlights the importance of adding more options for people to deal with Forbidden Knowledge, as I detailed in my previous post.Nightfighters ― PC/NA and PC/EU
Dungeons and Trials:Personal best scores:- Dragonstar Arena: 46817 (NA)
- Maelstrom Arena: 600526 (NA)
- Blackrose Prison: 99274 (EU) (Unchained)
- Maw of Lorkhaj: 165227 (EU)
- Halls of Fabrication: 220708 (NA) (Tick-Tock Tormentor #1, #2, #3, #4, #5, #6, #7, #8, #9, #10, #11, #12)
- Asylum Sanctorium: 114957 (NA) (Immortal Redeemer #1, #2, #3, #4, #5, #6, #7, #8, #9, #10)
- Cloudrest: 131256 (NA) (Gryphon Heart #1, #2, #3, #4, #5, #6, #7)
- Sunspire: 250866 (EU) (Godslayer #1, #2, #3, #4, #5, #6, #7)
- Kyne's Aegis: 235841 (EU) (Dawnbringer #1, #2, #3, #4, #5, #6, #7, #8)
Dungeon trifectas:- Mountain God and Leave No Bone Unbroken
- Apex Predator and Pure Lunacy
- Depths Defier and Relentless Raider
- Defanged the Devourer and Nature's Wrath
- In Defiance of Death and No Rest for the Wicked
- Bane of Thorns and True Genius
- Ardent Bibliophile and Subterranean Smasher
- Battlespire's Best and Bastion Breaker
- Zero Regrets and Land, Air, and Sea Supremacy
- Fist of Tava and Invader's Bane
- Curator's Champion (Valinna) and Temporal Tempest
- Unshakeable Fervor and Lighting the Embers
Extended Journal Add-Ons: Item Set Browser ― Loot Log ― Character Knowledge ― Collectibles Tracker ― RaidificatorPC/Console Add-Ons: Combat Alerts ― Group Buff PanelsOther Add-Ons: Deconstruction Junk Marker ― Purge Tracker ― Asylum Status Panel ― Smart Looter ― Improved Companion Rapport Information0 -
 MyNameIsElias✭✭✭✭✭
✭Did the health of garvin the tracker get reduced on purpose? I see no mention in the patch notes, but he has several million health missing on hardmode compared to previous patches
@ZOS_KevinEdited by MyNameIsElias on January 28, 2025 12:30AMI am a Master Angler on 32characters, check the link below for some cool data!
https://forums.elderscrollsonline.com/en/discussion/456559/30-master-anglers-proof-that-the-artaeum-pickled-fish-bowl-works#latest0 -
code65536✭✭✭✭✭
✭✭✭✭✭MyNameIsElias wrote: »Did the health of garvin the tracker get reduced on purpose? I see no mention in the patch notes, but he has several million health missing on hardmode compared to previous patches
I'm pretty sure that this is a bug.- He has 5.9M health initially.
- Raise the challenge banner. Health remains unchanged at 5.9M
- Lower the challenge banner. Health remains unchanged at 5.9M
- Raise the challenge banner again. Health now goes up to 8.9M, which is what he had in week 1.
So for some reason, the extra health from HM is not applying until after you have cycled the banner on and off.Nightfighters ― PC/NA and PC/EU
Dungeons and Trials:Personal best scores:- Dragonstar Arena: 46817 (NA)
- Maelstrom Arena: 600526 (NA)
- Blackrose Prison: 99274 (EU) (Unchained)
- Maw of Lorkhaj: 165227 (EU)
- Halls of Fabrication: 220708 (NA) (Tick-Tock Tormentor #1, #2, #3, #4, #5, #6, #7, #8, #9, #10, #11, #12)
- Asylum Sanctorium: 114957 (NA) (Immortal Redeemer #1, #2, #3, #4, #5, #6, #7, #8, #9, #10)
- Cloudrest: 131256 (NA) (Gryphon Heart #1, #2, #3, #4, #5, #6, #7)
- Sunspire: 250866 (EU) (Godslayer #1, #2, #3, #4, #5, #6, #7)
- Kyne's Aegis: 235841 (EU) (Dawnbringer #1, #2, #3, #4, #5, #6, #7, #8)
Dungeon trifectas:- Mountain God and Leave No Bone Unbroken
- Apex Predator and Pure Lunacy
- Depths Defier and Relentless Raider
- Defanged the Devourer and Nature's Wrath
- In Defiance of Death and No Rest for the Wicked
- Bane of Thorns and True Genius
- Ardent Bibliophile and Subterranean Smasher
- Battlespire's Best and Bastion Breaker
- Zero Regrets and Land, Air, and Sea Supremacy
- Fist of Tava and Invader's Bane
- Curator's Champion (Valinna) and Temporal Tempest
- Unshakeable Fervor and Lighting the Embers
Extended Journal Add-Ons: Item Set Browser ― Loot Log ― Character Knowledge ― Collectibles Tracker ― RaidificatorPC/Console Add-Ons: Combat Alerts ― Group Buff PanelsOther Add-Ons: Deconstruction Junk Marker ― Purge Tracker ― Asylum Status Panel ― Smart Looter ― Improved Companion Rapport Information2 -
code65536✭✭✭✭✭
✭✭✭✭✭Ran this dungeon again for the first time since PTS week 1.
First, the speedrun time is still ridiculously out of whack for this dungeon's hard mode, compared to Exiled and to pretty much every dungeon preceding this. 25 minutes is too short given how much health the first and second bosses have, in conjunction with their lengthy immunity phases.
Second, Forbidden Knowledge still behaves weirdly. You can shield it with regular shields, but not with the projectile shield from Frost Safeguard, and you can't block it. Both of these limitations don't feel right (they are downright counter-intuitive and probably confusing for players who don't pick apart fine details like this in the logs), and more importantly, they really limit the options that people have for dealing with this mechanic.
Third, the icon for the final boss HM is still wrong; Orpheon doesn't have 6 arms:
Finally, the boulder tutorials are much better. Thanks.Edited by code65536 on February 20, 2025 3:44AMNightfighters ― PC/NA and PC/EU
Dungeons and Trials:Personal best scores:- Dragonstar Arena: 46817 (NA)
- Maelstrom Arena: 600526 (NA)
- Blackrose Prison: 99274 (EU) (Unchained)
- Maw of Lorkhaj: 165227 (EU)
- Halls of Fabrication: 220708 (NA) (Tick-Tock Tormentor #1, #2, #3, #4, #5, #6, #7, #8, #9, #10, #11, #12)
- Asylum Sanctorium: 114957 (NA) (Immortal Redeemer #1, #2, #3, #4, #5, #6, #7, #8, #9, #10)
- Cloudrest: 131256 (NA) (Gryphon Heart #1, #2, #3, #4, #5, #6, #7)
- Sunspire: 250866 (EU) (Godslayer #1, #2, #3, #4, #5, #6, #7)
- Kyne's Aegis: 235841 (EU) (Dawnbringer #1, #2, #3, #4, #5, #6, #7, #8)
Dungeon trifectas:- Mountain God and Leave No Bone Unbroken
- Apex Predator and Pure Lunacy
- Depths Defier and Relentless Raider
- Defanged the Devourer and Nature's Wrath
- In Defiance of Death and No Rest for the Wicked
- Bane of Thorns and True Genius
- Ardent Bibliophile and Subterranean Smasher
- Battlespire's Best and Bastion Breaker
- Zero Regrets and Land, Air, and Sea Supremacy
- Fist of Tava and Invader's Bane
- Curator's Champion (Valinna) and Temporal Tempest
- Unshakeable Fervor and Lighting the Embers
Extended Journal Add-Ons: Item Set Browser ― Loot Log ― Character Knowledge ― Collectibles Tracker ― RaidificatorPC/Console Add-Ons: Combat Alerts ― Group Buff PanelsOther Add-Ons: Deconstruction Junk Marker ― Purge Tracker ― Asylum Status Panel ― Smart Looter ― Improved Companion Rapport Information2 -
 Jaimeh✭✭✭✭✭
✭✭✭✭✭I think making the visual for Forbidden Knowledge a bit more prominent will be helpful, on my (low) settings it's a very faint and almost transparent pale colour, so it not always easy to see it when it starts, and since you have to react pretty fast, seeing it better (with maybe a more saturated colour) could be helpful.0 -
 Faint_One✭✭✭some tooltips of achievements are not that clear
it's hard to notice the boss’skill name
also still doubt if it means only consider yourself while it not shows “your group member” on tooltips,like if we keep siege master alive,on Noriwen ,Tank might must get hit while he pulled by boss0