Maintenance for the week of March 16:
• PC/Mac: No maintenance – March 16
• ESO Store and Account System for maintenance – March 18, 6:00AM EDT (10:00 UTC) - 4:00PM EDT (20:00 UTC)
• PC/Mac: No maintenance – March 16
• ESO Store and Account System for maintenance – March 18, 6:00AM EDT (10:00 UTC) - 4:00PM EDT (20:00 UTC)
Sunspire Mechanics Guide

code65536
✭✭✭✭✭
✭✭✭✭✭
✭✭✭✭✭
Introduction – What this guide is—and isn't.
The goal here is to lay out the key mechanics found in Sunspire. While I may touch a little on strategies and tactics and offer some recommendations, that is not the goal of this guide. This is not a "What should I do?" guide, but rather a "What is going on?" guide.
Base Population: General – Non-boss enemies
Alkosh's Roar / Senche-Raht
[Placeholder]
Base Population: Storm-Themed – Non-boss enemies encountered on Lokkestiiz's side of the temple
Jone's Gale-Claw
[Placeholder]
Alkosh's Fate – Large Khajiit wielding a staff
Alkosh's Will – Large Khajiit wielding a greatsword
Base Population: Fire-Themed – Non-boss enemies encountered on Yolnahkriin's side of the temple
Jode's Fire-Fang
[Placeholder]
Ruin of Alkosh – Large Khajiit wielding a sword and shield
Fury of Alkosh – Large Khajiit wielding no weapon
[Placeholder]
Edited by code65536 on May 23, 2019 3:13PM The goal here is to lay out the key mechanics found in Sunspire. While I may touch a little on strategies and tactics and offer some recommendations, that is not the goal of this guide. This is not a "What should I do?" guide, but rather a "What is going on?" guide.
Base Population: General – Non-boss enemies
Alkosh's Roar / Senche-Raht
[Placeholder]
Base Population: Storm-Themed – Non-boss enemies encountered on Lokkestiiz's side of the temple
Jone's Gale-Claw
[Placeholder]
Alkosh's Fate – Large Khajiit wielding a staff
- Aspect of Winter and Chilling Comet: A circular AoE telegraph with a large 7m radius will start to grow on a random player.
- The AoE takes 4 seconds to form.
- Once it has fully formed, a Chilling Comet will impact the area; this needs to be blocked.
- A Frost Well will be left behind at the player's location.
- The Frost Well does damage to nearby players and can be attacked and destroyed; however, they will despawn upon the death of the Fate that had spawned them.
Alkosh's Will – Large Khajiit wielding a greatsword
- Furious Sweeps: This ability has a conal AoE cleave and can quickly kill DDs; tanks must make sure that these enemies are always turned away from other players.
Base Population: Fire-Themed – Non-boss enemies encountered on Yolnahkriin's side of the temple
Jode's Fire-Fang
[Placeholder]
Ruin of Alkosh – Large Khajiit wielding a sword and shield
- Shield of Decimation: The Ruin of Alkosh gains a damage shield, and while the shield is active, the shield shoots high-damaging fiery projectiles at all players. If a Ruin of Alkosh has a damage shield active, that shield must be broken through to stop the barrage of fire damage.
Fury of Alkosh – Large Khajiit wielding no weapon
[Placeholder]
Nightfighters ― PC/NA and PC/EU
Dungeons and Trials:
Personal best scores:
Dungeon trifectas:
- Dragonstar Arena: 46817 (NA)
- Maelstrom Arena: 600526 (NA)
- Blackrose Prison: 99274 (EU) (Unchained)
- Maw of Lorkhaj: 165227 (EU)
- Halls of Fabrication: 220708 (NA) (Tick-Tock Tormentor #1, #2, #3, #4, #5, #6, #7, #8, #9, #10, #11, #12)
- Asylum Sanctorium: 114957 (NA) (Immortal Redeemer #1, #2, #3, #4, #5, #6, #7, #8, #9, #10)
- Cloudrest: 131256 (NA) (Gryphon Heart #1, #2, #3, #4, #5, #6, #7)
- Sunspire: 250866 (EU) (Godslayer #1, #2, #3, #4, #5, #6, #7)
- Kyne's Aegis: 235841 (EU) (Dawnbringer #1, #2, #3, #4, #5, #6, #7, #8)
Dungeon trifectas:
- Mountain God and Leave No Bone Unbroken
- Apex Predator and Pure Lunacy
- Depths Defier and Relentless Raider
- Defanged the Devourer and Nature's Wrath
- In Defiance of Death and No Rest for the Wicked
- Bane of Thorns and True Genius
- Ardent Bibliophile and Subterranean Smasher
- Battlespire's Best and Bastion Breaker
- Zero Regrets and Land, Air, and Sea Supremacy
- Fist of Tava and Invader's Bane
- Curator's Champion (Valinna) and Temporal Tempest
- Unshakeable Fervor and Lighting the Embers
Extended Journal Add-Ons: Item Set Browser ― Loot Log ― Character Knowledge ― Collectibles Tracker ― Raidificator
PC/Console Add-Ons: Combat Alerts ― Group Buff Panels
Other Add-Ons: Deconstruction Junk Marker ― Purge Tracker ― Asylum Status Panel ― Smart Looter ― Improved Companion Rapport Information
14
-
code65536✭✭✭✭✭
✭✭✭✭✭Lokkestiiz - Storm (Ice/Lighting) Dragon
Fight space:- The area is smaller than that of the other side boss.
- Players who stand too far to the left or right of the dragon will be subject to the dragon's Wing Thrash attack, which do a very high amount of damage and knocks players back.
- The "back" of the fight area, away from the dragon's position, is out of the range of the dragon's breath attack and is where the Frozen Tomb mechanic takes place.
Flow of the fight:- 100%-80%: Standard mechanics: Frozen Tomb and timed atronach spawns
- 80%: Flight mechanics: Two sets of atronach spawns, Relentless Gale, Storm Breath, and Storm Fury
- 80%-50%: Standard mechanics
- 50%: Flight mechanics: Two sets of atronach spawns, Storm Fury, Relentless Gale, and Storm Breath
- 50%-20%: Standard mechanics
- 20%: Flight mechanics: Two sets of atronach spawns, Storm Breath, Storm Fury, and Relentless Gale
- 20%-0%: Standard mechanics
Tanking the dragon:- Minimum Range: If a player with aggro on the boss stands too close to the boss, behind the arc of its head, the boss will push back and stagger the tank to force the tank in front of the arc of the boss's head. This mechanic, which does not affect players that don't have boss aggro, is to ensure that the tank is always in a position where it is subject to the boss's bites and breaths.
- Frost Breath: Channeled cone on the main tank.
- The channel lasts for 2.6s and damage ticks every 0.5s.
- It cannot be sidestepped (will track/follow the tank). It can be blocked. It can be dodged.
- The damage is very strong, comparable to that of the Warrior's Channeled Swipes.
- Recommended: Extra healing attention on the main tank.
- Optional: Procing the Vykosa Undaunted set at the start of Frost Breath.
- Not recommended: Most of the time, dodging works just fine, and by dodging, the tank can usually come out of a breath virtually unscathed. So why do I advise against doing this? The breath lasts long enough that it will require at least two dodges. The problem is that if the damage ticks during the brief window between two dodge rolls, that tick will be unblocked. And with ticks happening every 0.5s, the risk of having a tick land in such a window of vulnerability is too high. So, yes, most of the time, dodging works just fine, but all it takes is for one breath where the damage ticked at just the right time for the tank to die and for things to spiral into a wipe. If healers are dead and the group is trying to recover, then dodging the breath is probably a good idea. But during the normal course of the fight, the unreliability is not worth it.
- Frostbolt: Punishment for range-tanking. This is a very hard-hitting (but dodgeable) projectile that will be launched at the tank if the tank is too far from the boss. The damage is very high and it serves as a means to discourage/punish ranged tanking.
Frozen Tomb:- This is a heal-check mechanic. "Baneful 2.0"
- Initial animation/tell: The dragon will stretch its neck and raise its head straight up into the air. The casting animation lasts for 1.8s.
- The Frozen Tomb(s) will now appear, with a red ring telegraph. This phase lasts for 2.6s.
- The red ring telegraph disappears, and the Frozen Tomb(s) will begin a 10s countdown. If any Tomb remains unoccupied after 10s, it will explode and wipe the group with Shatter damage.
- A player occupies the tomb by walking into it.
- Upon entering, the player loses 70% of their health and gains a 8s effect called Frozen Prison.
- Frozen Prison applies a substantial defile on the player (this defile does not appear to affect health recovery, however)
- In Veteran non-Hard Mode, the defile is 80%; i.e., healing is 20% effective
- In Veteran Hard Mode, the defile is 90%; i.e., healing is 10% effective—the amount of healing required in HM to free a single player is twice that of non-HM
- Frozen Prison will do DoT damage to the player
- The Frozen Prison DoT is shieldable.
- The Frozen Prison DoT is the only damage that an entombed player can take; they are immune to all other damage while inside the Tomb.
- If the player is healed back up to full, the effect ends and they are freed.
- If the player is not healed back up to full health by the end of the 8s Frozen Prison effect, the player will instantly die and deal Shatter damage to the group.
- In non-HM, there is one tomb per spawn, but in HM, there are two tombs.
- Recommendation: Because it is impractical for a single healer to heal both tombs at the same time, it's recommended that the second tomb is not occupied until the first person is freed (or dies). If the first tomb is occupied as soon as it appears, there should be enough time for this sort of staggered occupancy.
- Once a person is freed from a Frozen Tomb, they must not enter another Frozen Tomb for another 60 seconds. If they do so, they will immediately die. This debuff goes away only if 60 seconds have elapsed or the group wipes; i.e., it does not reset upon a non-wipe death.
- The Frozen Tomb mechanic happens every 23±1 seconds. The number of people required to rotate for this mechanic is left as an exercise for the reader.
Atronachs:- Storm atronachs are stationary and will never move.
- When a storm atronach dies, it will leave behind a shock trap.
- Storm atronachs and ice atronachs always spawn in a 2:1 ratio.
- When an ice atronach enters a shock trap, it will instantly lose nearly half of its health.
- Since the amount of damage done by a shock trap is not quite half of the ice atronach's health, an ice atronach that has walked through two shock traps can survive with a small amount of health. Be careful not to walk an ice atronach through a third shock trap, thus "wasting" it.
- Shock traps despawn after a period of time, so it's important that they are utilized quickly.
Flight Mechanics:- Relentless Gale: The dragon shouts at a random player. This is telegraphed by a large AoE centered around that player. Anyone inside the AoE will be knocked back, potentially off the cliff to their death, if they do not block.
- Storm Breath: The dragon does a strafing run, dealing high damage to anyone initially caught in its path. This leaves behind a Storm Trail--a lingering lightning ground effect that does a moderate amount of damage over time.
- Storm Fury: The dragon sweeps the entire fight space with a "laser beam"
- The beam must be blocked.
- HM-only: Being hit by the beam will place a lingering effect called Static on the player that does DoT damage.
- Two players affected by Static standing within 4.25 meters of each other will take Arcing Bolts damage, which will most likely be lethal.
- The radius of the Arcing Bolts proc will appear as a circular AoE telegraph around each player affected by Static.
- This mechanic happens only once per flying phase.
- Order of Mechanics: The order in which these three mechanics happen is pre-determined and not random.
- 80% flight phase: Relentless Gale, Storm Breath, and Storm Fury
- 50% flight phase: Storm Fury, Relentless Gale, and Storm Breath
- 20% flight phase: Storm Breath (x2), Storm Fury, and Relentless Gale
Edited by code65536 on July 28, 2019 2:40PMNightfighters ― PC/NA and PC/EU
Dungeons and Trials:Personal best scores:- Dragonstar Arena: 46817 (NA)
- Maelstrom Arena: 600526 (NA)
- Blackrose Prison: 99274 (EU) (Unchained)
- Maw of Lorkhaj: 165227 (EU)
- Halls of Fabrication: 220708 (NA) (Tick-Tock Tormentor #1, #2, #3, #4, #5, #6, #7, #8, #9, #10, #11, #12)
- Asylum Sanctorium: 114957 (NA) (Immortal Redeemer #1, #2, #3, #4, #5, #6, #7, #8, #9, #10)
- Cloudrest: 131256 (NA) (Gryphon Heart #1, #2, #3, #4, #5, #6, #7)
- Sunspire: 250866 (EU) (Godslayer #1, #2, #3, #4, #5, #6, #7)
- Kyne's Aegis: 235841 (EU) (Dawnbringer #1, #2, #3, #4, #5, #6, #7, #8)
Dungeon trifectas:- Mountain God and Leave No Bone Unbroken
- Apex Predator and Pure Lunacy
- Depths Defier and Relentless Raider
- Defanged the Devourer and Nature's Wrath
- In Defiance of Death and No Rest for the Wicked
- Bane of Thorns and True Genius
- Ardent Bibliophile and Subterranean Smasher
- Battlespire's Best and Bastion Breaker
- Zero Regrets and Land, Air, and Sea Supremacy
- Fist of Tava and Invader's Bane
- Curator's Champion (Valinna) and Temporal Tempest
- Unshakeable Fervor and Lighting the Embers
Extended Journal Add-Ons: Item Set Browser ― Loot Log ― Character Knowledge ― Collectibles Tracker ― RaidificatorPC/Console Add-Ons: Combat Alerts ― Group Buff PanelsOther Add-Ons: Deconstruction Junk Marker ― Purge Tracker ― Asylum Status Panel ― Smart Looter ― Improved Companion Rapport Information10 -
code65536✭✭✭✭✭
✭✭✭✭✭Yolnahkriin - Fire Dragon
Fight space:- The area is significantly larger than that of the other side boss.
- Players who stand too far to the left or right of the dragon will be subject to the dragon's Wing Thrash attack, which do a very high amount of damage and knocks players back.
- Yolnahkriin's breath attack has a much longer range than that of Lokkestiiz, so being in the back does not guarantee safety for the offtank; they must be mindful of positioning.
Tanking the dragon:- Minimum Range: The minimum range mechanic is shared by all three dragons; please refer to Lokkestiiz's section of the guide for details.
- Fire Breath: Channeled cone on the main tank.
- Everything written about Frost Breath above applies here. Please refer to that section of the guide.
- Pyroclasm: Punishment for range-tanking. This is a very hard-hitting (but dodgeable) projectile that will be launched at the tank if the tank is too far from the boss. The damage is very high and it serves as a means to discourage/punish ranged tanking. Additionally, each Pyroclasm projectile that hits the tank (i.e., is not dodged) will apply a stacking debuff that causes the player to take increased damage from Fire Breath and future Pyroclasm projectiles. It is possible to have Pyroclasm projectiles that can 1-shot a tank through block.
- Bite: Melee heavy attack.
- This ability places a small hostile fiery ground AoE at the tank's position that lasts for 20s.
- One of the key themes of this fight is area denial and space management, and this mechanic is a part of that
- This ability places a small hostile fiery ground AoE at the tank's position that lasts for 20s.
Iron Servants, Fire Atronachs and Cataclysm:- Approximately every minute, the boss will summon an Iron Servant and two Fire Atronachs.
- Iron Servants: Recycling the final boss of Bloodroot Forge
- They are primarily a threat to the off-tank.
- They should be turned away from the group, as their Blast Furnace ability will spew hostile ground AoEs in a 180-degree cone in front of them.
- They have a lot of health and are impractical to kill via traditional means.
- Fire Atronachs:
- They are primarily a threat to the DDs, with their ranged light attacks (Flare) and their Lava Geysers and should be promptly taunted.
- They don't have much health and can be easily killed.
- When they die, they will deposit a large pool of lava on the ground. It is thus important that they do not die near the main group. They can be CC'ed and chained.
- In Hard Mode, Fire Atronachs will Ignite after 20 seconds.
- Ignite is a 5-second animation in which the Fire Atronach dives underground and re-emerges as a more dangerous blue-shifted version.
- Once blue, the Fire Atronach will no longer be tauntable (they can still be CC'ed) and will charge a player at random, doing massive AoE damage to anything they get close to. They have the potential to wipe the group if they manage to charge into it.
- Warning: Because of the long animation and because the Fire Atronach disappears underground during part of this animation, it is easy to lose track of the Fire Atronach--it is easy to mistake the animation as the Fire Atronach dying.
- Cataclysm:
- At 75%, 50%, and 25% health, the dragon will fly into the air and blast the area with fire.
- The blast, which will instantly kill anyone caught within, will cover everything except the outer edges of the island.
- The blast will clear any lava pools left behind by dead Fire Atronachs.
- It is recommended that Fire Atronachs are killed before the Cataclysm blast
- The blast will melt the Iron Servants. This will cause them to enrage and do increased damage. But it also weakens them and cause them to take substantially more damage.
- It is recommended that Iron Servants are left alive until Cataclysm and then killed once they are weakened by this mechanic
Focused Fire:- Approximately every 32-36s, one player will be targeted by Focused Fire.
- Timing of damage: There will be a 4-meter damage AoE centered around that player that does 5 pulses of damage, with each pulse taking 1 second to charge up. Note: Sometimes, Focused Fire only does 4 pulses of damage. My best guess is that this is a bug. Plan for taking 5 pulses of damage.
- 0.0s: AoE around the targeted player starts to form
- 1.3s: AoE has formed and the first pulse starts to charge up
- 2.3s: Pulse #1
- 3.3s: Pulse #2
- ... etc.
- Damage sharing: The damage from Focused Fire is shared between all the players within the AoE. Unlike Roaring Flare in Cloudrest, there is no limit to the amount of damage that is reduced by sharing. But...
- The debuff (damage ramp and limit on damage sharing): After each pulse of Focused Fire damage that a player takes, they gain a stack of the Focused Fire debuff.
- This debuff increases the amount of damage that the player takes from Focused Fire, which means that players take ramping damage from Focused Fire. It's important to note that the damage done by each pulse of Focused Fire is constant, but the damage taken by each player ramps up the more pulses that player takes.
- This debuff lasts for 45 seconds.
- Since Focused Fire happens more frequently than once every 45s, it means that if a player stood in and ate all five pulses of a Focused Fire mechanic and then they stand in the next Focused Fire mechanic, they will start the second mechanic with a 5-stack debuff, which will most likely kill them.
- This is why you must not have everyone group up for Focused Fire and instead need two separate groups.
- Damage levels: As a point of reference, in Hard Mode, you can expect each player to take about 15-17K damage each for the final 5th pulse of Focused Fire (i.e., each player has 4 stacks of the debuff going into the 5th pulse), if there are 5 players grouped together for the mechanic and Minor Maim is on the boss.
- In HM, you must have two groups of 5 (with only 4 players, damage levels can reach 20K for the final 5th pulse), with only the two tanks standing outside of group.
- The damage cannot be blocked, but it can be shielded (though given the intensity and frequency of damage, shields are likely to be of limited usefulness)
- The damage in non-HM is substantially more forgiving.
- It is recommended that players in HM have at least 18K health after Ebon/Toughness.
- Note that it is not uncommon for the off-tank to be in a position where they are out of Ebon range, so it is recommended that the off-tank not be the one to provide Ebon for the group.
- It is recommended that healers focus heals during Focused Fire--this is particularly important in HM where players need to be healed back up to full after the 4th pulse if they are to survive the 5th pulse.
- It is recommended that the main tank reapply Minor Maim at the start of each Focused Fire mechanic, to reduce the risk of Maim expiring during the mechanic.
- Selection of target: Focused Fire will pick at random a player with the fewest stacks of the debuff (usually, a player who doesn't have the debuff active at all) and who doesn't have taunt.
- If two groups are maintained, Focused Fire will naturally alternate its targeting of the two groups, since someone in the group that hasn't had Focused Fire recently would be free of the debuff and be selected.
- Things can go wrong if distinct groups are not maintained. For example, if someone in group 1 fails to stay grouped for a Focused Fire, they would not have the debuff, and when the next Focused Fire comes, they could be targeted instead of someone in group 2, and if for the second Focused Fire, they stack with their assigned group 1, then group 1 would thus be getting a second consecutive Focused Fire and will likely perish.
Edited by code65536 on May 26, 2019 12:01PMNightfighters ― PC/NA and PC/EU
Dungeons and Trials:Personal best scores:- Dragonstar Arena: 46817 (NA)
- Maelstrom Arena: 600526 (NA)
- Blackrose Prison: 99274 (EU) (Unchained)
- Maw of Lorkhaj: 165227 (EU)
- Halls of Fabrication: 220708 (NA) (Tick-Tock Tormentor #1, #2, #3, #4, #5, #6, #7, #8, #9, #10, #11, #12)
- Asylum Sanctorium: 114957 (NA) (Immortal Redeemer #1, #2, #3, #4, #5, #6, #7, #8, #9, #10)
- Cloudrest: 131256 (NA) (Gryphon Heart #1, #2, #3, #4, #5, #6, #7)
- Sunspire: 250866 (EU) (Godslayer #1, #2, #3, #4, #5, #6, #7)
- Kyne's Aegis: 235841 (EU) (Dawnbringer #1, #2, #3, #4, #5, #6, #7, #8)
Dungeon trifectas:- Mountain God and Leave No Bone Unbroken
- Apex Predator and Pure Lunacy
- Depths Defier and Relentless Raider
- Defanged the Devourer and Nature's Wrath
- In Defiance of Death and No Rest for the Wicked
- Bane of Thorns and True Genius
- Ardent Bibliophile and Subterranean Smasher
- Battlespire's Best and Bastion Breaker
- Zero Regrets and Land, Air, and Sea Supremacy
- Fist of Tava and Invader's Bane
- Curator's Champion (Valinna) and Temporal Tempest
- Unshakeable Fervor and Lighting the Embers
Extended Journal Add-Ons: Item Set Browser ― Loot Log ― Character Knowledge ― Collectibles Tracker ― RaidificatorPC/Console Add-Ons: Combat Alerts ― Group Buff PanelsOther Add-Ons: Deconstruction Junk Marker ― Purge Tracker ― Asylum Status Panel ― Smart Looter ― Improved Companion Rapport Information13 -
code65536✭✭✭✭✭
✭✭✭✭✭Nahviintaas - Final Boss
Fight space:- The area is the smallest of them all.
- Like the other two dragons, players who stand too far to the left or right of the dragon will be subject to the dragon's Wing Thrash attack, which do a very high amount of damage and knocks players back.
Flow of the fight:- 100%: Add wave (1x Will, 1x Fate, 1x Fury, 1x Ruin), Fire Storm, and Vigil Statue (HM)
- 90%: Time Shift
- 80%: Add wave (1x Will, 1x Fate, 1x Fury, 1x Ruin), Fire Storm, and Vigil Statue (HM)
- 70%: Time Shift
- 60%: Add wave (1x Will, 2x Fate, 2x Fury, 1x Ruin), Fire Storm, and Vigil Statue (HM)
- 50%: Time Shift
- 40%: Add wave (1x Will, 2x Fate, 2x Fury, 1x Ruin), Fire Storm, and Vigil Statue (HM)
- 33%: Sky changes color, start of Molten Meteors
Tanking the dragon:- Minimum Range: The minimum range mechanic is shared by all three dragons; please refer to Lokkestiiz's section of the guide for details.
- Searing Breath: Channeled cone on the main tank.
- Everything written about Frost Breath above applies here. Please refer to that section of the guide.
- Marked for Death: Nahviintaas will shout Krii Lun Aus and mark the tank for 15s, increasing their damage taken, reducing their healing received, and afflicting them with a damage-over-time effect.
- This is a tank swap mechanic, though it is possible, with the right setup, for a tank to survive without trading taunt.
Add waves and Vigil Statues:- Every 20% boss health, starting at the very beginning of the encounter, you will need to kill a group of adds.
- An Alkosh's Fate (Mage) and Alkosh's Will (2H) will spawn on the left/storm side
- A Ruin of Alkosh (1H/S) and Fury of Alkosh (Unarmed) will spawn on the right/fire side
- For the 60% and 40% add waves, there will be an additional Alkosh's Fate on the right/fire side and an additional Fury of Alkosh on the left/storm side
- Periodically, Nahviintaas will cast Battle Fury (Mid Vur Shaan) at one of these enemy units
- Nahviintaas will shout and shoot a yellow ball of energy at the enemy unit that he wishes to empower
- Upon landing, a large circular ground AoE 8.5m in radius will start to fill over the course of 5 seconds.
- After those 5 seconds, the Battle Fury ground AoE will enrage and heal any enemy within it, so it is important to quickly either kill or pull out the enemies located within that AoE.
- After the adds die, the boss will cast his Fire Storm mechanic
- Initially, Fire Storm will just spawn small AoEs that can be easily sidestepped
- Fire Storm will then take the form of a large AoE that covers the entire platform.
- The platform-wide AoE will pulse damage three times, with the final pulse instantly killing anyone who is not protected.
- To protect yourself from the final pulse of Fire Storm, you must stand behind one of the Vigil Statues and use it to shield you from the damage.
- In non-Hard Mode, one of the Vigil Statues will disappear after this mechanic.
- In Hard Mode, one of the Vigil Statues will awaken after this mechanic and must be killed.
- Powerful Slam: This attack by the Vigil Statue affects a circular AoE with a 5.5m radius. Anyone in this AoE will be knocked back, even if they are blocking, and potentially into the outer ring of fire to their death. This is similar what Zaan does in Scalecaller Peak. The tank holding the Vigil Statue must roll out of this AoE instead of blocking it.
- Hail of Stone: The Vigil Statue is immune to all damage unless it is doing its Hail of Stone channeled ability. During its channel of this ability, it can be damaged.
- During this channel, the Vigil Statue will unleash a barrage of stones every 2.5s.
- The damage from these barrages increase the longer the statue is channeling.
- Players must make a judgement call about when to interrupt the statue. Interrupt it too early, and you lose your ability to damage it until its next channel. Interrupt it too late, and you run the risk of dying to the barrage damage. With sufficiently high DPS, it is possible to kill a Vigil Statue within a single channel.
General Mechanics:- Sweeping Breath: Periodically, the boss will sweep the entire playing area with his breath.
- This ability must either be blocked or dodged.
- The direction of the sweep--either from left to right or from right to left--is random.
- The damage of the sweep increases over time, so players standing near the end of the sweep will take more damage. E.g., if the boss sweeps left to right, then players standing on the right side of the room will take more damage than players standing on the left side of the room.
- In Hard Mode, the damage is high enough that players need to be mindful of positioning. Generally, players standing in the middle of the room can survive a Sweeping Breath if they block--for players further away from the start of the sweep, they must either dodge or quickly reposition.
- Thrash: Periodically, the boss will thrash his head and knock back and potentially kill any players standing in melee range of the boss. DDs in melee range of the boss must block (or dodge) the Thrash in order to survive.
- Soul Tear and Tormented Vestige: Periodically, the boss will apply the Soul Tear effect to all players when he shouts Rii Vaaz Zol.
- This effect is a Heal Absorption--essentially, it is a sort of reverse damage shield that is placed on a player, absorbing any healing the player receives until it has absorbed enough heals that it breaks.
- The size of the Heal Absorption effect is 41699 in Veteran and 52122 in Veteran Hard Mode.
- The Soul Tear effect is accompanied by Major Defile.
- While the Heal Absorption from Soul Tear is active, the player will take DoT damage from Soul Tear.
- Essentially, players must receive enough healing to break Soul Tear's Heal Absorption before they succumb to the DoT from Soul Tear.
- The DoT from Soul Tear can be shielded.
- A Tormented Vestige—a wraith—will spawn from a player's corpse if a player dies while affected by Soul Tear.
- Similar to the Shades of the Fallen in Cloudrest, the Tormented Vestige is an anti-resurrection mechanic. Although it behaves similarly to Shades of the Fallen, this mechanic differs in that it only affects players who died with Soul Tear and is thus rarely seen.
- The Tormented Vestige must be killed before the player from which it spawned can be resurrected. Resurrecting a player before killing their Tormented Vestige will cause the resurrecting player to take lethal amounts of feedback Soul Tear damage.
- The Tormented Vestige has a substantial amount of health (over half a million on Veteran) and will attack players with abilities typically used by wraiths. These standard attacks are not particularly threatening.
- This effect is a Heal Absorption--essentially, it is a sort of reverse damage shield that is placed on a player, absorbing any healing the player receives until it has absorbed enough heals that it breaks.
Time Shifts and Eternal Servants:- At 90%, 70%, and 50% boss health, the boss will shout Tiid Klo Ul and start his core Time Shift mechanic: He will summon help from an Eternal Servant, three Time Breach portals will open, and Time Stops will start to appear.
- Players must prevent the Eternal Servant from reaching the boss; if the Eternal Servant arrives, it will wipe the group.
- There will be three time breaches that form—in the left, center, and right—and each time breach can time shift one player to the Eternal Servant.
- A maximum of three players can be sent to dispatch the Eternal Servant.
- Unlike other side mechanics such as the Shadow Realm in Cloudrest or the void in Maw, there is no way to send replacement players or backup. Players who die in the time-shifted realm are not automatically returned to the main group unless the Time Shift mechanic is completed and instead need to be rezzed by other players in the time-shifted realm.
- Translation Apocalypse
- The Eternal Servant will make four attempts at reaching the boss. The first attempt happens at approximately 15s and then once every approximately 20s (this 20s is timed from end of the previous Translation Apocalypse attempt).
- The Eternal Servant will do a 7-second channel that, if uninterrupted, will instantly kill every time-shifted player and bring the Eternal Servant to the main boss, thus wiping the group.
- The Eternal Servant is immune to interrupts during the first 2 seconds of that 7s channel. Players who are within melee range of the Eternal Servant or who attempt to enter melee range will be knocked back and stunned during this initial 2s phase.
- At the start of the 7s channel, the Eternal Servant will pin players, similar to Ozara's pins in Sanctum Ophidia. Players who are not pinned will have to free the players who are pinned with a synergy.
- No players are pinned the first time the Eternal Servant channels Translation Apocalypse, and the number of players pinned increases by one each time. I.e., you will receive 0/1/2/3 pins for the channels that happen at approximately 15/40/65/90s. Failing to defeat the Eternal Servant before the triple pins at 90s is a wipe.
- Because the Eternal Servant is immune to interrupts for the first 2 seconds of their channel, players should unpin first before attempting to interrupt.
- Because the next Translation Apocalypse is timed from the end of the previous, delaying the interrupt to the last possible moment could buy players a couple of extra seconds.
- Health:
- In Veteran (non-HM), the Eternal Servant has approximately 3.6 million health.
- In Hard Mode, the Eternal Servant has approximately 11.3 million health. Each player must do at least 42K DPS in order to defeat the Eternal Servant before 90s.
- Sundering Gale: The Eternal Servant will periodically target a cone at a player.
- This cone tracks the player and cannot be sidestepped.
- A player caught by this cone will be blown back and stunned.
- To avoid the knockback, the cone must either be dodged or blocked.
- Lightning Storm: Similar to the "Call Lightning" mechanic found in older content, when the Eternal Servant casts Lightning Storm, lightning will start to rain down on all players for 10 seconds, tracking their movement. Players must constantly move to avoid the lightning strikes.
- Negate Field: The Eternal Servant will periodically drop a large Negate Field at a player's position that damages, stuns, and silences. A well-timed dodge can take a player out of the field right as it lands, thus avoiding most of its effects.
- Aspect of Winter and Chilling Comet: This is the same ability used by the Alkosh's Fate enemies; please refer to that section of the guide for details.
- Recommendation: Players targeted by this ability should move into melee range of the Eternal Servant so that the Frost Well will be left near the Eternal Servant, where it can be cleaved down and destroyed.
- Time Wounds and Echoes
- It is possible for players "upstairs" to aid the time-shifted players battling the Eternal Servant.
- Whenever a player is stunned by Nahviintaas' Time Stop, a Time Wound will appear in the "downstairs" time-shifted realm
- The Time Wound looks like a Psijic Portal with a small friendly green ground telegraph
- Only one Time Wound can spawn at a time, so there is no benefit to having multiple players stand inside a Time Stop
- Time Wounds will despawn after a period of time if unused, so don't let them go to waste!
- A player standing in a Time Stop with CC immunity will not be stunned and will not cause a Time Wound to spawn.
- Touching a Time Wound (by simply walking into it) will despawn the Time Wound and grant the player who touched it the Time Echo effect, which significantly increases the player's Spell/Weapon Damage and restores their magicka/stamina resources.
- Eternal Servant Hard Mode demonstration: (additional details and tips in the video description)
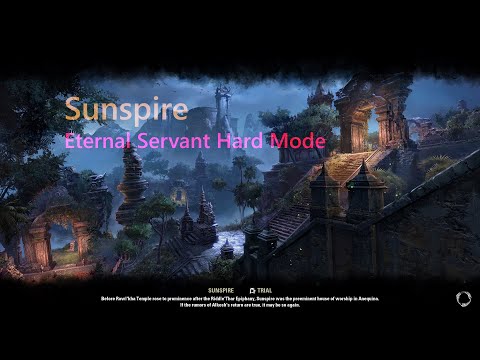 https://www.youtube.com/watch?v=6SLqHzUJcrM
Molten Meteors:- At 33% health, Nahviintaas will darken the sky to signal the start of the "execute phase" of the fight, the core mechanic of which are the Molten Meteors.
- Each time it is cast, three players at random will receive the Molten Meteor effect, lasting for 4 seconds.
- After 4 seconds, the player's Molten Meteor will be dropped on the ground, denying that area.
- This area of denial lasts for 25s in vet non-Hard Mode.
- This area of denial lasts indefinitely in Hard Mode.
- It is recommended that players use those 4 seconds to move their meteor away from the group in a way that minimizes the amount of area that is denied by this mechanic.
Edited by code65536 on January 17, 2020 1:31PMNightfighters ― PC/NA and PC/EU
Dungeons and Trials:Personal best scores:- Dragonstar Arena: 46817 (NA)
- Maelstrom Arena: 600526 (NA)
- Blackrose Prison: 99274 (EU) (Unchained)
- Maw of Lorkhaj: 165227 (EU)
- Halls of Fabrication: 220708 (NA) (Tick-Tock Tormentor #1, #2, #3, #4, #5, #6, #7, #8, #9, #10, #11, #12)
- Asylum Sanctorium: 114957 (NA) (Immortal Redeemer #1, #2, #3, #4, #5, #6, #7, #8, #9, #10)
- Cloudrest: 131256 (NA) (Gryphon Heart #1, #2, #3, #4, #5, #6, #7)
- Sunspire: 250866 (EU) (Godslayer #1, #2, #3, #4, #5, #6, #7)
- Kyne's Aegis: 235841 (EU) (Dawnbringer #1, #2, #3, #4, #5, #6, #7, #8)
Dungeon trifectas:- Mountain God and Leave No Bone Unbroken
- Apex Predator and Pure Lunacy
- Depths Defier and Relentless Raider
- Defanged the Devourer and Nature's Wrath
- In Defiance of Death and No Rest for the Wicked
- Bane of Thorns and True Genius
- Ardent Bibliophile and Subterranean Smasher
- Battlespire's Best and Bastion Breaker
- Zero Regrets and Land, Air, and Sea Supremacy
- Fist of Tava and Invader's Bane
- Curator's Champion (Valinna) and Temporal Tempest
- Unshakeable Fervor and Lighting the Embers
Extended Journal Add-Ons: Item Set Browser ― Loot Log ― Character Knowledge ― Collectibles Tracker ― RaidificatorPC/Console Add-Ons: Combat Alerts ― Group Buff PanelsOther Add-Ons: Deconstruction Junk Marker ― Purge Tracker ― Asylum Status Panel ― Smart Looter ― Improved Companion Rapport Information21 -
code65536✭✭✭✭✭
✭✭✭✭✭For players on PC, the Combat Alerts addon will assist with and alert many of the mechanics discussed here.Nightfighters ― PC/NA and PC/EU
Dungeons and Trials:Personal best scores:- Dragonstar Arena: 46817 (NA)
- Maelstrom Arena: 600526 (NA)
- Blackrose Prison: 99274 (EU) (Unchained)
- Maw of Lorkhaj: 165227 (EU)
- Halls of Fabrication: 220708 (NA) (Tick-Tock Tormentor #1, #2, #3, #4, #5, #6, #7, #8, #9, #10, #11, #12)
- Asylum Sanctorium: 114957 (NA) (Immortal Redeemer #1, #2, #3, #4, #5, #6, #7, #8, #9, #10)
- Cloudrest: 131256 (NA) (Gryphon Heart #1, #2, #3, #4, #5, #6, #7)
- Sunspire: 250866 (EU) (Godslayer #1, #2, #3, #4, #5, #6, #7)
- Kyne's Aegis: 235841 (EU) (Dawnbringer #1, #2, #3, #4, #5, #6, #7, #8)
Dungeon trifectas:- Mountain God and Leave No Bone Unbroken
- Apex Predator and Pure Lunacy
- Depths Defier and Relentless Raider
- Defanged the Devourer and Nature's Wrath
- In Defiance of Death and No Rest for the Wicked
- Bane of Thorns and True Genius
- Ardent Bibliophile and Subterranean Smasher
- Battlespire's Best and Bastion Breaker
- Zero Regrets and Land, Air, and Sea Supremacy
- Fist of Tava and Invader's Bane
- Curator's Champion (Valinna) and Temporal Tempest
- Unshakeable Fervor and Lighting the Embers
Extended Journal Add-Ons: Item Set Browser ― Loot Log ― Character Knowledge ― Collectibles Tracker ― RaidificatorPC/Console Add-Ons: Combat Alerts ― Group Buff PanelsOther Add-Ons: Deconstruction Junk Marker ― Purge Tracker ― Asylum Status Panel ― Smart Looter ― Improved Companion Rapport Information9 -
 Hamrb✭✭✭✭thanks codeFounder of Sheogorath's Mortals NA PC
Exiled Lannister EP Sorc dps
Hamrb EP Temp healer or dps
l mufasa l EP Stamblade
Fat Tyrion EP DK dps
Mia Stone AD DK tank or dps
Finn the Altmer AD Nightmage
Launch Pad McQuack DC DK DPS
Sterk Stonecrusher EP Stamplar
-Wabba Jack DC Stam Sorc
Sheo's Sweeper DC Magicka Temp0 -
code65536✭✭✭✭✭
✭✭✭✭✭Errata – Significant changes/corrections to the guide will be called out here in this section.- 2019-05-27: The DoT from the Frozen Prison effect applied by the Frozen Tomb is shieldable. The previous claim that it was not stemmed from a misreading of esologs data during the PTS.
- 2019-06-26: Added more technical detail about the Storm Fury ability.
- 2019-10-02: Clarified that spawning Time Wounds in the time-shifted realm requires a stun from a Time Stop. Edited the timing of the Translation Apocalypse to reflect the consensus that it is keyed off the end of the previous Translation Apocalypse channel.
- 2019-10-09: Added subsection detailing the Tormented Vestige (the anti-resurrection mechanic associated with Soul Tear).
Edited by code65536 on October 10, 2019 3:08AMNightfighters ― PC/NA and PC/EU
Dungeons and Trials:Personal best scores:- Dragonstar Arena: 46817 (NA)
- Maelstrom Arena: 600526 (NA)
- Blackrose Prison: 99274 (EU) (Unchained)
- Maw of Lorkhaj: 165227 (EU)
- Halls of Fabrication: 220708 (NA) (Tick-Tock Tormentor #1, #2, #3, #4, #5, #6, #7, #8, #9, #10, #11, #12)
- Asylum Sanctorium: 114957 (NA) (Immortal Redeemer #1, #2, #3, #4, #5, #6, #7, #8, #9, #10)
- Cloudrest: 131256 (NA) (Gryphon Heart #1, #2, #3, #4, #5, #6, #7)
- Sunspire: 250866 (EU) (Godslayer #1, #2, #3, #4, #5, #6, #7)
- Kyne's Aegis: 235841 (EU) (Dawnbringer #1, #2, #3, #4, #5, #6, #7, #8)
Dungeon trifectas:- Mountain God and Leave No Bone Unbroken
- Apex Predator and Pure Lunacy
- Depths Defier and Relentless Raider
- Defanged the Devourer and Nature's Wrath
- In Defiance of Death and No Rest for the Wicked
- Bane of Thorns and True Genius
- Ardent Bibliophile and Subterranean Smasher
- Battlespire's Best and Bastion Breaker
- Zero Regrets and Land, Air, and Sea Supremacy
- Fist of Tava and Invader's Bane
- Curator's Champion (Valinna) and Temporal Tempest
- Unshakeable Fervor and Lighting the Embers
Extended Journal Add-Ons: Item Set Browser ― Loot Log ― Character Knowledge ― Collectibles Tracker ― RaidificatorPC/Console Add-Ons: Combat Alerts ― Group Buff PanelsOther Add-Ons: Deconstruction Junk Marker ― Purge Tracker ― Asylum Status Panel ― Smart Looter ― Improved Companion Rapport Information0 -
 Tvedten✭✭✭Thanks a lot for this very useful Guide !Le Site de notre Guilde : La Compagnie de Solitude0
 -
 Khrogo✭✭✭June 2021 and still an invaluable resource. Thank you so much for taking the time to share this knowledge.0


