Maintenance for the week of January 5:
· [COMPLETE] NA megaservers for maintenance – January 7, 4:00AM EST (9:00 UTC) - 10:00AM EST (15:00 UTC)
· [COMPLETE] EU megaservers for maintenance – January 7, 4:00AM EST (9:00 UTC) - 10:00AM EST (15:00 UTC)
· [COMPLETE] NA megaservers for maintenance – January 7, 4:00AM EST (9:00 UTC) - 10:00AM EST (15:00 UTC)
· [COMPLETE] EU megaservers for maintenance – January 7, 4:00AM EST (9:00 UTC) - 10:00AM EST (15:00 UTC)
The Elder Scrolls Online: New Player Guide

ZOS_JessicaFolsom
Community Manager
Welcome to The Elder Scrolls Online New Player Guide!
This guide is designed to cover all the basics for players new to Tamriel.
To get started, please make use of the links below to navigate the page.
Don’t forget that if you ever have additional gameplay questions, you can always visit the Players Helping Players forum to talk to the ESO community or checkout any of the player-made guides right here.
Table of Contents
Controls and Keybindings
Quests and Exploring
Edited by ZOS_DominicD on February 19, 2016 6:50PM This guide is designed to cover all the basics for players new to Tamriel.
To get started, please make use of the links below to navigate the page.
Don’t forget that if you ever have additional gameplay questions, you can always visit the Players Helping Players forum to talk to the ESO community or checkout any of the player-made guides right here.
Table of Contents
Controls and Keybindings
- Movement
- Menus
- Combat
- General
Quests and Exploring
- Quests and Objective Tracking
- Exploration
- Lockpicking
- Fishing
- Fast Travel
- Mounts
- Justice System
- Inventory
- Equipment
- Item Comparison
- Quickslots
- Buying, Selling, and Repairing
- Bank
- Allocating Attribute Points
- Skill Lines and Types of Abilities
- Learning Abilities
- Slotting Abilities
- Ability Morphs
- Weapon Attacks
- Active Abilities
- Blocking
- Interrupting Enemies
- Stealth
- Dodging and Escaping
- Synergies
- Looting
- Death
- Communicating with Other Players
- Forming a Party
- Interacting with Others
- Looking for Group System
- Travel to Player
- Adding Friends
- Forming a Guild
- Guild Banks and Stores
- Dungeons
- Dark Anchors
- Overland Bosses
- Trials
- Arenas
- Finding Materials
- Harvesting Resources
- Crafting
- Smithing
- Alchemy
- Provisioning
- Enchanting
- Campaigns
- Alliance Points and Emperorship
- Keeps
- Siege Weapons
- Forward Camps
- Transitus Shrines
- Elder Scrolls
- PC
- Mac
7
-
 ZOS_TristanK✭✭✭✭✭
✭Controls and Keybindings
[Go Back to the New Player Guide Index ] | url="http://forums.elderscrollsonline.com/en/discussion/comment/1568400/#Comment_1568400"]Go to Character Creation Guide[/url
Movement
PC/Mac
W, A, S, D – Move character
Mouse – Look around
Shift (hold) – Sprint
Spacebar – Jump
Ctrl – Enter stealth mode
Num Lock – Activate auto-run
Xbox One
Left Stick (LS) – Move your character
Right Stick (RS) – Look around
While moving, press Left Stick (L) – Sprint
A button – Jump
Press Right Stick (R) – Enter Stealth mode
PlayStation 4
Left stick (LS) – Move your character
Right stick (RS) – Look around
While moving, press L3 – Sprint
X – Jump
R3 – Enter Stealth mode
Menus*
PC/Mac
I – Inventory
C – Character screen
M – Map
J – Quest journal
K – Skills
O – Contacts
P – Group
G – Guilds
L – Alliance War
N – Notifications
H – Toggle mount
Alt – Open last-used UI menu
Esc – Game menu
F1 – Help
Xbox One
All Menus can be accessed by hitting the "Menu" button on the controller.
PlayStation 4
All menus can be accessed by hitting the "Options" button on the controller.
Combat
PC/Mac
Left Mouse Button – Attack with equipped weapon. Tap to execute a light attack, hold down for a heavy attack
Right Mouse Button – Hold to block
Right Mouse Button + Left Mouse Button – Perform a bash
1 through 5 – Use slotted active abilities
R – Use slotted ultimate ability
W, A, S, D (double-tap) – Dodge
Tab – Cycle preferred enemy target
Q (hold) – Open Quickslot radial menu
Q (press) – Use selected Quickslot item
X – Activate synergy
` – Swap weapons (unlocked at level 15+)
Xbox One
Right Trigger (RT) – Attack with equipped weapon. Tap to execute a light attack, hold down for a heavy attack
Left Trigger Hold (LT) – Block
Hold LT + Tap RT – Perform a bash
Face buttons (X, Y, B, Left Bumper (LB), Right Bumper (RB)). Use active Abilities
LB + RB – Use slotted Ultimate Ability
Movement in any direction + LT + A – Dodge Roll
Up on D-pad (Hold) – Open Quickslot radial menu
Up on D-pad (Tap) – Use Quickslot item
Y + B – Activate Synergy
Left on the D – Pad(Tap) – Swap weapons (unlocked at level 15+)
PlayStation 4
R2 – Attack with equipped weapon. Tap to execute a light attack, hold down for a heavy attack
L2 Hold – Block
Hold L2 + Tap R2 – Perform a bash
Face buttons (square button, triangle button, circle button, L1, R1). Use slotted active Abilities
L1 + R1 – Use Ultimate Ability
Movement in any direction + L2 + X – Dodge Roll
Up button (Hold) – Open Quickslot radial Menu
Up button (Tap) – Use Quickslot item
Triangle button + circle button – Activate Synergy
Left button (Tap)– Swap weapons (unlocked at level 15+)
General
PC/Mac
E – Interact (use, talk, gather)
F – Interact with another player
. – Activate cursor
T – Cycle active quest objective
V – Toggle first- and third-person camera mode
Mouse Wheel – Zoom camera in or out. Zooming all the way in activates first-person mode
Z – Sheathe/unsheathe weapon
Enter – Start chat
Xbox One
A – Interact (use, talk, gather) or jump
Menu button – Interact with another player
Right on D-pad– Cycle active quest objective
Down on D-Pad – Toggle first- and third-person camera mode
Down on D-pad (Hold) + right stick – Zoom camera in or out (zooming all the way in activates first-person mode)
Left on D-pad (Hold) – Sheathe/unsheathe weapon
Map button (Tap) – Opens Map
Map Button (Hold) - Mount
PlayStation 4
X – Interact (use, talk, gather) or jump
OPTIONS button (Hold) – Interact with another player
Right button– Cycle active quest objective
Down button – Toggle first- and third-person camera mode
Down button (Hold) + right stick – Zoom camera in or out (zooming all the way in activates first-person mode)
Left button (Hold) – Sheathe/unsheathe weapon
Touch Pad Button (Tap) – Opens Map
Touch Pad Button (Hold) – Mount
*Tip: UI menus often contain several sub-menus. When you open a menu, you’ll see a row of icons across the top of the screen. Accessible sub-menus are displayed directly beneath these icons in text.
[Go Back to the New Player Guide Index ] | url="http://forums.elderscrollsonline.com/en/discussion/comment/1568400/#Comment_1568400"]Go to Character Creation Guide[/urlEdited by ZOS_DominicD on February 12, 2016 2:12PM0 -
ZOS_TristanK✭✭✭✭✭
✭Character Creation
[Go Back to the New Player Guide Index ] | url="http://forums.elderscrollsonline.com/en/discussion/comment/1568401/#Comment_1568401"]Go to Quests and Exploring Guide[/url
Character Creation
Several icons appear in the top right of the character creation screen. The icons represent four character creation menus:- Race and gender
- Class selection
- Body appearance
- Facial appearance
Once you’re happy with your selections and have entered a name, select “Create,” and you’ll be ready to play.
[Go Back to the New Player Guide Index ] | url="http://forums.elderscrollsonline.com/en/discussion/comment/1568401/#Comment_1568401"]Go to Quests and Exploring Guide[/urlEdited by ZOS_DominicD on February 11, 2016 12:37PM0 -
ZOS_TristanK✭✭✭✭✭
✭Questing and Exploration
[Go Back to the New Player Guide Index ] | url="http://forums.elderscrollsonline.com/en/discussion/comment/1568402/#Comment_1568402"]Go to Inventory and Items Guide[/url
Quests and Objective Tracking
If a quest is available nearby, you’ll notice a tracking icon on your compass and over the questgiver’s head. Speak with them to obtain the quest.
You can access your quest journal by pressing “J” if on PC/Mac, or by navigating to the Main Menu, then Journal if on console.
From the journal, you can:- Review your active quests
- Set a quest as your focus (objectives appear on the compass)
- Share quests with group members
- Abandon quests
- Look at Lore Library
- Check Achievements
- Check Leaderboards
In ESO, you won’t only find quests in towns, so get out there and explore to find them all!
Exploration
There are lots of reasons to step off the beaten path in ESO. Scattered throughout Tamriel, you’ll find:- Points of interest with challenging enemies
- Treasure chests with locks you can pick
- Dark Anchors threatening to pull Tamriel into Coldharbour
- Mundus Stones that grant special buffs
- Skyshards you can collect to earn skill points
- Lore books
- Treasure maps that lead to hidden chests
- Crafting resources
- And more!
Lockpicking
Some of the treasure chests you encounter in the world are locked. If you have lockpicks, you can attempt to pick the lock. Be warned that this is a timed activity—you need to pick the lock before the timer bar empties!
To pick a lock:- Position the lockpick over a tumbler.
- On PC/Mac, click and hold the left mouse until the tumbler tightens (note the visual and audio cues).
- On consoles, hold "RT" if on Xbox One or "R2" if on PlayStation 4.
- If you’re successful, the tumbler stays locked down when you release.
- Position the lockpick over the next tumbler and repeat!
- You also have the option to attempt to force the lock. If this attempt fails, your lockpick will break.
Some locks are more difficult to pick than others, so practice on every chest you come across!
Fishing
As you explore, you’ll come across fishing holes in bodies of water. If you have any bait (obtained from vendors or by looting some creatures), you can interact with these locations to select your bait and begin fishing. The bait you use can determine the types of fish you can obtain.
Fast Travel
Wayshrines can be found all over Tamriel. These shrines activate when you approach them and allow you to travel quickly between them.
You can travel from anywhere on the map to a Wayshrine you’ve visited before by selecting the Wayshrine icon on your map and paying a small fee in gold. You can travel between Wayshrines with no fee if you approach a Wayshrine and interact with it.
Mounts
Mounts, which allow you to travel more quickly, range in price starting at 10,000 gold in any major city.
Once you have a mount, you can summon it by pressing “H” if on PC/Mac, holding the "Menu" button if on Xbox One, or by holding down the "Touch pad" button if on PlayStation 4.
At a stable master, you can feed and name your mount. The food you choose determines your mount’s statistics. Food for mounts can be purchased at stables.
The Justice System
You are able to participate in a variety of criminal actives in Tamriel, including thievery and murder.
Thievery
To steal from an NPC, crouch and approach your unsuspecting target from behind. When you can steal, a red prompt will appear to let you know you are in position and how likely it is you will succeed. You can steal from both the NPCs themselves and their containers. Don’t be seen!
Assault and Murder
You can attack NPCs unprovoked, and it is possible to look the corpse of somebody you have killed, but be warned: If your crime is witnessed, you’ll have to deal with the local guards.
Consequences
If you are witnessed committing a crime, you will receive a bounty on your head. When you have a bounty, guards will attempt to hold you accountable by demanding you pay a sum.
There are three bounty levels:- Disreputable – The guards will generally ignore you unless you approach them.
- Notorious – You'll be chased down by the guards, who enlist other guards to assist in the pursuit.
- Fugitive – You are “Kill On Sight” to the guards.
To lower your bounty, you can either wait for it to decay over time or find a fence that can assist you in paying it off. Fences can be found in an Outlaws Refuge.
Legerdemain Skill Line
The Legerdemain Skill Line has abilities that will make you an even more effective criminal mastermind. It gains levels as you participate in criminal activities.
[Go Back to the New Player Guide Index ] | url="http://forums.elderscrollsonline.com/en/discussion/comment/1568402/#Comment_1568402"]Go to Inventory and Items Guide[/urlEdited by ZOS_DominicD on February 19, 2016 6:26PM0 -
ZOS_TristanK✭✭✭✭✭
✭Inventory and Items
[Go Back to the New Player Guide Index ] | url="http://forums.elderscrollsonline.com/en/discussion/comment/1568403/#Comment_1568403"]Go to Skills and Leveling Up Guide[/url
Inventory
The items you acquire are kept in the inventory, which is accessed by pressing “I” if on PC/Mac, or by navigating to the Main Menu, then Inventory if on console.
When you open your inventory on PC/Mac, all of your items are displayed on the right side of the screen. Clicking on the icons at the top of the list allows you to view all of your items or just items of a specific type.
On consoles, inventory categories will be displayed on the left side of the menu. Selecting a category will open sub categories, and you can use the left stick to navigate through the menu. Highlighting a category will show the stats of any items in that category that are currently equipped. Highlighting an unequipped item will bring up a comparison window, showing any currently equipped item of that type on the right, and the unequipped item on the left.
When you right-click or highlight an item, the following options will be available:- Equip an item
- Destroy an item
- Add an enchantment to an item
- Link the item in chat
- Mark an item as junk to sell later
- Repair the item (if you have a repair kit)
- Split a stack of items
- Assign item to quickslot
Quickslots
The Quickslot Radial Menu allows fast access to consumables and other items.
To use the quickslot menu:
PC/Mac- Open the inventory.
- Click the “Quick Slot” icon on the top right.
- Drag items from the list on the right to the circular menu to slot them.

While you’re playing, you can hold “Q” to bring up the quickslot menu and click on an item to place it in your quickslot. Pressing “Q” activates the item you chose.
Xbox One- Open your Inventory
- Highlight the item
- Assign to a quickslot by pressing "X" and selecting a position in the selection wheel
PlayStation 4- Open your Inventory
- Highlight the item
- Assign to a quickslot by pressing "Triangle" and selecting a position in the selection wheel
Buying, Selling, and Repairing
Some NPCs are merchants. By speaking with them, you can view, purchase items, sell items, or repair your damaged equipment.
Select “buy”, “sell” or "repair" from store screen after activating a shop to see its items or review your own for sale.
On PC/Mac, double-clicking an item buys or sells it, or you can right-click an item to buy, sell, or buy several of the same item.
On consoles, you can scroll through item categories using "L1" or "R1". Highlighting an item and pressing "X" if on Xbox One or "Triangle" if on PlayStation 4 will buy, sell, or repair that item based on the tab you are currently on.
If you accidentally sell an item you wanted to keep, you can get it back by accessing the “buyback” tab.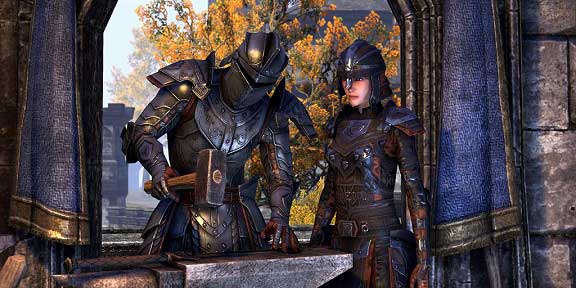
Equipment loses durability when you die, and it will eventually need to be repaired. Selecting “repair” will allow you to view any of your damaged items and repair them. You can repair them individually or all at once. You can also purchase repair kits, which allow you to repair items anywhere.
A shopkeeper’s inventory can be sorted, just like your inventory.
Bank
All of your characters (regardless of their Alliance) share a common bank that can be accessed through Bankers in large cities throughout Tamriel. Crafting materials stored in your bank can be directly accessed at crafting stations.
[Go Back to the New Player Guide Index ] | url="http://forums.elderscrollsonline.com/en/discussion/comment/1568403/#Comment_1568403"]Go to Skills and Leveling Up Guide[/urlEdited by ZOS_DominicD on February 18, 2016 1:20PM0 -
ZOS_TristanK✭✭✭✭✭
✭Skills and Leveling Up
[Go Back to the New Player Guide Index ] | url="http://forums.elderscrollsonline.com/en/discussion/comment/1568404/#Comment_1568404"]Go to Combat Basics Guide[/url
As you gain experience, you’ll earn levels. Every time you gain a level, you’ll receive attribute and skill points to distribute. You can see your current level progress on the top-left of the Character Menu.
Allocating Attribute Points
When you level up, you’ll gain an attribute point that you can distribute to health, magicka, or stamina.- Health determines the number of hit points your character has
- Magicka is used to power magical abilities
- Stamina is used by physical abilities and by sprinting, blocking, dodging, interrupting, and sneaking.
To spend Attribute Points on PC/Mac, press “C” to open the character menu. Click the plus icons to allocate points, and when you’re satisfied, press “E” to commit your changes.
To spend Attribute Points on console, open the Character Menu and highlight an Attribute. Use the left stick to add points to a specific trait. Press "A" if on Xbox One or "X" if on PlayStation 4 to commit your changes.
Skill Lines and Types of Abilities
All abilities are sorted into skill lines. As you use abilities, you gain experience in the associated skill line. Some abilities cannot be purchased until you reach a particular skill line level.
Note: Your level with a skill line is separate from your overall character level and represents your use of, and experience with, that particular set of abilities.
Abilities are divided into three main types:- Active Abilities that can be used on your shortcut bar and activated
- Passive Abilities that are “always on” once purchased
- Ultimate Abilities that are powerful active abilities. You can only have one ultimate ability on your shortcut bar at once
You can see all of your skill lines by pressing “K” if on PC/Mac, or by going to Skills from the Main Menu if on console.
Selecting on a category (such as “Class”) expands the list to show you available skill lines in that category. Selecting on a skill line displays that line’s abilities on the right side of the screen.
Note: You don’t start the game with all possible skill lines—there are some skill lines (such as the Mages and Fighters Guild) that you can discover in the world.
Learning Abilities
You receive skill points as you level up and as you discover the Skyshards hidden throughout the world.
Note: You need to discover three Skyshards to gain a skill point.
To spend skill points:- Press “K” if on PC/Mac or navigate to Skills from the Main Menu if on console
- Select the category and skill line you want from the menu list.
- Abilities you can purchase are indicated by a plus icon.
- Select the plus icon to purchase the ability.
- Confirm your selection.
Slotting Abilities
Once you have purchased a new ability, you need to slot it into your shortcut bar to be able to use it in combat.
PC/Mac
Your shortcut bar is displayed at the bottom of the skills menu. You can drag any active ability icon to your shortcut bar from its skill line. This assigns it to a number key 1 through 5 (or “R” in the case of ultimates). When you press that key, you’ll use that ability.
Xbox One
Your shortcut bar is displayed at the top of the Skills Menu. To slot abilities:- Highlight the bar.
- Select a cell.
- Press "A" to choose from the list of skills.
PlayStation 4
Your shortcut bar is displayed at the top of the Skills Menu. To slot abilities:- Highlight the bar.
- Select a cell.
- Press "X" to choose from the list of skills.
You can only have one ultimate ability slotted per shortcut bar, so choose carefully.
At level 15, you gain the ability to have two different weapon sets equipped. Each weapon set has an ability shortcut bar, so your second weapon set can have its own set of 6 abilities.
To set your secondary abilities, swap your weapon set by pressing “`” if on PC/Mac, "Y" if on Xbox One, or "Triangle" if on PlayStation 4 and slot abilities as outlined above.
Ability Morphs
Many abilities can be morphed. When an ability is ready to morph, you’ll see an icon next to it in the skills menu. By selecting this icon, you’ll be presented with a choice, allowing you to customize that ability.
Confirming an ability morph requires you to spend a skill point, just like purchasing a new ability.
The Champion System
Upon reaching Level 50 you will unlock the Champion System. The Champion System is accessed by pressing "=" on PC/Mac, or by navigating to Main Menu, then Champion if on console.
You will earn champion points as you gain experience and play after reaching Level 50. You can assign these champion points to a myriad of passive abilities. When you assign these Passive Abilities they will be shared across all of the characters on your account.
[Go Back to the New Player Guide Index ] | url="http://forums.elderscrollsonline.com/en/discussion/comment/1568404/#Comment_1568404"]Go to Combat Basics Guide[/urlEdited by ZOS_DominicD on February 18, 2016 1:22PM1 -
ZOS_TristanK✭✭✭✭✭
✭Combat Basics
[Go Back to the New Player Guide Index ] | url="http://forums.elderscrollsonline.com/en/discussion/comment/1568405/#Comment_1568405"]Go to Chat and Grouping Guide[/url
Weapon Attacks
On PC/Mac you can use the left mouse button to perform attacks with your equipped weapon. If playing on consoles, you can use "RT" if on Xbox One or "R2" if on PlayStation 4.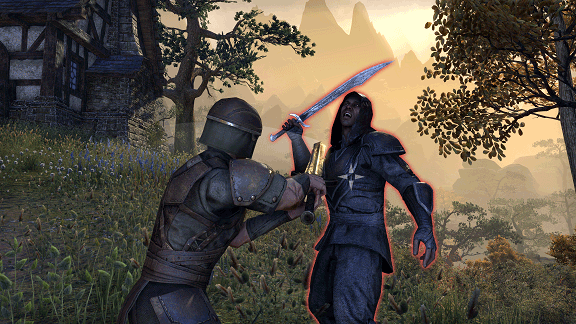
There are two types of basic attacks:- Light attacks - performed by pressing the attack button
- Heavy attacks - performed by holding the attack button
Active Abilities
On PC/Mac, the number keys 1 through 5 allow you to use slotted abilities, and ultimate abilities are executed by pressing the “R” key.
On Xbox One, the face buttons (X, Y, B, LB, RB) allow you to use slotted abilities, and ultimate abilities are executed by pressing "LB + RB".
On PlayStation 4, the face buttons (square button, triangle button, circle button, L1, R1) allow you to use slotted abilities, and ultimate abilities are executed by pressing "L1 + R1".
Every ability has an activation cost, generally in magicka or stamina. If you have enough resources, you can press the corresponding button to execute that ability.
When you use your ultimate, you’ll notice that its icon becomes darker. To use it again, fill the icon up by engaging in combat.
Some abilities can be toggled on and off by pressing their related button. Ability tooltips within the Skills Menu will help you to recognize toggled abilities.
Blocking
In order to reduce incoming damage, you are able to block attacks.
On PC/ Mac, hold the right mouse button to block. For console players, you need to hold "LT" if on Xbox One, or "L2" if on PlayStation 4.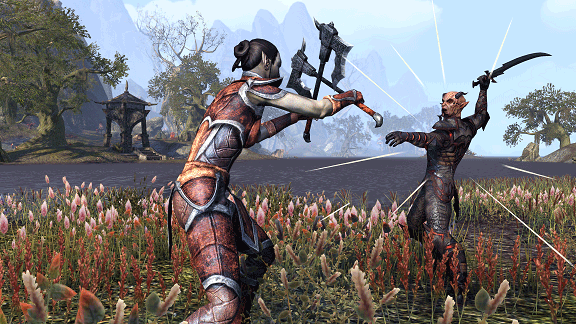
Any weapon can block, but shields are the best-suited for it.
Note: Blocking an attack consumes stamina.
In addition, if you block an enemy’s strong attack (indicated by a glowing yellow effect around the enemy), you’ll knock the enemy off balance and open them up for a devastating counterattack. To counterattack, use your heavy attack on an off-balance enemy.
Interrupting Enemies
When you see a glowing red effect around an enemy, the attack they are using (or are about to use) can be interrupted.
To interrupt the attack on PC/Mac, approach the enemy and press the left and right mouse button at the same time. On consoles, hold "LT", then tap "RT" if on Xbox One, or hold "L2", then tap "R2" if on PlayStation 4.
Note: Interrupting an attack consumes stamina.
Stealth
To move freely undetected by the enemy or launch a surprise attack, you are able to enter stealth mode.
To enter stealth mode on PC/Mac, press the “Ctrl”. On consoles, press down on "RS" if on Xbox One or "R3" if on PlayStation 4.
This decreases the chance that enemies will detect you, and some abilities can only be used while in stealth.
While moving around in this mode, your targeting reticule becomes an eye. If the eye begins to open, you're in danger of being detected and may need to move. If it opens all the way, you've been spotted.
Note: As you move in stealth, you consume stamina.
Dodging and Escaping
You are also able to dodge incoming attacks and escape from being held or controlled.
To dodge enemy attacks on PC/Mac, double-tap the movement keys in the direction you’d like to dodge. On consoles, press "LT + A" if on Xbox One, or "L2 + X" if on PlayStation 4.
If you time it right, you’ll avoid damage from the attack.
Note: Dodging costs stamina.
Some enemy attacks may hold you in place. To break this effect and escape on PC/Mac, press both left and right mouse buttons at once. On consoles, press "LT + RT" if on Xbox One or "L2 + R2" if on PlayStation 4. Like dodging, this action also costs stamina.
Synergies
When you engage in combat with a group of allies, you may discover combat synergies with some abilities that trigger secondary effects.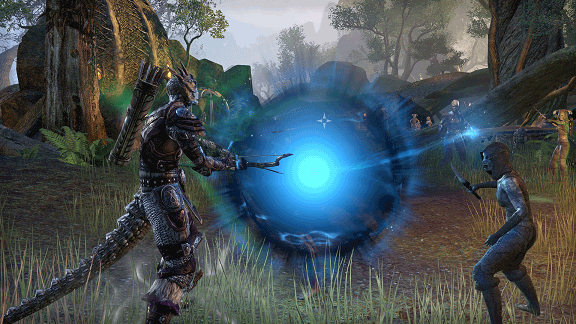
To activate a synergy when prompted, press “X” if on PC/Mac, "Y + B" if on Xbox One, or "Triangle + Circle" if on PlayStation 4.
Looting
When you defeat enemies, they often leave behind loot.
To collect the loot from nearby defeated enemies, approach the corpses and press “E” if on PC/Mac, "A" if on Xbox One, or "X" if on PlayStation 4.
You automatically collect loot from several corpses—no need to interact with each one.
Death
If your health is reduced to zero, you've died, and your equipped items will suffer durability loss. If you have a full soul gem of the appropriate level in your inventory, you have the option to revive at the location where you fell. If you don’t, you can return to the nearest Wayshrine.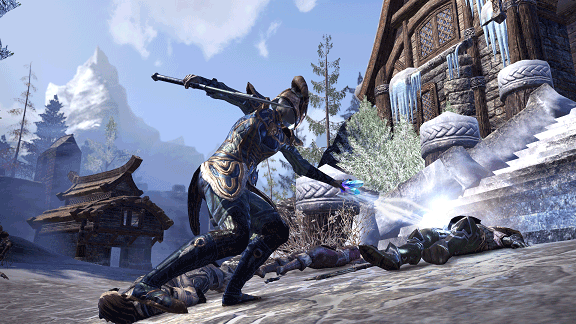
To fill soul gems, you’ll need Soul Trap, an ability gained through the Soul Magic skill line.
If you come across a dead player, you also can use a filled soul gem to revive them.
[Go Back to the New Player Guide Index ] | url="http://forums.elderscrollsonline.com/en/discussion/comment/1568405/#Comment_1568405"]Go to Chat and Grouping Guide[/urlEdited by ZOS_DominicD on February 18, 2016 1:24PM1 -
ZOS_TristanK✭✭✭✭✭
✭Chat and Grouping
[Go Back to the New Player Guide Index ] | url="http://forums.elderscrollsonline.com/en/discussion/comment/1568406/#Comment_1568406"]Go to Group PvE Challenges Guide[/url
Communicating with Other Players
Chat Communication on PC/Mac
To open the chat window, press “Enter.” From here, you can use various chat commands to communicate with other players. Here are some common chat commands:- /say <message> sends the message to players in close proximity
- /party <message> sends the message to players in your party
- /zone <message> sends the message to all players in the zone
- /tell <player> <message> sends a private chat message to the indicated player
- /guild 1 or /g1 <message> sends the message to the first guild you’ve joined. If you join multiple guilds, you can use the numbers 2-5 to speak to your other guilds (ex. /guild 2 or /g2).
You can also perform a variety of emotes—fun animations that add flavor to your interactions with others. Try a /dance!
There are several chat options you can access by clicking the gear icon in the upper-right of the chat window. This allows you to adjust the font size, the chat channels you see, and more.
Voice Chat Communication on Consoles
Voice chat can be accessed by accessing Main Menu, then Social , and finally Voice Chat. There are three types of channels:- Area – Open to everyone within a certain distance of you. You are automatically added to this channel on first login.
- Group – Only open to members of your group
- Guild – Only open to member of your guild -- guilds have six sub channels: one for officers and five for other members of the guild.
Quick Chat & Emotes
Quick chat and emotes are a way to quickly message other players around you. You can open the Quick Chat and Emote Menu by navigating to Main Menu, then Social, and Emotes.
From here, you can select the quick chat or emote you wish to use. While playing the game, press and hold right on the D-pad to open the emote quickslot for emotes and quick chat.
Forming a Party
Many of Tamriel's dangers require a group to overcome.
To invite another player to your party:
PC/Mac- Open the chat window by pressing “Enter”.
- Type /invite <character name>.
- Press “Enter”.
You can also invite a character that is nearby by approaching them and pressing “F” to bring up the interaction radial menu. Incoming party requests appear as a small, glowing chat bubble icon in your chat window.
Xbox One- Approach the player.
- Hold down "Menu" button.
- Use the left stick to choose “Invite”.
PlayStation 4- Approach the player.
- Hold down "Options" button.
- Use LS to choose “Invite”.
Interacting with Others
By pressing “F” on PC/Mac while another player character is highlighted, you can perform several interactions, such as inviting that player to a party or initiating a trade with them.
On consoles, you can interact with others by holding down the "Menu" button if on Xbox One or the "Options" button if on PlayStation 4.
Looking for Group System
The Looking for Group tool can assist you in finding other players to join with.
To access the tool:
PC/Mac- Press “P” to open the group menu.
- Select the search menu in the top right.
- Select the content you’d like to participate in and your preferred role(s).
- Now you can find other players to group with.
To access this tool on console, navigate to Main Menu , then Social , and finally Group.
The Social Menu will also allow you to set your desired group role to let others know what your expected responsibilities will be within the group: damage-dealing, healing, etc.
Once you’re grouped, you can use the “Wayshrine Network” or “Travel to Player” options to join up.
The social menu also allows you to set your desired group role to let others know what types of abilities and responsibilities you can to bring to the party (damage-dealing, healing, etc).
Travel to Player
You can travel to players of your alliance that are in your group, guild, or contacts list.
To do this, select their name in the Contacts, Group, or Guild Menu, then select Travel to Player. In the Alliance War area of Cyrodiil this will allow you to travel to a frontier keep. You cannot leave Cyrodiil in this fashion.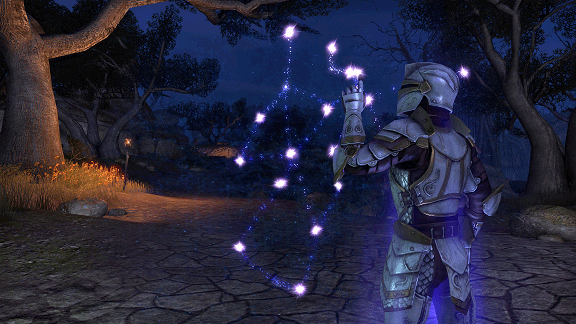
Adding Friends
Your friends list helps you keep track of players you like to socialize with in-game.
To add a friend:
PC/Mac- Open the Contacts Menu.
- Press “E” to open the “Add Friend” dialog.
- Enter your friend’s character name or UserID.
- (Optional) enter a message to send your friend.
- Hit “Request.”
Xbox One
On Xbox One, your friends list helps you keep track of players that you like to socialize with, in-game.
To add a friend, use your Xbox One system or send friend requests by holding down "Menu" button while targeting a player and choosing "Add As Friend" with the left stick.
PlayStation 4
On PlayStation 4, your friends list helps you keep track of players that you like to socialize with, in-game.
To add a friend, you can use your PS4 system or send friend requests by holding down "Options" button while targeting a player and choosing "Add As Friend" with the left stick.
Forming a Guild
Guilds allow large groups of players to organize, coordinate, and socialize. They each have their own private chat channel and several other benefits.
To form a guild:
PC/Mac- Open the Guilds Menu.
- Press “E” to create your guild.
- Enter your desired guild name.
- Select your guild’s alliance for the Alliance War.
- Choose “Create Guild.”
Xbox One- Open the Social Menu.
- Go to Guilds.
- Select Create New Guild.
- Select your guild’s alliance for the Alliance War.
- Enter your desired guild name.
- Select Finish.
PlayStation 4- Open the Social Menu.
- Go to Guilds.
- Select Create New Guild.
- Select your guild’s alliance for the Alliance War.
- Enter your desired guild name.
- Select Finish.
If you’re invited to join a guild, you’ll receive a notification that allows you to accept or decline the invitation.
Guild Banks and Stores
When a guild reaches the appropriate size, it unlocks the ability to use the guild bank and store.
Guild banks are accessible through Bankers in large cities, and bank permissions can be set by the guild leader.
Guild stores are also accessed by interacting with a Banker. Your guild members buy items from other guild members and post items for sale in the guild store.
[Go Back to the New Player Guide Index ] | url="http://forums.elderscrollsonline.com/en/discussion/comment/1568406/#Comment_1568406"]Go to Group PvE Challenges Guide[/urlEdited by ZOS_DominicD on February 18, 2016 1:57PM0 -
ZOS_TristanK✭✭✭✭✭
✭Group PvE Challenges
[Go Back to the New Player Guide Index ] | url="http://forums.elderscrollsonline.com/en/discussion/comment/1568407/#Comment_1568407"]Go to Gathering and Crafting Guide[/url
Dungeons
Dungeons are designed to be a challenge for a party of four players of the appropriate level. Each party of four that enters has its own version of the dungeon—no one else can wander in. In dungeons, you’ll encounter tough enemies and bosses that you’ll need to work together with others to overcome.
Dark Anchors
Molag Bal threatens to pull Tamriel into his Oblivion realm of Coldharbour, and the Dark Anchors will allow him to succeed if they aren’t driven back. You’ll know when you see a Dark Anchor—there will be a large event and very visible disturbance. Make sure to gather some allies before you try to drive back the Daedra and destroy the Anchor!
Overland Bosses
You’ll sometimes encounter creatures in the world that are too powerful for one person to challenge. If you do, put out the call for allies!
Trials
Trials are repeatable 12-man timed challenges for organized PVE group play. Groups are pitted against the most aggressive types of encounters Tamriel has to offer. If your group is successful, you can earn the highest quality loot. There are currently three Trials available:- Aetherian Archive – Found in Craglorn.
- Hel Ra Citadel – Found in Craglorn.
- Sanctum Ophidian – Found in Craglorn.
Trials are timed and attributed to a server-wide leaderboard. Each week the top trial runs receive unique rewards.
Arenas
Arenas are unique challenges that are designed for smaller groups or solo play. They feature waves of enemies and offer unique rewards. There are currently two Arenas available:- Dragonstar Arena – A four-man arena in Craglorn.
- Maelstrom Arena – A solo arena in Wrothgar.
Arenas, like Trials, have their own weekly leaderboards that feature unique rewards.
[Go Back to the New Player Guide Index ] | url="http://forums.elderscrollsonline.com/en/discussion/comment/1568407/#Comment_1568407"]Go to Gathering and Crafting Guide[/urlEdited by ZOS_DominicD on February 19, 2016 6:28PM2 -
ZOS_TristanK✭✭✭✭✭
✭Gathering and Crafting
[Go Back to the New Player Guide Index ] | url="http://forums.elderscrollsonline.com/en/discussion/comment/1568408/#Comment_1568408"]Go to The Alliance War (PvP) Guide[/url
In ESO, you can gain experience as a Clothier, Woodworker, Blacksmith, Alchemist, Enchanter, and Provisioner. Crafting skills can be accessed and improved in the Skills Menu.
Finding Materials
In cities and other settlements, you’ll find crafting materials in barrels, crates, and other containers. Open them all and you’ll build up a big supply of crafting resources!
Harvesting Resources
In addition to the materials you find in crates and barrels, resources can be found throughout the wilderness. Plants, minerals, mushrooms, and many other materials can be gathered in the wild. If you approach a harvestable resource, you will be prompted to gather it.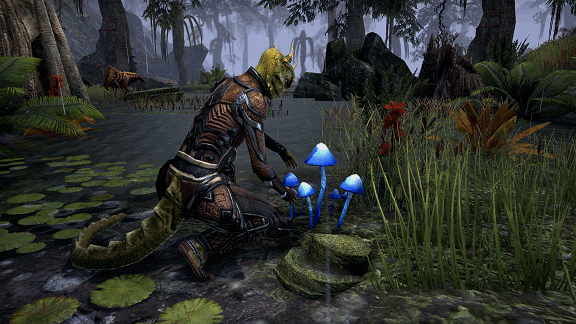
Crafting
With all the materials you find, you’ll be able to create a wide variety of items. To craft, you’ll need to approach the appropriate crafting station for the skill (an anvil for blacksmithing, a cooking fire for provisioning, etc). Once there, you can use the materials you’ve gathered to begin crafting.
Smithing
There are three types of smiths: Woodworkers, Blacksmiths, and Clothiers. Smiths create armor and weapons from raw materials. The materials used determine a crafted item’s level. You can use style components to craft items in racial styles and add traits that you’ve researched to them.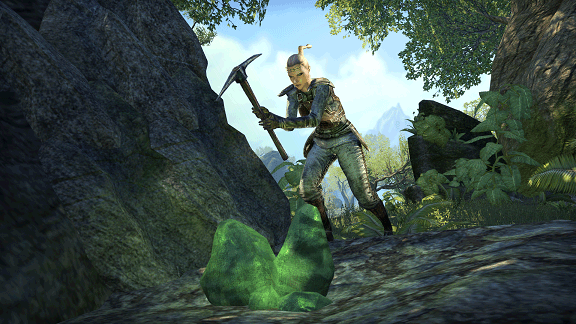
To learn new traits, you must research an item with the trait you wish to learn. This deconstructs the item and takes an increasing amount of time based on how many traits you’ve already learned for that kind of item. Research progresses even if your character is not online. You can access research at the appropriate crafting station (in the upper-right of the crafting menu).
Smiths can also deconstruct items to obtain raw materials, style and trait components, and tempers, tannins, or resins. Tempers, tannins, and resins can be used to improve the quality of an item. The higher the quality of the item, the more of these “boosters” you’ll need to ensure successful upgrading. Boosters can be traded to other players.
Alchemy
Alchemists use plants, mushrooms, and other ingredients to create potions. To create potions, gather these items in the world, and approach an Alchemy Station. From here, you can combine the reagents and solvents you’ve found to try and discover new potions. By combining ingredients that have the same trait, you’ll create a potion with that effect. You can sample ingredients by using them from you inventory to discover the first trait of an ingredient, but you’ll need to experiment to discover more.
Provisioning
Provisioners can create food items that provide buffs. To create these items, you’ll first need to find a recipe. Once you have a recipe, all you need to do is find the ingredients it calls for and combine them at a cooking fire to create it.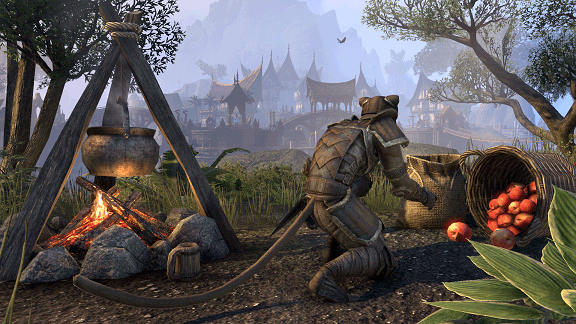
Enchanting
Enchanters combine mysterious runes of Potency, Essence, and Aspect to create glyphs that add new properties to weapons and other equipment. You’ll need at least one of each rune type to create a glyph at an Enchanting Station, and you can extract runes from glyphs you find there as well. Runes can be found throughout the world as you explore.
[Go Back to the New Player Guide Index ] | url="http://forums.elderscrollsonline.com/en/discussion/comment/1568408/#Comment_1568408"]Go to The Alliance War (PvP) Guide[/urlEdited by ZOS_DominicD on February 18, 2016 1:27PM1 -
ZOS_TristanK✭✭✭✭✭
✭The Alliance War (PvP)
[Go Back to the New Player Guide Index ] | url="http://forums.elderscrollsonline.com/en/discussion/comment/1568409/#Comment_1568409"]Go to Recommended & Minimum System Specs[/url
When you reach level 10, you can travel to Cyrodiil and participate in the Alliance War. If your character is not level 50, you’ll be scaled up so you can effectively participate in combat. To access the Alliance War menu on PC/Mac, press “L”. Console players can access the Alliance War by navigating to Main Menu, then Campaigns.
The Alliance War is dangerous, but don't worry: If you are slain in Cyrodiil by another player, your items will not lose durability.
Campaigns
You’ll be automatically assigned to a home campaign when you enter Cyrodiil. You can travel to Cyrodiil from the “Campaign” tab of the Alliance War menu. When multiple campaigns are active, you’ll be able to become a guest in your friends’ campaigns or choose a new home campaign.
Alliance Points and Emperorship
You’ll earn alliance aoints as you participate in battle throughout Cyrodiil. Killing enemy players and defending or capturing keeps and resource sites are some of the way you’ll earn AP. With AP, you can purchase gear, siege equipment, and more from your alliance’s merchants.
Alliance points also help determine your overall score. You can see the top players in your campaign on the “leaderboard” tab of the Alliance War Menu. The top player in a campaign that captures the keeps that ring the Imperial City will become the Emperor!
Keeps
Capturing and defending keeps is a key strategy for winning in the Alliance War. You’ll need allies to successfully assault an enemy keep and the resources that surround it, so gather your friends and lay siege! Once you’ve breached a keep’s defenses, your alliance must occupy the two inner banners of that keep long enough for it to change ownership.
If you are defending a keep, the walls, doors, and siege weapons can be repaired with the proper repair kit. To repair, target the object you want to work on and use the repair kit from your quickslot.
Siege Weapons
You can use alliance points to purchase rams, boiling oil, trebuchets, catapults, and ballistae from the merchants at your alliance main gate or keeps to assist in sieging and defending keeps. To deploy a siege weapon, assign it to your quickslot and use it. A yellow circle will appear on the ground in valid deployment locations.
Each siege weapon has its own strengths and weaknesses, so try them out to learn more.
Forward Camps
Forward camps provide additional respawn points. They are placed like siege weapons but have a limited duration and can’t be placed near another forward camp. You can destroy an enemy’s forward camp by approaching it and making use of the prompt.
Transitus Shrines
Transitus Shrines allow fast travel in Cyrodiil between your alliance’s gate and keeps or outposts it controls (provided there is an unbroken link between the locations). Use them to travel quickly to the action.
Elder Scrolls
Each alliance protects an Elder Scroll, a powerful relic that provides benefits to the entire alliance. If your alliance can manage to steal an Elder Scroll from the enemy’s heavily-guarded shrines and return it to your alliance’s shrine, the entire alliance will gain a bonus. Elder Scrolls are not easy to capture, but are well-worth the effort.
[Go Back to the New Player Guide Index ] | url="http://forums.elderscrollsonline.com/en/discussion/comment/1568409/#Comment_1568409"]Go to Recommended & Minimum System Specs[/urlEdited by ZOS_DominicD on February 18, 2016 1:28PM2 -
ZOS_TristanK✭✭✭✭✭
✭Recommended & Minimum System Specs
[Go Back to the New Player Guide Index ] | url="http://forums.elderscrollsonline.com/en/discussion/comment/1568410/#Comment_1568410"]Go to Getting Help Guide[/url
PC
PC RECOMMENDED SYSTEM REQUIREMENTS- Operating System: Windows 7 64-bit or Windows 8 64-bit
- Processor: Quad Core 2.3GHz or equivalent processor
- Memory: 4GB System RAM
- Hard Disk Space: 60GB free HDD space
- Video Card: DirectX 11 compliant video card with 2GB of RAM (NVIDIA GeForce 560 Ti / ATI Radeon 6950 or better)
- Sound: DirectX compatible sound card
PC MINIMUM SPECS:- Operating System: Windows XP 32-bit
- Processor: Dual Core 2.0 GHz or equivalent processor
- Memory: 2 GB System RAM
- Hard Disk Space: 60 GB free HDD space
- Video Card: DirectX 9.0 compliant video card with 512 MB of RAM (NVIDIA GeForce 8800, ATI Radeon 2600 or better)
- Sound: DirectX compatible sound card
Mac
MAC RECOMMENDED SPECS:- Operating System: Mac OS X 10.7.0 or Later
- Processor: Intel i5 processor
- Memory: 4 GB System RAM
- Hard Disk Space: 60 GB free HDD space
- Video Card: NVIDIA GeForce GT 650M, ATI Radeon HD 5770 or better.
- Resolution: 1024X768 minimum display resolution
MAC MINIMUM SPECS:- Operating System: Mac OS X 10.7.0 or Later
- Processor: Intel Core 2 Duo processor
- Memory: 4 GB System RAM
- Hard Disk Space: 60 GB free HDD space
- Video Card: Intel HD Graphics 4000, NVIDIA GeForce GT 330M, ATI Radeon HD 6490M or better; Resolution: 1024X768 minimum display resolution
[Go Back to the New Player Guide Index ] | url="http://forums.elderscrollsonline.com/en/discussion/comment/1568410/#Comment_1568410"]Go to Getting Help Guide[/urlEdited by ZOS_TristanK on February 18, 2015 9:10PM1 -
ZOS_TristanK✭✭✭✭✭
✭Getting Help
[Go Back to the New Player Guide Index ] | url="http://forums.elderscrollsonline.com/en/discussion/comment/1568399/#Comment_1568399"]Go to Controls and Keybinds Guide[/url
If you encounter a problem that prevents you from accessing your account or that keeps you from playing the game, we’re here to help. You can contact Customer Support team through any of these means:- If you are on PC/Mac you can press “F1” to open the Help menu and submit a ticket in game
- Submit a ticket via our website at http://help.elderscrollsonline.com
[Go Back to the New Player Guide Index ] | url="http://forums.elderscrollsonline.com/en/discussion/comment/1568399/#Comment_1568399"]Go to Controls and Keybinds Guide[/urlEdited by ZOS_DominicD on February 12, 2016 6:38PM4
This discussion has been closed.