Maintenance for the week of November 24:
• PC/Mac: No maintenance – November 24
• PC/Mac: No maintenance – November 24
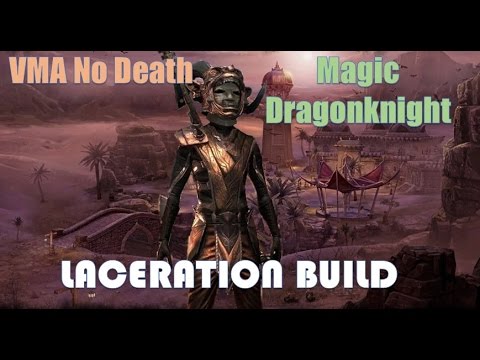
No Death VMA Magic Dragonknight Build - Laceration
Deltia
✭✭✭✭✭
Hello ESO Community,
I wanted to share my latest VMA Build for the Magic Dragonknight Class, Laceration. I did a no death Flawless Conqueror achievement and I figured to share my build here for folks looking for information on Magic DKs. You can find the full post on my website HERE.
BUILD VIDEO
 https://youtu.be/ELCudAYqyK0
NO DEATH VMA VIDEO
 https://youtu.be/zUdtzxmFpIU
Objectives
I wanted an self-sustaining solo Dragonknight build that could produce high Veteran Maelstrom Arena scores, capable of No-Death and fun. This build sacrifices some DPS for various survival skills but is capable of hitting the 500k+ score, and with fine tuning even higher. If you're looking for a specific VMA DK build or something that can handle end-game solo, this is it.
Skills

Bar One - Fire Destruction Staff (damage)
[Ultimate] Standard of Might (morph of Dragonknight Standard | Ardent Flame skill line) - 20% more damage, 20% damage reduction from mobs while inside the "Banner" plus a DoT. It's the singular best ultimate for damage in the game. It has a hefty 250 ultimate cost so memorizing the round in which you need this will be important. When in doubt, drop a Banner and nuke stuff. Out of resources? Drop a Banner and nuke stuff.
Bar Two - Restoration Staff (buffs and healing)
[Ultimate] Dawnbreaker of Smiting (morph of Dawnbreaker | Fighters Guild skill line) - A super useful ultimate with a very low cost. A lot of the rounds are Undead and Daedra and this can stun them and usually insta-kill most mobs. Plus it gives us resources if we run out in between 250 Banner cost. Try it, you'll love it.
Pre Fight Buffs -Makes sure to go through this cycle prior to the fight or another spawn, this will drastically improve performance.
From here I go into a rotation of damage/buffs, every spawn I make sure to keep up Harness, Rapid Regen, and Proxy if multiple mobs. Practice practice practice doing this until it's auto pilot and it will become natural.
Damage Phase
Gear


Option 1
Option 2
Champion Points

LINK HERE
Click link it will take you to CP Calculator. Using Asayre’s CP Guide found HERE.
I wanted to share my latest VMA Build for the Magic Dragonknight Class, Laceration. I did a no death Flawless Conqueror achievement and I figured to share my build here for folks looking for information on Magic DKs. You can find the full post on my website HERE.
BUILD VIDEO
 https://youtu.be/ELCudAYqyK0
NO DEATH VMA VIDEO
 https://youtu.be/zUdtzxmFpIU
Objectives
I wanted an self-sustaining solo Dragonknight build that could produce high Veteran Maelstrom Arena scores, capable of No-Death and fun. This build sacrifices some DPS for various survival skills but is capable of hitting the 500k+ score, and with fine tuning even higher. If you're looking for a specific VMA DK build or something that can handle end-game solo, this is it.
Skills

Bar One - Fire Destruction Staff (damage)
- Flames of Oblivion (morph of Inferno | Ardent Flame skill line) - I now use this instead of the Mages Guild "Inner Light." It gives us our major crit and comes with the benefit of a 15 second DoT ability. The key to using this is cast at the begin of the round and not over casting it. If you have three seconds left and there's one mob alive, don't recast. If you have another wave and two seconds up, use it. The amount of single target damage this does is staggering, a must have now.
- Force Pulse (morph of Force Shock | Destruction Staff skill line) - This is our ranged AoE and single target spammable attack. I swap in and out Flame Lash depending on the round and situation. Range is very useful in the arena. Keep in mind if you apply the "Burning Effect" (with Burning Embers) prior to use, you get the added benefit of AoE to near by enemies. The range is very useful and hard to pass up.
- Burning Embers (morph of Searing Strike | Ardent Flame skill line) - A powerful DoT with a heal to boot. Try to swipe each target nearby (5 meters) and recast if you need an instant heal. If you're getting hammered hard, you can literally spam cast this and survive most rounds. It heals that well.
- Elemental Blockade (morph of Wall of Elements | Destruction Staff skill line) - A strong single target and AoE damage ability that is in front of you in a long rectangle. The nice thing is you, cast this prior to the round starting (when you see glowing teleporters) and you'll just nuke the mob in 1 second. Don't spam cast it, let them burn inside it. If they die because of WoE, you get a flood of resources back too!
- Elemental Drain (morph of Weakness to Elements | Destruction Staff skill line) - A huge boost to our sustained but tricky to use. Don't just cast this on a mob that will die in one second. Try to keep this up on a mini boss or a full boss. It really helps with resources especially if we are saving a Standard of Might (Banner) for a later boss.
[Ultimate] Standard of Might (morph of Dragonknight Standard | Ardent Flame skill line) - 20% more damage, 20% damage reduction from mobs while inside the "Banner" plus a DoT. It's the singular best ultimate for damage in the game. It has a hefty 250 ultimate cost so memorizing the round in which you need this will be important. When in doubt, drop a Banner and nuke stuff. Out of resources? Drop a Banner and nuke stuff.
Bar Two - Restoration Staff (buffs and healing)
- Proximity Detention (morph of Magic Detention | Alliance War skill line) - Massive single target and AoE damage 8 seconds are it's been casted. The way I use this is casting it roughly four seconds before the round starts. That way once the mobs appear, run close it'll go off. Try to recast it with other buffs here and there and you'll have no problem with AoE.
- Dragon Fire Scales (morph of Reflective Scales | Draconic Power skill line) - A reflect that is super useful in almost all stages/rounds. It's only four seconds of reflection and four seconds so try to optimize the time to cast this. A good example of this is early Stage 3 where you get attacked by tons of ranged targets. I'll cast this only once right after the mobs appear and usually that's enough to kill them or something else.
- Rapid Regeneration (morph of Regeneration | Restoration Staff skill line) - A powerful heal over time that helps with our healing needs. Plus it has the added benefit of giving us magic back on critical hits if you have the VMA Staff. It's roughly 2k heals per second which helps our greatly during all stages. I must have IMO regardless if you have the staff or not.
- Harness Magicka (morph of Annulment | Light Armor skill line) - Absorbs magic damage and turns it into resources. Don't over cast this either, you want the duration to elapse or it to be consumed. You get more magicka then it cost if you play it correctly and it will shield you from poison, fire, ice tons of stuff in almost every round. Consider this a flex spot if you want more CC for Fossilizes.
- Healing Ward (morph of Steadfast Ward | Healing Staff skill line) - A powerful ward that is used to prevent death when below 35% health. It's kind of like a Breath of Life for solo play but comes with a hefty magicka cost. Don't use this when above say 70% let your HoTs and Burning Embers heal you. Do it when your health drops fast and reapply your buffs and heal. Note, I do use Combat Pray when going for a high score due to the amount of damage it gives.
[Ultimate] Dawnbreaker of Smiting (morph of Dawnbreaker | Fighters Guild skill line) - A super useful ultimate with a very low cost. A lot of the rounds are Undead and Daedra and this can stun them and usually insta-kill most mobs. Plus it gives us resources if we run out in between 250 Banner cost. Try it, you'll love it.
Pre Fight Buffs -Makes sure to go through this cycle prior to the fight or another spawn, this will drastically improve performance.
- VR15 Spell Power Potion (47 seconds duration)
- Harness Magicka (24 second duration)
- Rapid Regeneration (16.5 second duration)
- Proxy Det (8 seconds)
- Flames of Oblivion RIGHT as the portals appear (15 seconds duration)
- Elemental Blockade just before the mob spawns
From here I go into a rotation of damage/buffs, every spawn I make sure to keep up Harness, Rapid Regen, and Proxy if multiple mobs. Practice practice practice doing this until it's auto pilot and it will become natural.
Damage Phase
- Burning Embers right away so i can swipe heal if needed later on.
- Force Pulse until you need to reapply buffs.
- Elemental Blockade
- FoO
- Proxy
- Repeat
Gear


Option 1
- Engine Guardian – Shoulders obtained via Undaunted Pledges and helm can be found in Darkshade Cavern. I use this on a lot of builds because it works for my playstyle. I run zero regen and combed with ultimates, I don’t run out of magicka. Plus the extra healing and stamina is great for no death Maelstrom attempts. For ultra damage, I switch to Valkyn Skoria and even the Lich set can be nice.
- Maelstrom Weapons – Don’t freak out if you don’t have VMA weapons, you can always just use a crafted Fire Nirnhoned and a precise Restoration and do just fine. It does make a difference once you get it so something to look forward to.
- Julianos – I like this better than TBS on my DK due to the way our critical passives work, especially in solo play. It can be crafted in Orsinium south and is easy to get.
Option 2
- Engine Guardian – Shoulders obtained via Undaunted Pledges and helm can be found in Darkshade Cavern. Substitute would be something with magicka regeneration or Bloodspawn for more ultimate.
- Twice Born Star – The best DPS set period. If you like to do PvP, or swap mundus stones a good substitute is Julianos. I’ve tested both with legendary gear, and TBS out preforms it hands down.
- Willpower -Part of the Imperial City DLC and a great three piece set. Now some other jewelry pieces are out in Orsinium though I still prefer this setup.
Champion Points

LINK HERE
Click link it will take you to CP Calculator. Using Asayre’s CP Guide found HERE.
In-game @deltiasgaming | deltiasgaming.com for Elder Scrolls Online [ESO / TESO] Guides
"It's a good day to be alive"
"It's a good day to be alive"
3
-
EsoRecon✭✭✭✭✭cool, don't have a magic dk though.Xbox One [ NA ]
Gamertag - Zyzz II Legacy
Stam Sorc & Stam NB PvP
(I'm Just Here To 1vX)0
